Pages

Sunday, 23 December 2012

Coca-Cola Cupcakes with Salted Peanut Butter Frosting


Merry Christmas and happy holidays!

Yes, I know nothing says Christmas less than chocolate and peanut butter, but in my defence, these were meant to go up weeks ago! Umm, yeah, I realise that's not a great defence but also ..., also..., nothing says Christmas like forgiveness and a bit of tolerance, so if you all would just exercise your Christmas spirit and pretend these are Christmassy cupcakes then we all win :)

Whatever you're doing this festive season, however you celebrate, or not, I hope you're surrounded by people you love and you have a wonderful wonderful wonderful few days. Rest like I've been doing a lot of since yesterday at my parents house. Oh. And bake. Because also, nothing says Christmas like the smell of home baking wafting through a house :)

See you in the new year!


Slightly adapted from Sprinkles Bakes

Yield: 12 - 14 cupcakes

Ingredients

Cupcakes
1 cup Coca-Cola (Not diet!)
1/2 cup unsweetened cocoa powder
57g unsalted butter, cut into pieces
1/2 cup plus 2 tbsp granulated sugar
1/4 cup firmly packed dark brown sugar
1 cup plain flour
1/2 tsp plus1/8 tsp baking soda
1/2 tsp salt
1 egg

Frosting
3 cups icing sugar
227g butter, softened
1 cup creamy peanut butter
1/4 tsp salt
3-4 tbsp double cream
Sea salt for sprinkling
Ground salted peanuts
  1. Cupcakes: Preheat the oven to 180C / Gas mark 4 / 350F. Line a cupcake tin with cupcake wrappers.
  2. In a small saucepan, heat the Coca-Cola, cocoa powder and butter over a medium heat until butter is melted. Add sugars and whisk until dissolved. Remove from heat and let cool.
  3. In a large bowl, whisk flour, baking soda, and salt together.
  4. In a small bowl, whisk egg until just beaten, then whisk it into the cooled cocoa mixture until combined. Gently stir flour mixture into cocoa mixture.
  5. Use a 1/4 cup measure to pour batter into the cupcake wrappers. Bake cupcakes for 25 minutes or until cake springs back when pressed in the middle.
  6. Allow cupcakes to cool completely before frosting.
  7. Frosting: In the bowl of a stand mixer fitted with a whisk attachment (or with the whisk beaters on a hand mixer), combine icing sugar, butter, peanut butter and salt. Mix on low speed until just combined, then switch to high speed.
  8. Add double cream one tablespoon at a time and beat until mixture is lightened and smooth. Transfer to a piping bag or a sandwich bag with the corner snipped. Pipe onto cooled cupcakes.
  9. Garnish with ground peanuts and a sprinkling of sea salt.


Thursday, 22 November 2012

Soft Bake Chocolate Chip Cookies


I am going to ask you a question. And I would urge you to think very carefully about your answer. Because while I might make out like it's all fun and games, there is a wrong answer and I will not-so-secretly secretly judge you if you get it wrong. Okay. Here goes.

*Deep breath*
...
Are you ready?
...
How do you like your cookie?

I watched the movie "Think like a man" last night which is why I feel the need to clarify that I am talking about baked goods here ;p

There are two answers to that question. (Only one of them is correct). You either like your cookie crispy/crunchy or you like your cookie the best other way; soft and slightly chewy.

If you answered crispy/crunchy, then I think it's safe to say that this; me and you,  isn't going to work out. We're just too different. It's not you, it's ... hang on, it's definitely you! You're weird!

If you like your cookie the normal way, you're in luck! Because I have some amazing chocolate chip cookies for you. These are soft and chewy and choc-full of chocolate chips; just like every good cookie should be! The secret ingredient to making them all tender-y and soft is cornflour. Cornflour in cookies are taking the cookie world by storm right now, and while mine look nothing like the the ones in Sweet Pea's blog (hers are so cute and puffy!), I'm certain they taste just as good! But don't take my word for it - give them a go :)


Recipe adapted (only very slightly changed) from this one from Sweet Pea's Kitchen.

Ingredients
2 cups plain flour
2 teaspoons cornflour
1 teaspoon baking soda
1/2 teaspoon salt
170g butter, softened
3/4 cup brown sugar
1/4 cup white sugar
1 egg
2 teaspoons vanilla extract
1 cup milk chocolate chips

  1. Preheat the oven to 180C / Gas Mark 4 / 350F. Line two baking sheets with grease proof paper.
  2. In a medium bowl, combine the flour, cornflour, baking soda and salt; set aside
  3. Using an electric mixer, cream the butter and both sugars on medium speed until light and fluffy, about 2 minutes. 
  4. Scrape down the sides of the bowl then add the egg and vanilla and beat until well combined.
  5. Add half of the flour mixture and mix for 15 seconds. Add the remaining flour mixture and beat until just incorporated. Fold in the chocolate chips.
  6. Roll about a tablespoon's worth of dough into balls and place onto the prepared baking sheets, leaving about 2 inches between them. Bake for 8 - 10 minutes or until barely golden brown around the edges.
  7. Let cookies cool on sheets for 5 minutes before transferring cookies to wire racks to cool completely.
Makes about 36 cookies.


Tuesday, 13 November 2012

Bittersweet Chocolate Tart and Stylist Magazine


Stylist Magazine - yeah ... it's one of the highlights of my week. For those that don't live in the UK or those lucky people who do live in the UK but don't have to take public transport to work, it's a free women's magazine that is distributed in train and tube stations on Tuesday evenings and Wednesday morning. They don't distribute it at any of my tube stations on my way to or from work so a lovely friend at work delivers it to my desk on Wednesday morning whoop whoop!

It is pretty amazing for a free magazine, or just for a magazine generally; full of fashion (it's actually a bit too high-fashion and pricey for me but that's okay, I can gloss over those pages), beauty, a great column and so on. My favourite bits are where they get someone with a (mostly) really cool job such as the MD of a Literary Agency or the organiser of the MOBO awards to talk about their typical day and how they got to do what they do, and the recipes! I have ripped many a recipe page out of the magazine only to pass it on to my sister (an unfortunate Stylist-deprived person) half torn and tattered. She reads it anyway!

This Cappuccino Pavlova is from the magazine as is this incredible Spinach and Coconut Milk Soup and these AH-MAZING Champagne and Raspberry Cupcakes. And I have in my pile of Stylist cut outs, still to make, a pistachio cake with white chocolate frosting, a lemon pudding of sorts, a wild rice salad and lots of other luscious-sounding recipes!
Each week, I read and savour the magazine knowing that I have yet to come across the best bit - the recipe at the end (save the best till last and all)! Even better is that there are also recipes at Stylist Magazine Online ; which is where today's recipe is from.

So Stylist Magazine, don't say I never gave you anything. You just had an entire blog post dedicated to you!

Recipe from Stylist Magazine Online. They published it from The Newlywed Cookbook by Sarah Copeland.

Ingredients
1/2 cup / 115g unsalted butter, melted
3 tbsp sugar
1/2 tsp pure vanilla extract
pinch of fine sea salt
1 cup / 115g all-purpose/plain flour
1/2 cup / 120ml double cream
1/2 cup / 120ml whole milk
2 tbsp sugar
pinch of fine sea salt
7oz / 200g high-quality bittersweet (dark) chocolate, chopped (1 heaping cup)
1 large egg, beaten
smoked sea salt (I used normal sea salt flakes)
Creme fraiche (optional)

1 - Preheat the oven to 350F / 180C / gas mark 4.

2 - To make the crust: Whisk together the melted butter, sugar, vanilla and salt. Add the flour and stir until it feels like damp sand. Press the dough evenly along the bottom and up the sides of an 8-inch/20-cm square or 9-inch/23-cm round tart pan/flan tin with a removable bottom (which makes it easier to remove the tart in one piece. If you don't have a tart pan/flan tin, you can make this tart in a springform pan; press the dough evenly across the bottom and only about 1 1/4 to 1 1/2 inches or 3 to 4 cm up the side of the pan). Use wax/greaseproof paper or buttered fingers to even out and press the dough tightly into the corners.

3 - Prick the crust all over with a fork and chill in the fridge until ready to bake, about 30 minutes. Set the pan on a baking sheet/tray and bake until the crust is golden brown, about 25 minutes. (Mine took 20 minutes so check at 20 minutes).


4 - While the crust bakes, bring the cream, milk, sugar and salt to a simmer in a medium saucepan over low heat. Remove from the heat and add the chocolate. Let it sit for about 2 minutes, without stirring. Starting in the middle of the pan, whisk together until the chocolate is evenly melted and the mixture is smooth and a shiny dark brown.


5 - Whisk the beaten egg into the chocolate filling and pour the filling directly into the hot crust. Decrease the oven to 300F/150C/gas mark 2 and return the tart to the oven.

6 - Bake until the filling is set, but still a little wiggly in the centre, about 15 minutes (temperatures vary from oven to oven, so the visual clue is more important than time). Set your timer for 13 minutes.

7 - If it looks mostly set at that point, test it by opening the oven door a crack and carefully jiggle the tart pan/flan tin with the edge of your oven mitt. Only the centre third should wobble.

8 - Remove the tart and cool completely on a rack at room temperature. Just before the tart cools and sets completely, sprinkle a few large flakes of smoked salt on the surface, or leave plain.

9 - Remove the tart from the pan sides and carefully transfer to a platter before serving. Let it cool just until it slices easily, and serve slightly warm, with a dollop of creme fraiche. Or cool completely, and serve by itself.


Serves 12


Monday, 5 November 2012

Chocolate Chip, Chocolate Orange Loaf Cake


I'm on a bit of a Nigella Lawson roll innit?

I don't know about you but when I was growing up, every cake apart from birthday cake was a loaf cake. Or a bundt cake - which is the same but in a fancier tin.
More specifically in my home, it was a chocolate and vanilla marble cake with a faint hint of lemon as my mum and yaya always put lemon zest in every cake. I bet my mum will be surprised that I remember her cakes so well :) I remember not being able to understand, no matter how many times she explained, why she put the zest of lemon in cakes. Finally, I totally get it!

So yeah, loaf cakes have  all sorts of great associations for me - treats, home, comfort, guests, mummy-time ... when I grow up and have kids, I want to always have home-made cake in my kitchen.  Try and recreate these great memories for my kids. In a large raised cake stand with a glass lid, there will always be some home-made goodness. Yup, I know, hello obesity! We'll balance it out somehow :)

I think the main thing with loaf cakes is that despite being very un-fancy, they're usually really good cake! They don't have any fancy frosting or ganaches to hide behind - at most a drizzle of a glaze - so the cake has to be great. And it usually is. This one by Nigella Lawson is pretty incredible. I made it for church and because I'd sliced it up and didn't get a chance to tell anyone what it was, every one thought they were brownies. It is a dense cake but not too much so, chocolatey but not overwhelming, perfectly citrussy and I think the addition of chocolate chips makes it the perfect loaf cake; understated but so incredibly satisfying.

With the weather getting very cold, I am getting the overwhelming urge to bake lots of loaf cakes so while I get on with that, how about you give this one a go? And make sure you feed back okay? I love hearing how your baking goes; especially when it's a recipe from my blog.

Have a wonderful week!


Recipe adapted from Nigella Lawson's Kitchen

Ingredients

150g soft unsalted butter, plus some for greasing
dab flavourless vegetable oil, for greasing syrup spoon
2 x 15ml tablespoons golden syrup
175g dark muscovado sugar
150g plain flour, plus about 1 tablespoon for tossing chocolate chips
1/2 teaspoon bicarbonate of soda
25g best-quality cocoa powder, sifted
2 eggs
zest 2 regular oranges and juice of 1
100g dark chocolate chips

1 x 900g (2Ibs) loaf tin

  • Preheat the oven to 170C / Gas mark 3 and line your loaf tin with baking parchment or a paper loaf-tin liner.
  • Beat the already soft butter with the syrup - if you dab a little oil on your tablespoon measure with a sheet of kitchen roll, the syrup shouldn't stick to the spoon  - and the sugar until you have a fairly smooth caffe Americano cream, though the sugar will always have a bit of grit about it.
  • Mix the flour, bicarb and cocoa powder together, and beat into the syrup mixture 1 tablespoon of these dry ingredients before beating in 1 egg. Then add another couple of spoonfuls of the dry ingredients before beating in the second egg.
  • Carry on beating in the remaining dry ingredients and then add, still beating, the orange zest and finally, gradually, the juice. At this stage, the batter may suddenly look dimpled as if slightly curdled. No need to panic!
  • Put the chocolate chips in a bowl, sprinkle over a tablespoon of flour and toss until they are completely coated in flour. (This is to stop them sinking to the bottom of the cake batter while the cake is baking). Now fold them into your batter.
  • Pour and scrape into the prepared tin and bake for 45 minutes, though check 5 minutes before and be prepared to keep it in the oven 5 minutes longer if need be. A cake tester won't come out entirely clean, as the point of this cake, light though it may be, is to have just a hint of inner gunge. Leave it to cool a little in its tin on a wire rack, then turn out with care and leave on the rack to cool.
Notes:
1 - The cake can be baked up to 3 days ahead. Wrap tightly in clingfilm and store in airtight container. Will keep for 5 days total.
2 - The cake can be frozen, tightly wrapped up in a double layer of clingfilm and a layer of foil, for up to 3 months. Defrost overnight at room temperature.


Monday, 29 October 2012

Nigella's Victoria Sponge


I don't have much to say about this cake other than doesn't it just have the prettiest name? I'm speaking totally objectively here - Victoria is THE best name in the world. Innit?

If I'm being honest, I never buy Victoria Sponge cakes or order them in coffee shops but every once in a while, I'll have a good one that reminds me why this is such a classic cake. The flavours are simple but when done well, are the perfect accompaniment to most hot drinks, perfect for tea time or y'know, breakfast.
And who better than Nigella Lawson to turn to for the best recipes? This is from her book "How to be a domestic goddess.

Ingredients

For the cake
225g unsalted butter, very soft
225g caster sugar
1 teaspoon vanilla extract
4 large eggs
200g self-raising flour
25g cornflour (note you can use 225g self-raising flour instead - Nigella believes the addition of corn-flour makes for a "lighter, more tender sponge".
1 teaspoon baking powder (if using processor method)
3-4 tablespoons milk

For the filling
2-4 tablespoons raspberry or other jam, depending on the berries
1 punnet raspberries or berries of choice
125ml (or simply a 142ml tub) double cream

For the topping
1-2 tablespoons caster sugar (I prefer to use icing sugar)

2 x 21cm sandwich tins (about 5cm deep), buttered

  • Preheat the oven to 180C / gas mark 4. If the tins are loose-bottomed, you don't need to line them, otherwise do. 
  • To make this basic sponge cake in the food processor: put all the ingredients except the milk in the food processor and process till you've got a smooth batter. Then pulse, pouring the milk gradually through the funnel till your cake mixture's a soft, drooping consistency. 
  • To make it the traditional way (which is what I did): Cream the butter and sugar, add the vanilla and the eggs, one at a time, adding a spoonful of flour between each. Fold in the rest of the flour and the cornflour, adding no baking powder, and when all incorporated, add a little milk as you need.
  • Pour and scrape the batter into the tins and bake for about 25 minutes, until the cakes are beginning to come away at the edges, are springy to the touch on top and a cake tester comes out clean. Leave the cakes in their tins on a wire rack for 10 minutes before turning out and leaving to cool completely. 
  • When you're ready to eat the cake, put one layer on a plate, right-way up, spread with jam and scatter fruit on top. Whip the cream till it's thickened but still soft and spread over the jammy fruit. Sit the other cake on top, and sprinkle over a tablespoon or so of caster sugar. Or sieve over a tablespoon or so of icing sugar which is my personal preference.
Note: I used a bigger cake tin which is why I have a larger, thinner cake. I also didn't use any fresh fruit in mine.

Monday, 22 October 2012

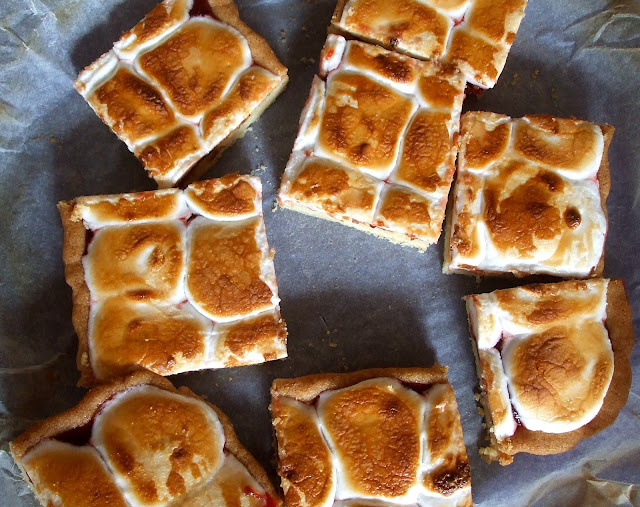
Toasted Marshmallow Squares

Who likes Mondays?

If you answered "yes" to that question, then I'm sorry but we can't be friends. Because you're obviously a bit insane. I mean, nobody likes Mondays! Except for my brother who is one of those people who likes to get the week started because it is a whole new opportunity to get things done and done right and be who you were meant to be and blah blah ... let's just say we live on two different continents. Literally and metaphorically. (Disclaimer: I love my brother very much and get on with him really well!)

I don't like Mondays because despite the fact that I don't usually sleep in on weekends, Monday removes ALL possibility of sleeping in for at least five days!

I don't like Mondays because I've usually not done half of the chores I set myself to do over the weekend.

I don't like Mondays because I have to go to work and much as I appear to be a not-lazy sort of person, I'm pretty sure I would make a great bum if I could afford to just not work ever!

I don't like Mondays because ... ah, I'm going to stop with the Monday blues! How was your weekend? I went to visit my family in Birmingham and ran the Bupa Half Marathon yesterday which despite my doing very little actual running training, I really enjoyed! I did it last year and it seemed like everything went wrong - I had painful shin splints for the first 5 miles, I nicked my tongue in the bottle cap at mile 3 and therefore had a bleeding tongue (it was minor but in my head I thought I might have to lose my tongue from the sheer amount of blood loss), one of my headphones didn't work so I didn't have the loud pumping music I like to run to and as it was my first hilly marathon, when we got to the hills at the end, I could have sworn they were the steepest hills in the whole wide world! Turns out they weren't that steep and despite my complete lack of training, I did a similar time as last year (less than a minute quicker) - 2 hours and 33 minutes which I was more than happy with. My sister blew 12 WHOLE MINUTES off her last year's time and finished in 2 hours and 15 minutes so I'm much happier for her!

So that was my weekend. Tell me about yours and enjoy my pretty pictures in the meantime. By the way, these bars are great! All the flavours are familiar but together, they are really wonderful and unexpected. I love them and can wait to try different flavour combos as Joy recommends.


Recipe from the wonderful Joy the Baker

Ingredients
113g unsalted butter, softened
1/2 cup granulated sugar
1 vanilla bean, scraped or 1 teaspoon pure vanilla extract
1 large egg yolk
1 cup plus 2 tablespoons plain flour, plus more for pressing dough into pan
1/4 teaspoon salt
1/4 cup plus 1 tablespoon fruit preserves
25 marshmallows

1 - Place rack in the center of the oven and preheat oven to 180C / Gas Mark 4 / 350F. Line an 8-inch square pan with greaseproof paper (leaving some overhanging paper flaps on two ends) and grease paper. Set aside.

2 - In the bowl of an electric stand mixer, fitted with a paddle attachment, beat together butter and sugar until pale and fluffy, about 3 minutes. Stop the mixer, scrape down the sides of the bowl, then beat in vanilla bean scrapings (or vanilla extract) and egg yolk. Beat until well incorporated. Stop the mixer and add flour. Beat on low speed until completely incorporated.

3 - Spoon batter into prepared pan. Sprinkle with flour. With clean fingers, press the dough into the bottom of the pan. Use a bit more flour as necessary so that the dough doesn't stick to your fingers. Try to make the crust as even as possible.


4 - Bake crust for 20 - 24 minutes until golden brown around the edges, but still slightly soft in the center. Remove from the oven and allow to cool for 20 minutes.

5 - Run a thin butter knife around edges of the pan. Use the two greaseproof paper flaps to carefully remove the crust from the pan. Run a butter knife between the crust and the paper and carefully slide the crust from the paper and onto an unlined baking sheet.

6 - Top crust with a thin layer of fruit preserve (I used Strawberry). Arrange marshmallows on top of jam.


Return to the oven for about 4 minutes. This will warm and soften the marshmallows. Remove from the oven and turn the oven on to the grill setting. Use the back of a spoon to gently press and smash the top of each marshmallow.

7 - Once all the marshmallows are smashed, return to the grill. Keep a very very very very close eye on the marshmallows. They'll toast in seconds. They'll burn in seconds.


8 - Remove toasted marshmallow cookie from the oven. Allow to rest for 10 minutes before slicing. Cookies can be served slightly warm or at room temperature. Cookies can be left, well wrapped at room temperature, for up to 4 days.

Makes 9 squares in an 8-inch square pan.


Saturday, 13 October 2012

If My iPhone Camera Could Talk...

There are a lot of reasons why most of the stuff I bake doesn't make it onto this blog. A lot of the time it's because people order cakes that I've already posted recipes for - I've lost count of the number of Cookies and Cream cupcakes I've made in the last two years but I'd say it's something in the region of 7, 342, 432. Or thereabouts.
Sometimes I don't like the final product enough to blog it or I don't like the pictures I took on my camera or I don't get a chance to take photographs and I absolutely refuse to post recipes without photos! What is a food blog without the food porn after all?
For a lot of reasons, I'd say 70% of my baking doesn't make it on here. 

However I often take pictures on my phone and sometimes post them on Twitter, or on Facebook, or more recently, since I've become addicted to Instagram, I'll usually pimp my pictures and post them on there. 

So today's post is a short one. And a visual one. It's behind the scenes, an up close and personal look at some of my baking over the last year :)

Have a good weekend! This is my first (and last) weekend for a while where I've got lots of time to myself to do as I choose so I'm planning to go cra-a-azy and ... do ... absolutely nothing.

Update: It's been pointed out to me that I didn't supply my Instagram handle in case any of you wants to follow me on Instagram ... my apologies; it is vickii373

Sunday, 7 October 2012

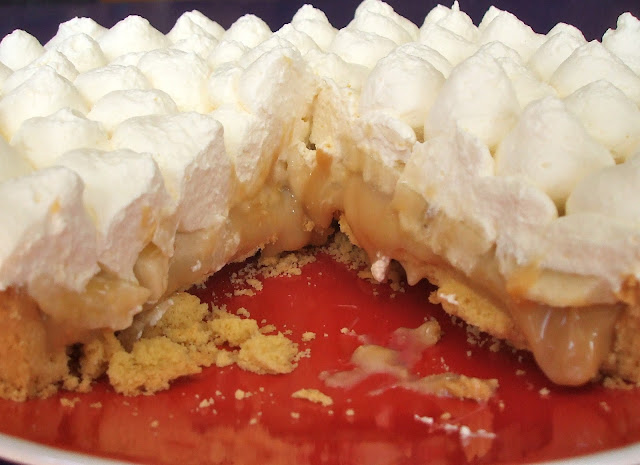
Easy Peasy Banoffee Pie


On Friday night, the lovely Ceri of Cucina Ceri (a great food blog full of recipes influenced by Paleo nutrition) cooked dinner for Adura (who has an inspiring blog that covers everything from exercise and nutrition to natural haircare) and I. The plan was to eat and watch Disney movies - yup, I know it's a pretty wild thing to do on a Friday night, but what can I say, that's just how we roll - but as we're all bloggers, we frequently interrupted 'Beauty and the Beast' and 'Tangled' to share blogging wisdom.
I left pretty inspired because they film videos and update their blogs frequently and I at that time had not updated my blog for a few weeks!

So as a result, I'm making it a small mission to start blogging regularly. You can expect to see new recipes and ignore enjoy my going ons at least once a week and maybe, just maybe, even more regularly. But don't hold me to that last bit!

Today's recipe is a classic dessert that is pretty easy to make. If my mum who is one of the world's most incompetent cooks, can nail this every time, then that is saying something. In my mum's defence, she is one of the most intelligent human beings in the world (no exaggeration - she is a doctor whowas third or something in the whole of Greece in her university entrance exams) but she has no interest in cooking whatsoever. She never has. Despite this, she has a pretty good repertoire of dishes she makes wonderfully for when we have guests.

The ease of Banoffee Pie is that the pastry case is ready, you can buy ready made whipped cream in a can with a nozzle thingie but I much prefer to make my own and slicing bananas, well, anybody can do that. So give it a go and I guarantee you it'll become your go-to dessert when you want to make something quick and amazing. I completely forgot how good it is till someone made one for a church lunch a few months ago and as soon as I remembered, I couldn't wait to make it again!

ps: I check the spelling of 'dessert' every time I write it to make sure it's referring to puddings rather dry land without water that gets really cold at night. This is particularly embarrassing for me since a) I LOVE desserts and I should know how to spell it and b) I pride myself on my spelling skills. Ah well, to paraphrase something I saw on Pinterest recently, it just wouldn't have been fair if God had made me as awesome as he did AND given me flawless spelling skills ;)

Ingredients
1 sweet pastry case (I bought mine at Waitrose but Sainsburys Taste the Difference range do a good one)
1 397g tin of condensed milk (Carnation also does the caramel - if you can find it, skip the step below for making caramel from condensed milk)
3 medium bananas, sliced
300ml double or whipping cream
1 tablespoon caster sugar

1 - To make caramel: I recommend you do this the night before. Place the tin of condensed milk in a pot, side down, cover with water and bring to the boil. Then reduce heat till water is simmering and leave it covered, for three hours. Please watch it and top up the water frequently so that it is never dry. (Apparently the tin will explode if the water dries up). I often make more than one tin at a time and just keep the spare unopened tins in the cupboard till I'm ready to use them again.


2 - Take it off the heat and leave it until it is completely cool. This might take a few hours. Now you have your caramel.


3 - To make whipped cream: Pour cold cream into a bowl. Add in the caster sugar. Using an electric mixer with the whisk beaters (if you have them) and starting on a low speed, whisk cream slowly increasing speed as it thickens until it is so stiff that you could turn the bowl upside down and it wouldn't fall out.

4 - Assembly: Place your sweet pastry case on a plate. Spread your tin of caramel evenly over the base of your case. Arrange your bananas over the caramel sauce. Finally, using a spatula, spread or pipe your whipped cream over the layer of bananas.


Sunday, 16 September 2012

Cappuccino Pavlova


My love for Nigella Lawson has been well documented on this blog. Here I waxed lyrical about her book "How to be a Domestic Goddess" while baking her Rocky Road Crunch Bars from a whole other book, here I made her Sesame Peanut Noodles for lunch, here I made her Glitzy Chocolate Puddings for a Nigella themed blogging event. I've made her chocolate banana bread, Boston Cream Pie, Strawberry and Almond Crumble, Spinach and Coconut Milk Soup , I even named my first stand mixer after her!
So yeah, I'm pretty indifferent about Nigella's cooking. Yeah right!
When I heard she was taking over an issue of Stylist Magazine last year - December I think it was - I was very very excited! If you read Stylist, you're sure to remember the issue - the one with her covered in caramel?

This has been on my 'to bake list' - or one of them at least - but I finally got the time to bake it during the last bank holiday. I was impressed by how easy pavlova is to make and the instructions are so good that at the end I had the perfect meringue, crispy on the outside and chewy and marshmallow-y on the inside!

I already can't wait to try lots of variations on this recipe. Perhaps the same again but with whipped mascarpone cheese instead of cream, or omit the coffee from the meringue and top the cream with fresh berries? The possibilities are endless! But first, I have to make this again. Exactly the same. To teach my housemates as they were totally and utterly in love with it. Ah well, you know what they say, give your housemates cake and they will eat for a day or two, teach them how to bake and you can benefit from the fruits of their labour. Or something like that anyway ;)

Have a great week!

Ingredients

250g caster sugar
4 tsps instant espresso powder, not instant coffee
4 egg whites
Pinch of salt
2 tsps cornflour
1 tsp white wine vinegar
300ml double cream
1 tsp cocoa powder

1 - Preheat the oven to 180C / gas mark 4. Line a flat oven sheet with baking parchment and, using a 23cm cake tin, draw a circle on it.
2 - Mix the sugar with the instant espresso powder in a small bowl and set aside.
3 In a clean, grease-free metal bowl whisk the egg whites and salt until they are holding soft peaks. Keep whisking while you add the sugar-coffee mixture a tablespoon at a time.
4 - When you have a firm, ecru-coloured meringue, fold in the cornflour and vinegar using a grease-free metal spoon.
5 - Dollop the meringue mixture inside the drawn circle. Smooth and shape it with a spatula so that it looks rather like the crown of a boater (nope, I don't know what a boater is either): it must be flat on top.

6 - Put it in the oven and immediately turn down to 150C/gas mark 3 and cook for an hour. Switch off the oven and leave inside until cool.


7 - Once the base is cool, lift it carefully in its paper and place it top-side down on a flat plate and peel off the paper.
8 - Whip the double cream until thick but soft and spread delicately over the top of the meringue. With a teaspoon, push the cocoa through a fine sieve or tea strainer to decorate the top, cappuccino-style.

Monday, 10 September 2012

Review of The Luxury Biscuit Club

Soho House, Shoreditch House, Groucho Club ... they can all keep their private memberships. Baker's Pantry Luxury Biscuit Club is MY kinda club. A selection of at least 7 different packets of "luxury, oven-fresh biscuits from Britain's very finest traditional bakers and bakeries" delivered monthly?!
Errr yes please, sign me up!

Baker's Pantry source the best, most luxurious, most exclusive biscuits in the UK and have them available with mouth-watering descriptions - such as "with a subtle taste of ginger running throughout the biscuit, and lovely chewy chunks of stem ginger balanced off by a gentle hint of lemon..." -  and information about the baker ready for you to buy on their website; after an undoubtedly agonising decision process as to which packets of biscuits you absolutely have to buy this time.
Now, I am notoriously bad at making decisions, I can often be heard saying "I'm not fussed" and I am that person in restaurants who takes forever deliberating over the menu. I go one step further and ask the waiter(ess) what they would recommend only to completely ignore their advice and then spend the entire meal in the throws of food envy! The long and short of it, I'm terrible at making decisions. So if you ask me, you're asking for trouble perusing the Baker's Pantry website without some guidance, which is why The Luxury Biscuit Club is such a great idea!

Here's what they have to say about it:

"As soon as people learn about my love of delicious British biscuits I always get asked the same question, but there isn't a simple answer to the question "what are the best biscuits?".

So a couple of years ago I started recommending a selection of my favourite biscuits, because I was sure they'd love most of them, and probably find a new favourite of their own.

But as I found more and more great biscuits my list of recommendations got longer and longer - and it was getting more and more difficult to get hold of these delicious biscuits.

The solution was simple. I'd set-up a biscuit club and each month I'd order a selection of the finest biscuits from the best bakers.

Now everyone who really wants to enjoy great biscuits can try a new selection each month and choose their own favourites.

So How Does the Biscuit Club work?

It couldn't be simpler really ... All you need to do is join the club and I'll do the rest!
  • I'll choose some of the greatest biscuits in Britain
  • I'll work with the bakers to write tasting notes which will tell you exactly what to look for in each biscuit
  • And then I'll send the biscuits to you so you can tuck in!"
Now try and tell me there is any part of that which doesn't sound VERY appealing! I received the introductory selection and I can tell you I wasn't expecting the very large box which was delivered to me containing all of the goodies below and some you can't see in the picture. And it included a large air tight jar which I assume lesser biscuit addicts than myself would use for saving open packets of biscuits AND a box of Clipper tea.
I was very pleased so thank you Luxury Biscuit Club and thank you from the lucky people I work with who were the beneficiaries of the half-eaten boxes of biscuits I'd started on ;)


My favourites were:

Brambles Honey and Raisin Biscuits - While I quite like raisins, I tend to see them as a nuisance in food and would prefer to eat them on their own so I was very pleasantly surprised at how much I enjoyed them in these biscuits, which had the perfect texture in my opinion. I only tasted the honey as an after-taste but that didn't matter. I really really enjoyed these biscuits.

Original Cornish Fairings by Furniss - These were described as spice biscuits and I was a bit apprehensive as to what to expect. I can't even remember what I expected anymore because what I got were perfectly buttery biscuits that tasted of ginger but not overpoweringly so; it was almost an after-taste. I could also taste lemon which was a great complement to the ginger. Finally they were crunchy but not crispy which is great as I like a lot of things crispy but not my biscuits!
Chocolate Orange Mini-Bites by Franks - There was no doubt that a chocolate biscuit would make its way into my favourites as I am a total chocoholic. But this means I'm also very particular about the taste of chocolate biscuits. The chocolate-orange combo is one of my favourites and these captured everything that is so wonderful about that flavour combination. The chocolate chips and oaty texture made having just one of these mini bites an impossibility. So I had two three four oh, who's counting!
My only qualm is that I kept on wanting to refer to these as cookies because the word "biscuit" - which refers to the stuff you buy in supermarkets - just doesn't do these justice!

To find out more about The Luxury Club and join, click here.

Saturday, 25 August 2012

Triple Layer Oreo Brownie Peanut Butter Choc Bars


Riddle me this: If a person is said to be on a sugar high or in a sugar coma from drinking a can of full fat coke*, how would you describe a person who spends 24 subsisting on raw cake batter and frosting? I'm ... err ... asking for a friend.
A friend of mine who clearly has appalling nutrition habits!
In my my friend's defence, she pretty much spent those 24 hours baking and as such cake batter and frosting were the most readily available source of food. That's my her story and I'm she's sticking to it!

I just watched "Fracture" with Anthony Hopkins and Ryan Gosling. Why is Anthony Hopkins so good at playing creepy, genius but devious killers? Is it because we've all seen him in "Silence of the Lambs" so we subconsciously think back to that character when he does anything similar? Or was he cast in "Silence of the Lambs" because he's so good at playing those roles. Hmmm - that's a regular chicken or the egg question right there.

Oh and have I told you guys how much I love Ryan Gosling?! I LOVE Ryan Gosling! Partly because he was Noah in "The Notebook" which was my favourite film of all time and partly just because he's amazing!

Umm yeah, so on to these bars. While I reduced the sugar in the brownies, they are still pretty sweet but also full of flavour and texture - the fudgy brownie layer, the crunchy cookies, the peanut butter infused chocolate covering mmmmmm. Definitely one for the chocolate lovers amongst you. They're also pretty simple to make so why don't you give them a try this bank holiday weekend for a sweet end to your BBQ (weather permitting).

* Why is regular coke often referred to as full fat coke when it is the amount of sugar that has increased from the diet coke versions rather than the fat?

This recipe has been adapted (only slightly) from the wonderful How Sweet It Is - another regular superwoman who seems to bake, cook AND blog something new every day! Don't know how she does it!

Ingredients

113g butter, at room temperature
1 cup brown sugar
2 eggs
2 tsps vanilla extract
1 1/2 cups plain flour
1/4 teaspoon salt
3 tablespoons cocoa powder
2 cups milk chocolate chips
1/2 cup peanut butter
20 Oreo cookies

 - Preheat oven to 180C / 350F / Gas Mark 4
 - Butter and flour an 8" x 8" cake tin or brownie pan
 - Using an electric mixer, cream butter and sugar until fluffy. Add eggs one at a time, then add vanilla
 - Add in cocoa powder and mix until combined. Add flour and salt, mixing well until batter is smooth and comes together. Fold in 1/2 cup chocolate chips
 - Spread mixture into the pan. Sink 9 Oreo cookies into the batter and press gently. Bake for 25 - 30 minutes

 - While baking, crush the remaining Oreos in a zip lock bag. 

When brownies are finished baking, remove from the oven and sprinkle with 1/2 cup chocolate chips and crushed Oreos. Place back in the oven for about 2 - 3 minutes

 - In this time, melt remaining chocolate chips and peanut butter together in the microwave checking and stirring every 20 seconds. Remove brownies from the oven and pour melted chocolate mixture on top, spreading with a spatula.Make sure chocolate gets down into the Oreo crevices, as it is the "glue" that holds the top to the bottom
 - Refrigerate for 2 hours. Let brownies sit at room temperature for 15 minutes before cutting. Don't worry if some of the cookies spill out from the middle or the top cracks - they are still delicious

Note: I made 1 1/2 times the recipe which is why I've got more Oreos in my baking tray :)


Sunday, 29 July 2012

Carrot Cake with Mascarpone, Cream Cheese and Cinnamon Icing (and some 'Hunger Games' matters)


Let's talk about carrot cake first. Then I'll move on to talking about books. This cake is W-O-N-D-E-R-F-U-L! So moist! So full of flavour - from the citrus undertones to the somethin' somethin' the toasted pecans and desiccated coconut bring - and covered in a truly wonderful frosting. It is light, and fluffy and not too sweet! The original recipe calls for only one tablespoon of caster sugar and I've upped this to four but it's still the least amount of sugar I have ever put in frosting before! And it works so well! It's luscious even though it's not too sweet and the cinnamon offsets the flavours in the cake wonderfully. I'm not the biggest carrot cake fan - and by that I mean that I do actually like carrot cake but if given menu with all the other wonderful cake flavours in the world, I wouldn't ever pick carrot - but this is delish! It is easily my favourite carrot cake I've eaten.

So books ... I've been wanting to rant about the Hunger Games for a while and then I realised, I have a blog which for some reason people seem to read, so why not take liberties here and post about literature instead of cake. Or with cake. That's cool with you guys right?

So who has read the Hunger Games trilogy? Watching the film doesn't count. I saw a trailer for the first film mid-2011, absolutely loved the concept and decided I wanted to read the books. It took me a whole year to get to them but I finally read them this year. My general criticism of all the books is that it  glosses over the most powerful themes; the violence, and loss and despondence. I realise that it is probably due to the fact that it is written for teenagers but I feel that the powerful statement they are attempting to make is never quite achieved due to the fact that Collins steps back every time she talks about the violence which is so central to the books.

My other criticism is that at crucial moments of the books, Collins begins to write in a weird dream-like voice which gives an unclear picture of what is happening and throws the reader off a bit. This happened at the end of the second book Catching Fire (I don't understand any of the last major event in this book) and towards the end Mockingjay when a character close to Katniss dies. It bugged me big time!

Saying that though, I really really enjoyed the first book and resented work on more than one occasion for taking me away from such a great story. And while it wasn't as good, I also really enjoyed Catching Fire. Mockingjay on the other hand was pretty poor though in my opinion, it isn't exciting and it's unnecessarily sad and most of all, most of all, I don't agree with who Katniss ends up with. I'm not going to give anything away but I think Collins matched her up with the wrong person!

Okay, that's my opinion of The Hunger Games series done. Let me know what you all think. And make this cake. You'll thank me. Oh and this is funny innit?


Recipe adapted from Delia Smith


Ingredients

For the cake
200g wholemeal self-raising flour
3 level teaspoons mixed spice
1 level teaspoon bicarbonate of soda
175g dark brown soft sugar
2 large eggs
150ml sunflower oil
Grated zest 1 orange
200g carrots, peeled and coarsely grated
110g sultanas
50g desiccated coconut
50g pecan nuts

For the syrup glaze
Juice 1 small orange
1 tablespoon lemon juice
75g dark brown soft sugar

For the topping
1 x 250g tub mascarpone cheese
200g Philadelphia Cream Cheese
4 rounded tablespoons caster sugar
1 heaped teaspoon ground cinnamon

To serve
50g pecan nuts

You will need 2 x 8 inch or 3 x 6 inch sandwich tins (I used 3 x 6 inch tins)

  1. Preheat Oven to Gas Mark 6/200C/400F then turn it down to Gas Mark 3 /170C/325F when you have toasted the pecan nuts.
  2. First, place all the pecan nuts on a baking sheet and, using a timer, toast them in the oven for 8 minutes. Now chop one half roughly for the cake and the other more finely, for the topping later. Then don't forget to turn the oven down for the cake.
  3. To make the cake, whisk the sugar, eggs and oil together in a bowl with an electric mixer for 2 -3  minutes, then check that there is no sugar left undissolved. 
  4. Now combine the flour, mixed spice and bicarbonate of soda into the bowl. Then stir all this into the sugar, eggs and oil mixture gently, followed by the remaining cake ingredients. 
  5. Divide the batter evenly between the prepared tins and bake the cakes on the centre shelf of the oven for about 30 minutes. They should be nicely risen, feel firm and springy to the touch when lightly pressed in the centre, and show signs of shrinking away from the sides of the tin. If not, give them another 2 - 3 minutes and test again.
  6. Meanwhile, make the topping by whisking all the ingredients together in a bowl until light and fluffy. Then cover with clingfilm and chill for 1 - 2 hours, until you are ready to ice the cakes. 
  7. To make the syrup glaze, whisk together the fruit juices and sugar in a small pan and place onto medium heat until it starts to boil and all sugar is dissolved. Take off the heat and allow to cool.
  8. When the cakes come out of the oven, stab them all over with a skewer or toothpick and quickly spoon the syrup evenly over the hot cakes. Now leave them to one side to cool in their tins, during which time the syrup will be absorbed.
  9. When the cakes are completely cold, remove them from their tins. Spread one-third of the filling over one of the cakes, place the other on top, (repeat again one more time if making a 6" 3 layer cake) then cover the top and sides with the remaining icing.
  10. Scatter the remaining toasted pecan nuts over the top.