Pages

Showing posts with label Cake. Show all posts

Sunday, 20 July 2014

Strawberry Champagne Layer Cake for Marathon #2!


I have three cake recipes to share with you. Not now. In the (hopefully not too distant) future! I had chosen to post this one first because it is a Champagne cake. Champagne = celebration. Me successfully completing my 2nd Virgin London marathon = a reason to celebrate.
But that was soon after the marathon which was on the 13th of April. Now, 3 months later, when I'm finally getting round to sharing it with you, the link between the cake and my race isn't quite as poignant but I'm still going to tell you all about it anyway!

It was a hot day. 18C! Well not hot hot, but hot for running. Anyone who knows me knows I love to run in winter and I refuse to run in any temperature over 16 degrees. Well ... it was 18 degrees and it was what it was, so I ran.

My sister and I were both running it but as she had gotten a charity place and I was running on a ballot place, we were in different colour group things (That actually the official name ;p). Red and blue. Or red and green. I forget. We just assumed that we would be able to start together anyway only to get there and realise that there were completely different starting points for the different colours. Still cool we thought. Until I tried to walk into her starting group and we were stopped by security who explained that I could very well start with her but my chip would not be activated upon crossing the start line as it could only be activated when I crossed my own colour start line. Ain't nobody running an entire marathon only for it not to be recorded anywhere!
We were running late as usual so we hurriedly made plans to meet at the mile 1 marker as we assumed  the different colour groups would have converged by then.

We go off, start the race. Separately. I had planned to run some of the marathon without music and just take in the crowds. That lasted all of about 2 minutes and I stuck my headphones in and got lost in some no-doubt expletive filled hip hop track (which seem to make up most of my running soundtrack) *shame faced*. I passed a man walking the marathon on crutches(!) on my way to the mile 1 marker and it helped me adjust my attitude to the weather. This man knew it would take him forever to complete this marathon and yet here he was giving it his all. I have two legs, some decent training under my belt and therefore no excuses! I got to mile 1, waited 30 seconds and then asked a girl next to me who was also waiting for someone just to make sure that my sister's colour would be passing through here and she said they wouldn't be. They wouldn't be converging with us till mile 3. At that point, I pretty much thought it would be impossible for Kitty and I to find each other out of 36,000 people and just really hoped that she hadn't waited too long at her mile 1 before finding out that we weren't going to be meeting there. I also prayed she would have a good race and feel okay running it on her own - as she was very stressed, wasn't feeling 100% the week before, and is generally less confident about running alone - and off I went.

At mile 4, I noticed the hoardes of runners from the other colour group joining the rest of the runners so I stopped again, and decided to give it 5 minutes to look for her. I knew it was a long shot! After 4 minutes passed, I saw her white cap! Against all the odds! I ran under the rope separating her group from ours, ran up to her and joined her stride to continue the race.

It was a tough race, but I just took it one mile at a time. I was waiting to get through the first half, and then the first 16 miles, because it was at mile 16 two years ago that I realised that despite being over half way, I still had a while to go and I started to struggle. In 2012, up till about mile 16, I had such a blast! But then I felt crappy, had blisters and just felt like there was no end in sight and that mindset led to me struggling for a while and then stopping to walk.

This time, the first half wasn't as fun, it was a race. But I also didn't hit a downer. One mile at a time till mile 18 where I started to get hot and tired and wanted to slow down to a walk. My strategy was to give myself permission to walk, all I had to do was run till the following mile and then if I wanted to walk then, fine. It was always one more mile, then walk if I want. I never walked.

I saw a work friend at mile 19 and another just after mile 20 I think and then I was on the home stretch and I just wanted to get it done. The last couple of miles - which last time dragged longer than the rest of the marathon put together - flew by and I people watched. I saw two people walking, supporting a friend between them. I saw people see their families and break down in front of them and the families hugging them and encouraging them to finish. I saw people walking, exhausted. I saw my family with about 900 metres to go. My cousin said later I had a huge smile on my face before I even saw them. I genuinely enjoyed that last couple of miles. I ran under the finish line listening to Coldplay's "Magic"and then burst into tears - again that didn't happen last time. The line "And if you had to ask me, after all that we've been through, do you believe in magic? Yes I do. Of course I do" particularly resonated.

My official time was about 5 hours 4 minutes and something. My watch time was 5:00:17 due to the wait for my sister. I just missed running a sub 5 hour marathon. But I don't care. I slowed down for a while with my sister which I don't regret as I know how I felt last year when I just wanted her to go off so I could stop and I wasn't going to let her stop. I was proud of myself for running the whole way and really pushing myself. And it'll just make my sub 5-hour marathon next time that much better!
Our before and after. We look better after. Weird.
Highlight for me were the showers - I ran into every single one of them with this smile of bliss on my face! I must have looked crazy!

Sorry for the long marathon post - it just sort of came out of me :) I didn't have this cake after the marathon but it was very good cake when I did have it. It's very rich; I think that's the swiss meringue buttercream - with a really nice dense cake that has just the right amount of champagne flavour!


Recipe (adapted very slightly) from Beantown Baker

For the Champagne Cake
3 3/4 cups plain flour
1 3/4 tsp baking powder
1/2 tsp baking soda
1/2 tsp salt
3 1/3 cups sugar
213g unsalted butter, melted and cooled slightly
1 1/2 cup champagne, flattened
5 tbsp vegetable oil
1 tbsp vanilla
9 egg yolks, room temperature
5 egg whites, room temperature

For the Strawberry Swiss Meringue Frosting
5 egg whites
1 1/4 cup sugar
1 1/2 cup butter, cut into cubes
2 tsp vanilla
1/4 cup strawberry puree, or good quality strawberry jam
pinch of salt

10-12 strawberries, thinly sliced.

Directions

  1. For the cake: Adjust oven rack to middle position and preheat oven to 180C / Gas Mark 4 / 340C. Grease three 9" round cake pans and line bottoms with grease proof paper.
  2. Whisk flour, baking powder, baking soda, salt and 2 1/2 cups sugar together in a large bowl. In mixing bowl whisk together melted butter, champagne, oil, vanilla, and yolks.
  3. In clean bowl of a mixer fitted with the whisk attachment/beaters, beat egg whites at medium-high speed until just foamy, about 30 seconds, gradually adding in remaining sugar; continue to beat until stiff peaks just form. Transfer to a bowl and set aside.
  4. Add flour mixture to now empty mixing bowl fitted with whisk attachment. Gradually add in butter mixture and mix until just incorporated. Stop mixer and scrape whisk and sides of bowl. Return mixer to medium-low and beat until smooth and fully incorporated.
  5. Fold the egg whites into the batter, pour into cake pans and bake for approximately 35 minutes or until a toothpick comes out clean. Let cake rest in cake tins for 10 minutes before turning out onto a wire cooling rack. 
  6. Cool completely before frosting. When cool, level tops of cake with sharp knife and discard cake cuttings. Set aside until ready to decorate.
  7. For the Strawberry Swiss Meringue Frosting: If making your own strawberry puree, place three to four strawberries into food processor and puree. Set aside 1/4 - 1/3 cup of strawberry puree.
  8. Wipe the mixer bowl and attachments with lemon or vinegar to make sure they are all completely clear of any residual grease. Add egg whites and sugar to mixing bowl, and place it over a sauce pan of simmering water. Whisk constantly but gently, until temperature reaches 160F (I don't have a food thermometer and simply leave it over the heat for 7 minutes exactly), or until the sugar is totally dissolved and the eggs are hot.
  9. With the whisk attachment of mixer, begin to whip until the meringue is thick, glossy, and the bottom of the bowl feels nearly room temperature. DON'T begin adding butter until the bottom of the bowl feels neutral, and not warm.
  10. Switch over to the paddle attachment / regular beaters and add butter one cube at a time until all has been added and is incorporated. Mix until it becomes smooth. If mixture is too soft and runny, place in refrigerator for about 15 minutes and continue mixing with paddle attachment until it all comes together. Add vanilla and salt, continuing to beat on low speed until well combined.
  11. Add strawberry puree/jam and beat until evenly incorporated. Add small amount of pink food colouring, if desired. I didn't.
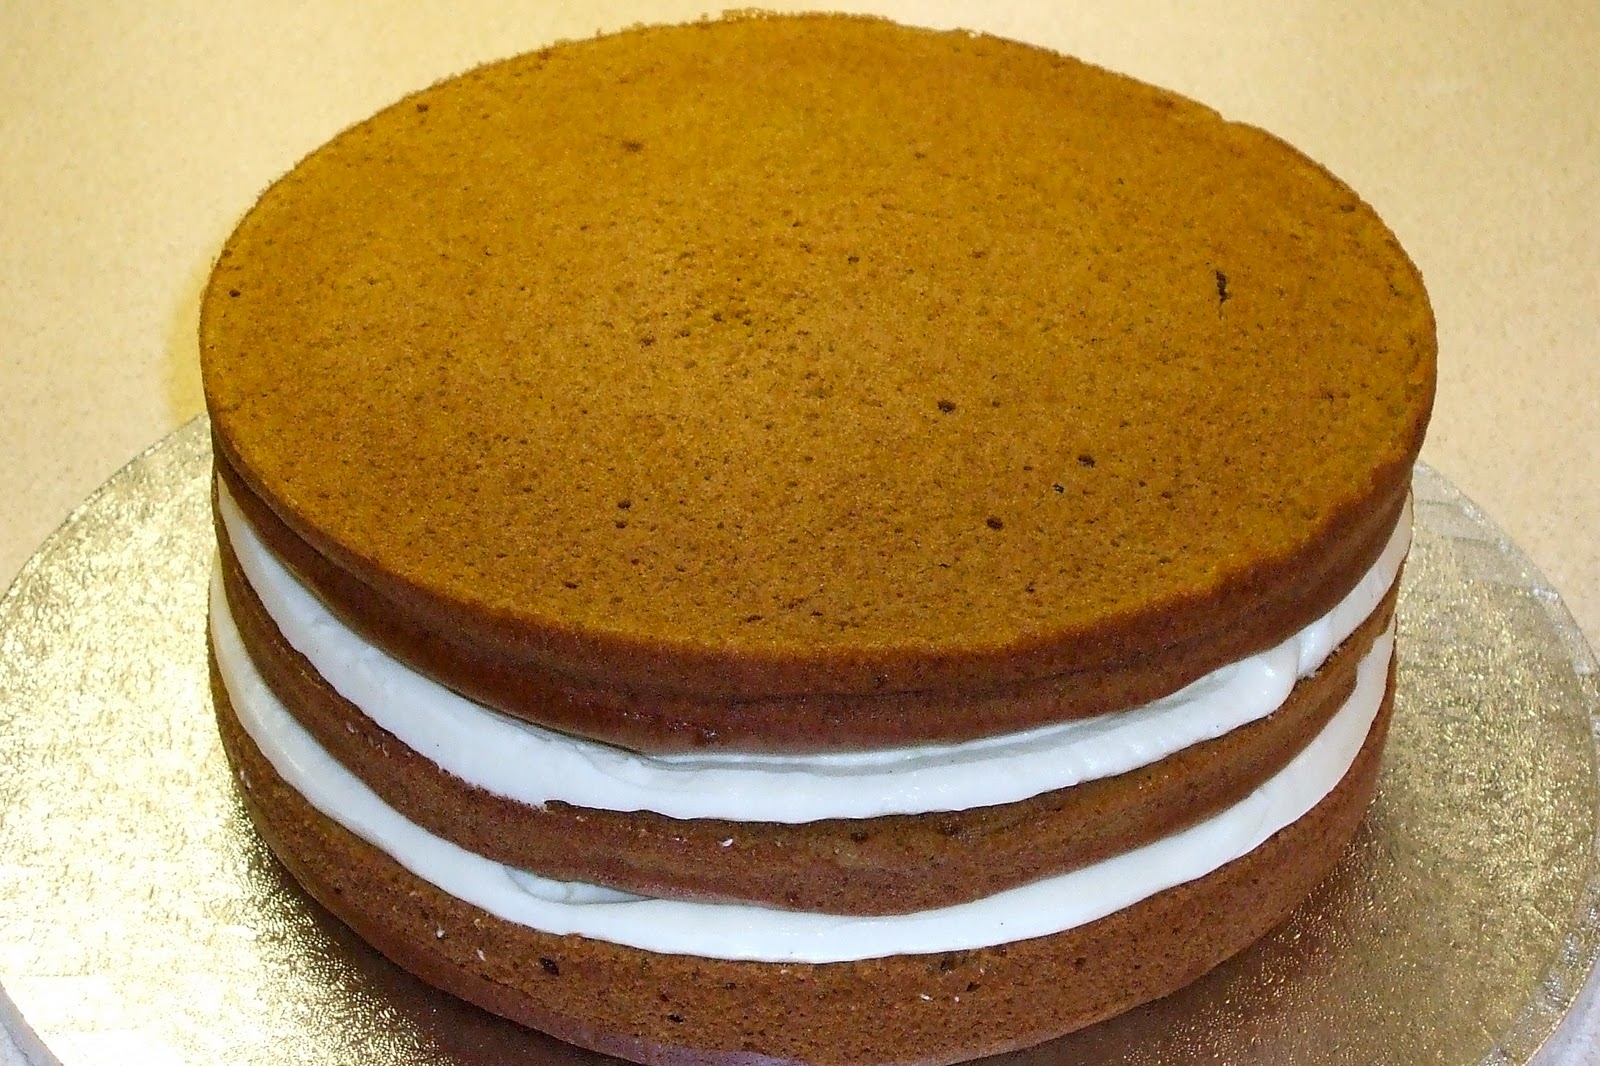
  12. To assemble cake: Level cakes and invert one cake layer on cake plate so that the bottom of the cake is on top. Dollop frosting onto it and spread evenly. Add a layer of thinly sliced strawberries. Repeat with other two layers. Frost top layer and smooth. Frost sides of the Cake. Garnish with fresh strawberries if desired.

Sunday, 16 June 2013

Maple Cream Bundt Cake


Lets get the formalities over and done with - hi! Happy Sunday! Yeah I haven't blogged for a while. I promise I will be more consistent at blogging from now on. I'm shocked and offended that you don't believe me - have I done anything to give you the impression that that is a promise I won't keep? Let me clarify, have I done anything specifically in the last 5 minutes to make you think that I would break that promise? Nope, I did not think so!

Now that we're done with that, can I have a little moan? And I ask rhetorically because y'know, it is my blog and I'm only asking to be polite, I am going to have a moan.
It is June! June! Half way through the year ... summer in most places that have summer at this time of year (except England obvs) ... the 6th month of the year ... y'know, June!
And I haven't been on holiday yet! I don't even have a holiday booked! Yup, I know. The tragedy.
I was thinking Trek America but it's pricey, Malta maybe, but let's be honest, I'll probably just end up in  Greece (which is beautiful and amazing but I've been a hundred times) and call it a day. So this is a shameless appeal to anybody with a holiday home or 5 star hotel in the Seychelles, Bora Bora, Hawaii or Tahiti to please have me over for a week. No less. I'll consider Cape Town and the Caribbean too. Please don't all get in touch at once ;p

While we're on the topic (or not), have you guys checked out the website for my business? www.ermionisbakeshop.com ?! There is only one correct answer to that question. ("Yes", in case it is unclear what the right answer should be). Thank you to the amazing Kylie Larsson for designing it for me. As well as doing all my branding!

I was very excited to get to use my bundt cake tin on this cake! To me, bundt cakes epitomise what a cake should look like and when I got a bottle of maple syrup from a friend as a gift, this was the first thing I thought to make - it is a dense, not too sweet cake (despite all the condensed milk) with a wonderful maple flavour that's just there enough; perfect with a coffee!


Recipe from Lauren's Latest, adapted very slightly here.

Ingredients
For the cake
3/4 cup vegetable oil
1/2 cup granulated sugar
1/2 cup packed brown sugar
1 teaspoon vanilla extract
3 eggs
1 cup sour cream
1/2 cup milk
1/4 cup pure maple syrup
2 3/4 cup plain flour
2 teaspoons baking powder
1/2 teaspoon bicarbonate of soda
1/4 teaspoon salt
1 teaspoon cinnamon

1 can of sweetened condensed milk (396g)

For the frosting
57g softened unsalted butter
1/4 cup pure maple syrup
1 cup icing sugar
1/2 teaspoon vanilla extract
1/2 cup chopped walnuts (for garnish) - I used slivered almonds


  1. Preheat oven to 170C / Gas mark 3 / 325F. Coat bundt cake tin liberally with non-stick cooking spray. (I buttered and floured my tin). Set aside.
  2. In a large bowl, whip oil, sugar, vanilla and eggs together until combined.
  3. In a small bow, stir together sour cream, milk and maple syrup.
  4. Combine flour, baking powder, baking soda, salt and cinnamon together.
  5. With mixer on low, alternate dry ingredients with milk mixture (dry ingredients in three batches, milk mixture in two) until everything is just incorporated. Scrape sides of bowl and mix briefly.
  6. Pour batter into prepared bundt tin, level the top and bake for 55 minutes to 1 hour 5 minutes or until a toothpick inserted comes out clean.
  7. Remove from oven and cool in the pan 15 minutes. Poke small 1 inch deep holes (using a toothpick) into the top (which ends up being the bottom) of the cake and spoon 1/3 of the sweetened condensed milk into the holes and over the visible cake. Let this soak in 15 minutes and then turn cake out of pan onto cooking rack. (You may want to run a knife along the sides to ensure the cake will come out of the pan nicely).
  8. Poke more small holes (about 2 inches deep) into the top of the cake and brush the remaining sweetened condensed milk into the holes and over the entire cake using a pastry brush so it is completely covered. Let cake sit 1 - 2 hours so sweetened condensed milk can be absorbed. (Don't be afraid to use all of the condensed milk - your cake will not be too sweet I promise!),
  9. Carefully remove cake from cooling rack and place onto cake stand (It will be sticky).
  10. For the frosting, whip butter and maple syrup together until combined. Stir in vanilla and icing sugar until completely smooth (I would do this with a mixer). Spread frosting over top of cake and down the sides slightly. Top with chopped walnuts.
  11. Store in a cool dry place in an air tight container or cake tin/stand.


Monday, 29 October 2012

Nigella's Victoria Sponge


I don't have much to say about this cake other than doesn't it just have the prettiest name? I'm speaking totally objectively here - Victoria is THE best name in the world. Innit?

If I'm being honest, I never buy Victoria Sponge cakes or order them in coffee shops but every once in a while, I'll have a good one that reminds me why this is such a classic cake. The flavours are simple but when done well, are the perfect accompaniment to most hot drinks, perfect for tea time or y'know, breakfast.
And who better than Nigella Lawson to turn to for the best recipes? This is from her book "How to be a domestic goddess.

Ingredients

For the cake
225g unsalted butter, very soft
225g caster sugar
1 teaspoon vanilla extract
4 large eggs
200g self-raising flour
25g cornflour (note you can use 225g self-raising flour instead - Nigella believes the addition of corn-flour makes for a "lighter, more tender sponge".
1 teaspoon baking powder (if using processor method)
3-4 tablespoons milk

For the filling
2-4 tablespoons raspberry or other jam, depending on the berries
1 punnet raspberries or berries of choice
125ml (or simply a 142ml tub) double cream

For the topping
1-2 tablespoons caster sugar (I prefer to use icing sugar)

2 x 21cm sandwich tins (about 5cm deep), buttered

  • Preheat the oven to 180C / gas mark 4. If the tins are loose-bottomed, you don't need to line them, otherwise do. 
  • To make this basic sponge cake in the food processor: put all the ingredients except the milk in the food processor and process till you've got a smooth batter. Then pulse, pouring the milk gradually through the funnel till your cake mixture's a soft, drooping consistency. 
  • To make it the traditional way (which is what I did): Cream the butter and sugar, add the vanilla and the eggs, one at a time, adding a spoonful of flour between each. Fold in the rest of the flour and the cornflour, adding no baking powder, and when all incorporated, add a little milk as you need.
  • Pour and scrape the batter into the tins and bake for about 25 minutes, until the cakes are beginning to come away at the edges, are springy to the touch on top and a cake tester comes out clean. Leave the cakes in their tins on a wire rack for 10 minutes before turning out and leaving to cool completely. 
  • When you're ready to eat the cake, put one layer on a plate, right-way up, spread with jam and scatter fruit on top. Whip the cream till it's thickened but still soft and spread over the jammy fruit. Sit the other cake on top, and sprinkle over a tablespoon or so of caster sugar. Or sieve over a tablespoon or so of icing sugar which is my personal preference.
Note: I used a bigger cake tin which is why I have a larger, thinner cake. I also didn't use any fresh fruit in mine.

Sunday, 29 July 2012

Carrot Cake with Mascarpone, Cream Cheese and Cinnamon Icing (and some 'Hunger Games' matters)


Let's talk about carrot cake first. Then I'll move on to talking about books. This cake is W-O-N-D-E-R-F-U-L! So moist! So full of flavour - from the citrus undertones to the somethin' somethin' the toasted pecans and desiccated coconut bring - and covered in a truly wonderful frosting. It is light, and fluffy and not too sweet! The original recipe calls for only one tablespoon of caster sugar and I've upped this to four but it's still the least amount of sugar I have ever put in frosting before! And it works so well! It's luscious even though it's not too sweet and the cinnamon offsets the flavours in the cake wonderfully. I'm not the biggest carrot cake fan - and by that I mean that I do actually like carrot cake but if given menu with all the other wonderful cake flavours in the world, I wouldn't ever pick carrot - but this is delish! It is easily my favourite carrot cake I've eaten.

So books ... I've been wanting to rant about the Hunger Games for a while and then I realised, I have a blog which for some reason people seem to read, so why not take liberties here and post about literature instead of cake. Or with cake. That's cool with you guys right?

So who has read the Hunger Games trilogy? Watching the film doesn't count. I saw a trailer for the first film mid-2011, absolutely loved the concept and decided I wanted to read the books. It took me a whole year to get to them but I finally read them this year. My general criticism of all the books is that it  glosses over the most powerful themes; the violence, and loss and despondence. I realise that it is probably due to the fact that it is written for teenagers but I feel that the powerful statement they are attempting to make is never quite achieved due to the fact that Collins steps back every time she talks about the violence which is so central to the books.

My other criticism is that at crucial moments of the books, Collins begins to write in a weird dream-like voice which gives an unclear picture of what is happening and throws the reader off a bit. This happened at the end of the second book Catching Fire (I don't understand any of the last major event in this book) and towards the end Mockingjay when a character close to Katniss dies. It bugged me big time!

Saying that though, I really really enjoyed the first book and resented work on more than one occasion for taking me away from such a great story. And while it wasn't as good, I also really enjoyed Catching Fire. Mockingjay on the other hand was pretty poor though in my opinion, it isn't exciting and it's unnecessarily sad and most of all, most of all, I don't agree with who Katniss ends up with. I'm not going to give anything away but I think Collins matched her up with the wrong person!

Okay, that's my opinion of The Hunger Games series done. Let me know what you all think. And make this cake. You'll thank me. Oh and this is funny innit?


Recipe adapted from Delia Smith


Ingredients

For the cake
200g wholemeal self-raising flour
3 level teaspoons mixed spice
1 level teaspoon bicarbonate of soda
175g dark brown soft sugar
2 large eggs
150ml sunflower oil
Grated zest 1 orange
200g carrots, peeled and coarsely grated
110g sultanas
50g desiccated coconut
50g pecan nuts

For the syrup glaze
Juice 1 small orange
1 tablespoon lemon juice
75g dark brown soft sugar

For the topping
1 x 250g tub mascarpone cheese
200g Philadelphia Cream Cheese
4 rounded tablespoons caster sugar
1 heaped teaspoon ground cinnamon

To serve
50g pecan nuts

You will need 2 x 8 inch or 3 x 6 inch sandwich tins (I used 3 x 6 inch tins)

  1. Preheat Oven to Gas Mark 6/200C/400F then turn it down to Gas Mark 3 /170C/325F when you have toasted the pecan nuts.
  2. First, place all the pecan nuts on a baking sheet and, using a timer, toast them in the oven for 8 minutes. Now chop one half roughly for the cake and the other more finely, for the topping later. Then don't forget to turn the oven down for the cake.
  3. To make the cake, whisk the sugar, eggs and oil together in a bowl with an electric mixer for 2 -3  minutes, then check that there is no sugar left undissolved. 
  4. Now combine the flour, mixed spice and bicarbonate of soda into the bowl. Then stir all this into the sugar, eggs and oil mixture gently, followed by the remaining cake ingredients. 
  5. Divide the batter evenly between the prepared tins and bake the cakes on the centre shelf of the oven for about 30 minutes. They should be nicely risen, feel firm and springy to the touch when lightly pressed in the centre, and show signs of shrinking away from the sides of the tin. If not, give them another 2 - 3 minutes and test again.
  6. Meanwhile, make the topping by whisking all the ingredients together in a bowl until light and fluffy. Then cover with clingfilm and chill for 1 - 2 hours, until you are ready to ice the cakes. 
  7. To make the syrup glaze, whisk together the fruit juices and sugar in a small pan and place onto medium heat until it starts to boil and all sugar is dissolved. Take off the heat and allow to cool.
  8. When the cakes come out of the oven, stab them all over with a skewer or toothpick and quickly spoon the syrup evenly over the hot cakes. Now leave them to one side to cool in their tins, during which time the syrup will be absorbed.
  9. When the cakes are completely cold, remove them from their tins. Spread one-third of the filling over one of the cakes, place the other on top, (repeat again one more time if making a 6" 3 layer cake) then cover the top and sides with the remaining icing.
  10. Scatter the remaining toasted pecan nuts over the top.

Sunday, 10 June 2012

Creamy Caramel Cake and Peggy Porschen's 'Boutique Baking' Review

I have been an avid admirer of Peggy Porschen's for a while now. This manifests itself in my frequent perusal of her website, looking at her beautiful cakes, cupcakes and cookies, and putting together a wish list of courses I would do at the Academy if I had all the time and money in the world. Surprisingly, I hadn't owned any of her books until the lovely people at Quadrille Food sent me a review copy of 'Boutique Baking'.
After going through this book cover to cover and marking all the recipes that I wanted to try (as is my standard new baking book protocol), I was glad this was my first Peggy Porschen book, as going from my judgement of her other books, solely from their covers (as that one famous saying says you shouldn't do; and which I always do) this book appears to be a more beginners' guide to cake decorating that is expanded on in the other books. But rest assured, this is in no way full of amateur looking cakes. No siree! These are beautiful cakes that are accessible. Beautiful cakes that you or even I can make! And if you want something more challenging, there's something for you too. Try your hand at the intricate Glorious Victoria Cake or the fresh and pretty Scrumptious Carrot Cake.

I decided to start off with something a bit simpler; the 'Creamy Caramel Cake'; which I made to round off a lunch for some American guests. It's a great cake - albeit with relatively simpler flavours than I was expecting from a caramel cake - and was  an absolute hit with my guests. I only got to keep a small piece after we'd all had a piece and they requested some to take home. The cake was light and fluffy and the sugar syrup definitely adds a depth of flavour and moisture to the cake. I'd only used a sugar syrup once on a cake before now but will definitely be doing it again; probably when I try out all the other recipes in this book that I intend to.
The more I flicked through this book oohing and aaahhing over the beautiful pictures of baked goods on each page (I'm a sucker for food porn), the more convinced I became that it is the perfect book for beginners to baking full stop. It covers sweet treats such as meringue kisses, biscuits, cupcakes, layer cakes, classic cakes and bakes - e.g. lemon, almond and poppy seed cake - and drinks. And for each recipe it contains detailed instructions and the equipment needed to make yours look just like the ones in the picture - which, let's be honest, is always what we're aiming for. I spent lots of time being disappointed when I first started baking because although my cake would taste pretty good, it would look nothing like the one in the picture because the mere line at the bottom of the recipe telling me something like "smooth on your frosting with a palette knife" simply wasn't sufficient instruction.
Boutique Baking's instructions can be intimidating at first glance as there are so many words, but you quickly become grateful for the step by step instructions and advice which you can always ignore or skip if you are an experienced baker/decorator.

Next on my list to try out is the Lemon Limoncello Cake. Or maybe the Cosmo Cupcakes. Or even the Sticky Toffee Cupcakes ... ahh who knows. What I do know is that I didn't win the Euromillions on Friday leaving me the time to take every single Peggy Porschen Academy course ever so instead I'm going to work through my favourites in this book and then graduate to one of her other books; probably 'Pretty Party Cakes' :)

Recipe from Peggy Porschen's 'Boutique Baking'.

Ingredients

For the sponge
200g unsalted butter, softened
200g caster sugar
Pinch of salt
Seeds of 1 vanilla pod
4 medium eggs
200g self-raising flour

For the sugar syrup
150ml water
150g caster sugar
scraped vanilla pod
2 tbsp Brandy

For the buttercream filling
100g unsalted butter
100g icing sugar, sifted
Pinch of salt
50g dulce de leche or a can of sweetened condensed milk boiled in water for 3 hours

For the decoration
About 2 tbsp cocoa powder

Equipment
Basic baking kit
Three 15cm (6in) round sandwich tins
Cake leveller or large serrated knife
Non-slip turntable
Flat disc to place on top of the turntable
15cm (6in) round cake card
Ridged side scraper (One from Wilton used in the book)

Bake the sponges one day ahead of serving.
Make the sugar syrup whilst baking the sponges. Prepare the filling and assemble and decorate the cake on the day of serving.
Dust the cake with the cocoa powder immediately before serving as, after a few hours, the cocoa powder may absorb moisture from the buttercream and appear wet.

Preheat the oven to 175C / Gas Mark 4.

Prepare the sandwich tins by greasing and lining them with greaseproof paper.

  1. To make the sponge - Place the butter, sugar, salt and vanilla seeds in a mixing bowl and cream together until pale and fluffy.
  2. Beat the eggs lightly in another bowl and slowly add to the butter mixture while whisking quickly. If the mixture starts to separate or curdle, stop adding the egg and beat in 2-3 tablespoons of flour. This will rebind the batter. Once all the egg has been added and combined with the butter mixture, sift in the flour and stir until the batter is just combined. This will ensure the sponges stay light and fluffy.
  3. Divide the batter evenly between the cake tins. If you find it difficult to measure by eye, use your kitchen scales to weigh out the amount of sponge mixture for each tin.
  4. Bake for 15 - 20 minutes, depending on your oven. If you are using deeper cake tins, the sponges will take longer to cook. The sponges are cooked when the sides are beginning to shrink away from the edges of the tins and the tops are golden brown and spring back to the touch. If in doubt, insert a clean knife or wooden skewer into the centre of each sponge; it should come out clean.
  5. To make the sugar syrup - While the sponges are baking, prepare the sugar syrup for soaking. Place the water, caster sugar and vanilla pod in a saucepan and bring to the boil. Simmer until all the sugar crystals have dissolved. Set aside to cool and then add the brandy.
  6. Once the sponges are baked, let them rest for about 10 minutes outside of the oven. Using a pastry brush, soak the top of the sponges with syrup while they are still warm; this allows the syrup to be absorbed faster.
  7. Once just warm, run a knife all the way round the sides of the tins, remove the sponges from the tins and leave to cool completely on a wire cooling rack.
  8. Once cool, wrap the sponges in cling film and then rest them overnight at room temperature. This will ensure that all the moisture is sealed in and the sponges firm up to the perfect texture for trimming and layering. When trimmed too soon after baking, the sponges tend to crumble and may even break to pieces.
  9. To make the buttercream filling - Place the butter, icing sugar and salt into a mixing bowl and cream together until very pale and fluffy.
  10. Add the dulce de leche to the mixture and stir through until combined and smooth
  11. To assemble the cake - Trim and sandwich together the three sponge layers using one-third of the butter cream filling. With the remaining buttercream filling, cover or mask the top and sides of the cake.
  12. To decorate - Cover the chilled cake with another generous layer of buttercream and, using a side-scraper with ridges, created a sculpted barrel design. If you are unable to achieve a perfect sculpted side on your first attempt, simply scrape off any excess buttercream and repeat the process until you are happy with the result. Clean up the top with a palette knife.
  13. Chill until set. Dust the top of the cake liberally with cocoa powder before serving.
Serve the cake at room temperature. This cake is best enjoyed within 3 days of baking but it can last for up to 1 week.

Sunday, 15 January 2012

Pumpkin Cake with Caramel Cream Cheese Frosting

Happy New Year all!

I made this cake twice for Christmas gatherings a week apart. I'll let the reviews I got do the talking ;)

"I dare say your pumpkin cake is currently my most favourite thing in the world.
The sweetness of the caramel frosting perfectly counterbalances the pumpkin moistness and density of the cake with a little bitter chaser" (She should be a food writer right?!)

"I thought Hummingbird was good but ... this cake, oh my God"

"Possibly the best cake I've tasted of yours so far"

"Had a slice, smuggled out and carried across state lines. One word; sublime"

"Someone just screamed OH MY GOD. Can you get me her details?"

I'm not touting my own horn; it's the cake!

This incredible recipe (changed very slightly) is from Food & Wine.

Ingredients

Frosting
1 cup sugar
1/2 cup water
1/2 vanilla bean, split and seeds scraped
170g unsalted butter, softened
2 tablespoons double cream
455g cream cheese, cut into small cubes

Cake
2 cups plain flour
2 1/4 teaspoons baking powder
1 teaspoon salt
3/4 teaspoon baking soda
1 teaspoon cinnamon
1 teaspoon ground ginger
1/2 teaspoon ground nutmeg
1/4 teaspoon ground cloves
1 1/4 cups brown sugar
4 large eggs
3/4 cup vegetable oil
1 425g can pumpkin puree
1/2 cup whole milk

For the frosting
1 - In a medium saucepan, combine the sugar, water, vanilla bean and seeds. Cook over high heat, stirring, until the sugar is dissolved. Using a wet pastry brush, wash down any crystals from the side of the pan.
2 - Cook over a medium-high heat without stirring until a medium-dark amber caramel forms, about 15 minutes (Don't worry if it takes longer). Remove from the heat and immediately stir in the butter and double cream. (Don't worry if the butter separates). Discard the vanilla bean.
3 - Transfer the caramel to the large bowl and using a mixer, beat at low speed until the caramel cools slightly and comes together, about 5 minutes.
4 - With the mixer, beat in the cream cheese, 1 cube at a time and beating well between additions (until the cube you've just added has completely disappeared into the mixture), until silky. It should be cool by the time you've incorporated all the cream cheese. Transfer the frosting to a bowl and refrigerate until very firm, at least 6 hours.
For the cake
5 - Preheat the oven to 180C / Gas mark 4 / 350F. Butter and flour two 8-inch round cake pans. (Note: I made 1 1/2 half times the recipe to make a triple layer cake).
6 - In a medium bowl, whisk the flour with the baking powder, salt, baking soda, cinnamon, ginger, nutmeg and cloves.
7 - In a bowl, using an electric mixer, beat the brown sugar and eggs at medium-high speed until fluffy, 3 minutes. Beat in the oil, then beat in the pumpkin puree. Alternately add the dry ingredients and the milk in 3 batches, beating well between additions.
8 - Pour the batter into the prepared pans and smooth the tops. Bake for 20 - 35 minutes, until a toothpick inserted in the centre of the cake comes out clean.
9 - Let the cakes cool on a rack for 20 minutes. Run a knife around the edges to loosen the cakes, then invert them onto a wire rack to cool completely.
10 - Place one layer on a plate and spread with 1 cup of the caramel cream cheese frosting. Top with the second layer and frost the top and side.

Refrigerate the cake for 2 hours before serving.
Make ahead: The cake can be refrigerated in an airtight container for up to 2 days. Serve cold or at room temperature.
Notes: The cake can be garnished with candied nuts

Thank to Philippa Brady for the lovely Christmassy photos!

Sunday, 2 October 2011

Boston Cream Pie


Has anyone seen the new movie 'I don't know how she does it'? Apparently Sarah Jessica Parker's character is obsessed with lists which help her juggle her wife, mother and busy professional balls. I totally get her. I too, am obsessed with lists!

At present, I have 22 lists in my iPhone 'notes'. They range from my permanent shopping list to a list of songs I want to download and a bunch of quotes that I love and want to keep to hand (sample: "According to aeronautical experts, a bumble bee cannot fly because of the asymmetric relationship between its body shape, size and wing span. She doesn't know this however, and flies anyway").

As usual, there is a link (albeit, as usual, tenuous) between my enlightened write-up random chit chat and today's recipe. And that is my 'to cook/bake' list. This list contains the recipes that jump out at me from all the numerous recipes I book mark and post-it-mark in my cookbooks. If I love it, it goes on here so that I remember it when I have time to bake 'just because'. And this Boston Cream Pie (not a pie, as the name misleadingly implies, but a cake) has been on my list for a very long time!

It is from my favourite Nigella book and as usual the recipe didn't let me down. I LOVE the creme patissiere filling but for some reason, the oil seemed to separate from the butter and chocolate in my ganache so it looked very oily. A few hours later, it was fine but you will notice the oily sheen in my pictures. If anyone knows why this happened, please enlighten me. I should also point out I always struggle with ganache so maybe it's just me!

Happy Sunday folks!


Recipe from Nigella Lawson's 'How to be a Domestic goddess'

Ingredients
  • For the cake
  • 225g unsalted butter, very soft
  • 225g caster sugar
  • 1 teaspoon vanilla extract
  • 4 large eggs
  • 200g self-raising flour
  • 25g cornflour (Nigella believes the combination of flour and cornflour makes for a lighter, more tender sponge but it is fine to replace this with 225g self raising flour, as I did)
  • 3 - 4 tablespoons milk

For the icing
  • 150ml double cream
  • 1teaspoon vanilla extract
  • 1 teaspoon unsalted butter
  • 150g dark chocolate

For the creme patissiere
  • 125ml milk
  • 125ml double cream
  • 1 vanilla pod or 1 teaspoon vanilla extract
  • 3 large egg yolks
  • 50g caster sugar
  • 15g plain flour


The cake
1 - Preheat the oven to 180C/gas mark 4. Grease and flour 2 x 21cm sandwich tins
2 - Cream the butter and sugar, add the vanilla and then the eggs, one at a time, adding a spoonful of flour between each
3 - Fold in the rest of the flour (and the cornflour if using), and when all is incorporated, add a little milk as you need.
4 - Pour and scrape the batter into the tins

bake for about 25 minutes, until the cakes are beginning to come away at the edges, are springy to the touch on top and a cake tester comes out clean..

Creme Patissiere
5 - When the cake is in the oven, warm the milk and cream in a saucepan along with the vanilla pod split length-wise.


 6 - Bring to the boil, then remove from the heat, cover and let stand to infuse for 10 minutes. If you're not using the pod, add the vanilla extract later, when you've combined all the ingredients.

7 - In a large bowl, whisk the yolks and sugar until creamy,

and then beat in the flour.

8 - With the point of a small, sharp knife, scrape the seeds out of the vanilla pod into the milk, and add this warm milk to the egg mixture and whisk until smooth

9 - Pour back into the saucepan and stir or whisk gently over a low heat until the custard thickens.
Remove from the heat and let the custard cool by pouring it into a wide bowl and tearing off some greaseproof paper, wetting it, then covering the bowl with it. This stops it forming a skin. Don't put it in the fridge.

10 - When the cakes are done, sit them in their tins on a wire rack for 5-10 minutes, then turn out and cool directly on the rack. When the cakes and the creme patissiere are cool, you can make the chocolate ganache.

Chocolate Ganache
11 - Warm the cream, vanilla extract and butter with the chocolate, chopped into small pieces, and bring to the boil in a thick-bottomed saucepan, by which time the chocolate should have melted.

12 - Remove from the heat and whisk till smooth and thickened. Let cool a little before using, but you still want it runny enough to ice with

13 - Sit one of the cakes on a plate or cake stand and spread with the cooled creme patissiere,


then top with the second cake. Dollop spoonfuls of the chocolate icing on top, letting it spread and drip down the sides of the cake

Serves 8

Friday, 2 September 2011

Lemon Blueberry Buckle

Hey hey! Sorry I've been AWOL for a bit. Okay, okay, about three weeks *shamefaced*. In my defence, I've been very very busy. But I'll also admit that I could have found some time somewhere to shoot off a quick post. Especially since I made this over a month ago and I've had the pictures ready to go the whole time.


Yup, I could have cleared some 'Cougar Town' from my schedule just long enough to write this. But have you seen 'Cougar Town'???? It's my new TV obsession! It's funny, not too deep and each episode is only 20 minutes long (which is great if you get restless when you sit still for too long. Like me. Not like anyone I know)! Plus it has Josh Hopkins who was in 'Ally McBeal' for a few episodes towards the end; but just long enough for me to fall in love with him *sigh*.


Anyway, I present you with yet more lemon. This time a Lemon Blueberry Buckle. If you're wondering what a Buckle is - because I totally did - it is a cake with a crumble topping. Now, I'm convinced that a crumble topping makes everything taste good - case in point fruit. Crumble makes fruit taste GOOD - so this was bound to be a winner. The cake is so delicately soft and so full of flavour and the crumble topping? Well, it is crumble topping so it rocks.


Anyway, try it! And I promise I won't stay away for so long next time!


(Recipe from The Novice Chef)
Yields - About 20 servings


Ingredients


Crumb Topping
1 cup flour
2/3 cup sugar
1/4 teaspoon salt
Zest of 2 lemons
113g butter, cubed, at room temperature


Cake
170g butter, at room temperature, plus extra for greasing the pan
3 cups plus 4 tablespoons flour
2 tsps baking soda
1 tsp salt
1/2 teaspoon ground nutmeg
1 1/2 cups sugar
Zest and juice of 2 lemons
4 eggs
1 cup vegetable oil
5 cups blueberries, fresh or frozen, divided into two lots
crumb topping, chilled


For Crumb Topping:
1 - In a medium bowl, whisk together the flour, sugar, salt and lemon zest.
2 - Add the butter, using a fork or your fingers to cut in the butter until it is reduced to the size of peas. Loosely cover the bowl, and place it in the freezer while you mix the cake batter.
For the Cake:
3 - Heat the oven to 180C / Gas Mark 4 / 180F. Lightly grease a 33 x 23cm baking tin
4 - In a medium bowl, whisk together the flour, baking powder, baking soda, salt and nutmeg
5 - In a large bowl with a hand mixer, cream together the butter, sugar and lemon zest until the mixture is light and fluffy; about 3 - 5 minutes.
6 - Add the lemon juice and eggs, one at a time, scraping down the sides of the bowl after each addition.
7 - Stir the flour mixture into the bowl, a third at a time, alternating with the oil, until both the flour mixture and oil are evenly incorporated into the batter.
8 - Gently fold 1 cup of blueberries into the batter
9 - Spread the batter into the prepared pan and distribute the remaining blueberries evenly over the top of the batter. 
Remove the crumb topping from the freezer and sprinkle it over the berries.
10 - Bake the cake until it is lightly golden and firm on top, and a toothpick inserted in the center comes out clean, about 45 - 50 minutes. Rotate the pan halfway through for even baking.
11 - Remove the cake from the oven and cool to room temperature before cutting.
The cake will keep at room temperature for 2 to 3 days, covered in plastic wrap.

Thursday, 21 July 2011

Orange Pound Cake and Me, Me, Me!

I know you guys lie awake at night, thinking to yourselves; "What I want most in the world is to know more about Vickii ..." Well, consider your wish my command, because this post is mostly about me! Ha ha, only kidding. Kind of.  I saw this on another blog (can't remember which one) and thought it would be fun to do - so enjoy, and feel free to judge me as harshly as you want.


Today's post is an orange pound cake that I made for church a few weeks ago when the weather was so lovely, I wanted to bake something with a refreshing zesty flavour. A lot of people thought it was lemon drizzle cake which is interesting as I think it is quite distinctively orange. But either way, it is a gorgeous pound cake. Soft and moist and fabulously citrusy yet not overwhelmingly so. Enjoy!


 1. IF YOU WERE ANOTHER PERSON WOULD YOU BE FRIENDS WITH YOU?
Totally! I'm a great friend.
2. DO YOU USE SARCASM A LOT?
A lot compared to who? Actually, it doesn't matter, yes I use sarcasm a lot. In fact, I think  I'm genetically incapable of opening my mouth without being sarcastic. 
3. DO YOU STILL HAVE YOUR TONSILS?
Yup
4. WHAT IS YOUR FAVORITE LUNCH MEAT?
Does bacon count?
5. WOULD YOU BUNGEE JUMP?
Probably not. I don't really get the point of jumping off somewhere really high just to bounce up and down and dangle after. Jumping out of a plane, now that I get.
6. WHAT IS YOUR FAVORITE CEREAL?
The cereal formerly known as Cinnamon Grahams. I've introduced so many people to it! It is  soooo good that I don't think it can technically be referred to as cereal. More like crunchy dessert.
7. DO YOU UNTIE YOUR SHOES WHEN YOU TAKE THEM OFF?
Only my running shoes because apparently it's bad to tug them off your feet while they're still laced up.
8. WHAT IS YOUR FAVORITE ICE CREAM?
One of the American Ben & Jerry's flavours. I can't choose. That's like asking me to pick a favourite child. (I don't have kids but I imagine that would be hard ;p)
9. RED OR PINK?
Pink - despite vehemently fighting it, it turns out I'm quite a girly girl
10. WHERE DO YOU WANT TO GO ON YOUR NEXT VACATION?
Hawaii. Or Cape Town. I wouldn't say no to Tahiti either. Or Thailand.
11. WHAT COLOR SHOES ARE YOU WEARING?
Camel coloured boots.
12. WHAT WAS THE LAST THING YOU ATE?
A jam sandwich for breakfast.
13. IF YOU WERE A CRAYON, WHAT COLOR WOULD YOU BE?
Yellow!
14. FAVORITE SMELLS?
I have LOTS of favourite smells. The sea. The smell of yummy baking. Stella McCartney's Stella perfume. Jo Malone's Nectarine and Honey perfume. Davidoff's cool water on men. The smell of caramelising onions. Freshly brewed coffee.... I could go on forever
15. WHO WAS THE LAST PERSON YOU TALKED TO ON THE PHONE?
My mum
16. FAVORITE SPORTS TO WATCH?
Football during the World or European cups17. DO YOU WEAR CONTACTS?
Nope
18. SCARY MOVIES OR HAPPY ENDINGS?
Happy endings.
19. LAST MOVIE YOU WATCHED?
Going The Distance. It wasn't as good the second time around.
20. WHAT COLOR SHIRT ARE YOU WEARING?
I'm wearing a strappy top in a colour best described as some shade of yellow.
21. WHAT BOOK ARE YOU READING NOW?
'I'm reading 'The Nanny Returns' - sequel to 'The Nanny Diaries'. I wouldn't recommend it.
22. FAVORITE SOUND?
The sound of waves crashing on a beach.
23. WHAT IS THE FARTHEST YOU HAVE BEEN FROM HOME?
Depends on which is further from London; California or Vancouver?
24. WHAT WAS THE LAST THING YOU WATCHED ON TV?
Probably 'Come Dine with Me'.
Recipe from Sweet Pea's Kitchen
Yields 2 loaves

Ingredients

For the Pound Cake
226g unsalted butter, at room temperature
2 cups granulated sugar
4 extra - large eggs, at room temperature
1/3 cup grated orange zest (from 6 oranges)
3 cups plain flour
1/2 teaspoon baking powder
1/2 teaspoon baking soda
1 teaspoon salt
1/4 cup freshly squeezed orange juice
3/4 cup buttermilk, at room temperature
1 teaspoon pure vanilla extract

For the Orange Syrup
1/2 cup fresh orange juice
1/2 cup sugar

For the Orange Glaze
2 cups icing sugar
4 - 6 tablespoons fresh orange juice

1 - Preheat the oven to 180C / Gas Mark 4 / 350F. Grease bottom and sides of two 9 x 5 inch loaf pans; dust with flour, tapping out excess. Line the bottoms with grease proof paper (optional).
2 - Using an electric mixer, cream butter and sugar until light and fluffy, about 5 minutes. With the mixer still running, beat in the eggs, one at a time, and the orange zest.
3 - In a large bowl, combine the flour, baking powder, baking soda, and salt. 
4 - In another small bowl, combine orange juice, buttermilk and vanilla.
5 - Add the flour and buttermilk mixtures alternatively to the butter and sugar mixture; beginning and ending with the flour. Beat until combined, not too long.
6 - Divide the batter evenly between the pans, smooth the tops and bake for 40 to 50 minutes, or until a toothpick inserted in the centre of the loaf comes out clean. Let cool in pans for 10 minutes
7 - While the loaves are cooling, make the orange syrup by combining the orange juice and sugar in a small saucepan over medium heat. Stir until the sugar is completely dissolved. Once dissolved, continue to cook for 3 more minutes. Remove from the heat.
8 - Remove loaves from tin and place on a wire rack positioned over a baking sheet. Use a toothpick to poke holes in the tops and sides of the loaves. 
9 - Brush the tops and sides of the loaves with the orange syrup. Let the syrup soak into the cake and brush again. Let the cakes cool completely.
10 - To make the orange glaze, in a small bowl whisk together the icing sugar and 4 tablespoons of the orange juice. The mixture should be thick but pourable. Add up to another tablespoon of orange juice if the mixture is too stiff.
11 - Pour the orange glaze over the top of each loaf and let it drip down the sides. Let the orange glaze harden, about 15 minutes, before serving

Tuesday, 7 June 2011

Triple Layer Oreo Cake (Warning: You might put on weight just LOOKING at this cake)

It was my mum's *cough* 40th *cough* birthday on the 27th of May and as I told you in this post, she's LOVES chocolate. So I knew I had to make her a cake that was loaded with chocolate. This cake came to mind pretty quickly because it was love at first sight as soon as I saw it but as it's such a big cake, I wanted to save it for a special occasion. And what better occasion than my amazing mum's birthday eh?


This recipe has been adapted slightly from Beantown Baker's. She's one of my favourite baking bloggers and I want to make layer cakes like her when I grow up!


I won't lie to you - this is a very involved cake. It took me about 7 hours to make but it is totally worth it in the end! I also had a few issues with the chocolate layers - my cake mixture was too watery and they rose unevenly making for very ugly uneven cakes; I'm amazed at the multitude of sins I was able to hide with the frosting! I've adapted the recipe slightly to try and resolve the issues I had but I haven't tested it yet. I'll update you guys when I do.


However, the time it takes is totally worth it. Even with their problems, the chocolate cake layers were wonderfully moist cake - I think they might be my favourite chocolate cake recipe (after Guinness chocolate cake) and the Oreo filling ... wow. It's creamy and vanilla-ey and not too sweet but still full of flavour. Yum. Yum. Yum. I'm using it to frost every cake I ever make EVER! Well. Okay. That is an exaggeration but this filling is that good! The whole cake is rich and decadent and incredible. It's just an amazing cake! And I'll stop now because I'm gushing. But you try it and see if you don't gush too!
Steps it takes to put this cake together
1 - Bake the cake layers. The cake layers can be made in advance and refrigerated or frozen. Layers should be completely cooled prior to assembling the cake
2 - Make the Oreo filling
3 - Stack the cake - Place 1 chocolate layer, flat side up, on a flat plate or cake pedestal. With a knife or spatula, spread the top with half of the Oreo filling. Place the Oreo cake layer on top and spread with the remaining Oreo filling. Place the last chocolate cake layer on top.
4 - Make the chocolate frosting
5 - Frost and decorate the cake. Spread frosting evenly on the top and sides of the cake and decorate with Oreo cookies and reserved filling. I used mini cookies.
Chocolate Cake Layers
Butter for greasing the cake tins
1 3/4 cups flour
2 cups sugar
3/4 cups cocoa powder
2 tsp baking soda
1 tsp baking powder
1 tsp salt
1 cup buttermilk
1/2 cup vegetable oil
2 eggs, at room temperature
2 tsps vanilla
1/2 cup freshly brewed hot coffee (I used instant)
1 1/2 packs of Oreos (about 21 cookies), cut  into quarters


1 - Preheat oven to 180C/Gas Mark 4/350F.Grease and flour 2 (8 inch) round cake pans
2 - Combine the flour, sugar, cocoa, baking soda, baking powder and salt
3 - In another bowl, combine the buttermilk, oil, eggs and vanilla
4 - With the mixer on low speed, slowly add the wet ingredients to the dry. With the mixer still on low, add the coffee and stir just to combine, scraping the sides and bottom of the bowl to make sure it is all combined
5 - Stir in the Oreo chunks and pour the batter into the prepared pans and bake for 35-40 minutes or until a skewer comes out clean.
6 - Cool in the pans for 30 minutes and then turn them out onto a cooling rack and cool completely


Oreo Cake Layer
57g unsalted butter, at room temp
1/2 cup milk
2 tsps vanilla extract
1 cup flour
1/2 tsp baking powder
1/4 tsp salt
2/3 cup + 2 tbsp + 2 tsp sugar
1 1/2 egg whites, at room temp
1 pack Oreos (14 cookies), cut into quarters


1 - Preheat oven to 180C/Gas Mark 4/350F.Grease and flour 1 (8 inch) round cake pan
2 - In a large bowl cream the butter until lighter and fluffy, about 3 - 5 minutes. Add the sugar and beat for another two minutes. Add the vanilla and beat until combined.
3 - In a separate bowl, combine the flour, baking powder and salt
4 - Add the dry ingredients in three batches, alternating with the milk. Start and end with the flour mix. Each time, beat only just combined
5 - Add the egg whites and beat for one more minute
6 - Fold in the quartered cookies, pour batter into prepared cake tin and bake for 25 - 30 minutes or until an inserted skewer comes out clean. 
7 - Allow to cool in the tin for about 10 minutes then turn out onto a rack and allow to cool completely


Oreo Filling
113g cream cheese, at room temp
1 tsp vanilla
1 cup icing sugar
1 cup whipping or double cream
7 Oreos, cut into quarters


1 - Using an electric mixer, beat the cream cheese, vanilla and icing sugar until light and creamy. 
2 - Add half of the cream and beat until smooth. Add the rest of the cream and beat until it has the consistency of whipped cream.
3 - Reserve 1/2 cup to use to decorate top of cake (I forgot to do this) and place the rest in the fridge until ready to use
4 - When ready to use, stir in the Oreo chunks


Chocolate Frosting
170g dark chocolate (70% cocoa solids)
227g unsalted butter, at room temp
1 egg yolk, at room temp
1 tsp pure vanilla extract

1 tbsp instant coffee


1 - Chop the chocolate and place it in a heat-proof bowl set over a pan of simmering water. Stir until just melted and set aside until cooled to room temperature.
2 - Using an electric mixer, beat butter on medium high speed until lighter and fluffy, about 4 minutes
3 - Add the egg yolk and vanilla and continue beating for 3 minutes
4 - Stir in the icing sugar (so that it doesn't go everywhere) and then beat until smooth and creamy, scraping down the bowl as necessary
5 - Dissolve the coffee in 2 teaspoons of very hot tap water. On low speed, add the chocolate and coffee to the butter mixture and mix until blended. Spread immediately on the  cooled cake