Pages

Tuesday, 8 February 2011

My New Toy and Cookies and Cream Brownies

I promise that one day, I'll bore you with an ENTIRE post on my kitchen gadget wish list, but for now, you'll have to make do with my exciting news that I've added the Breville SHM2 Twin Hand and Stand Mixer to my kitchen! 
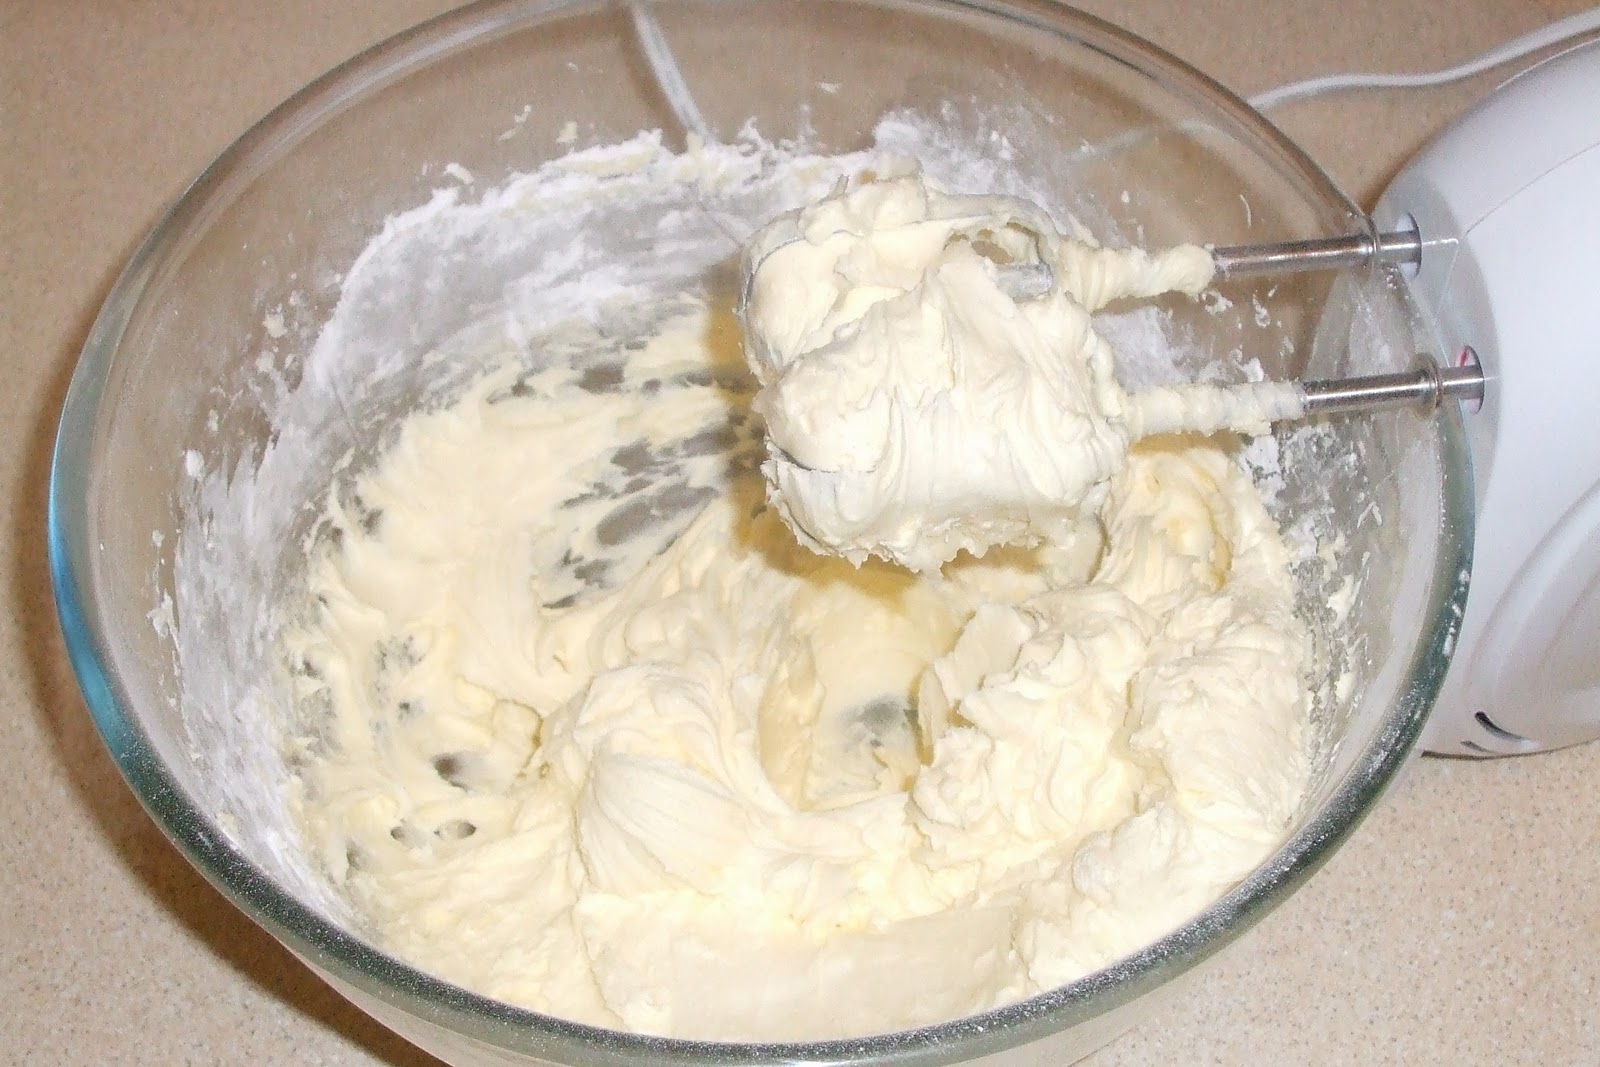
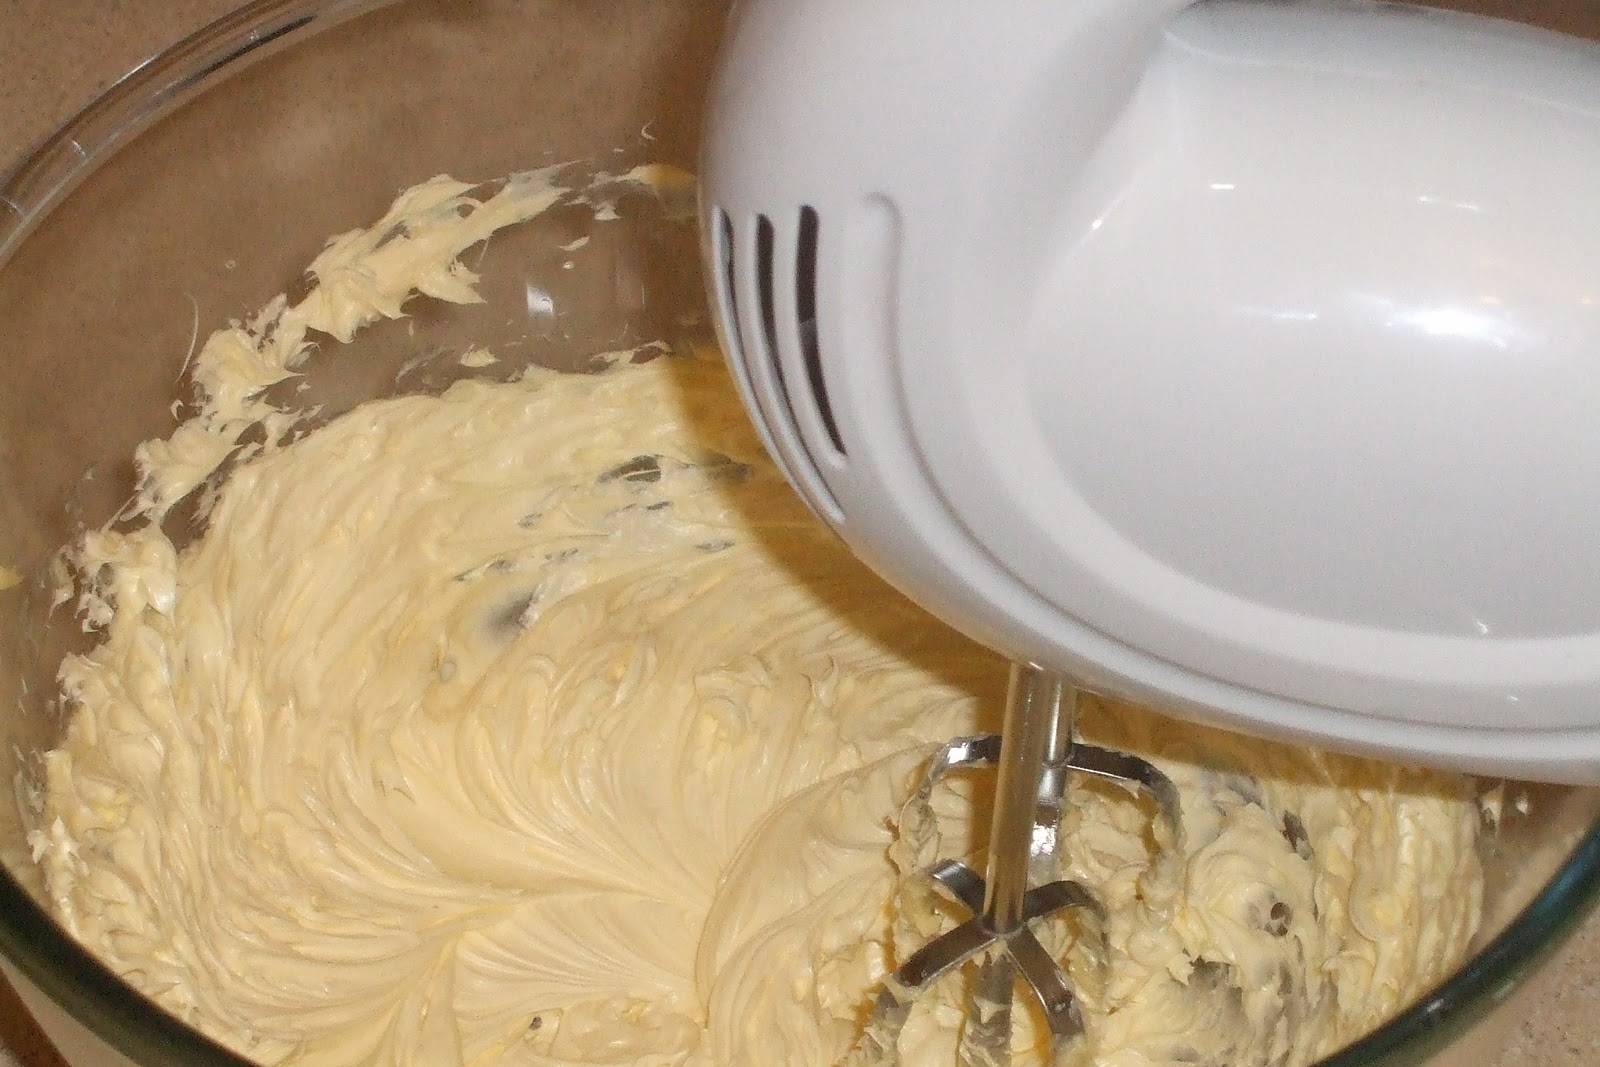
This is my pretty new mixer! It is not quite the Kitchenaid mixer in a variety of beautiful pastel colours that I'm constantly lusting after but it's a definite step up from my crappy Sainsbury's mixer. They say you shouldn't speak ill of the dead so in defence of my (now dead) mixer, it mostly did the job. For several good months. Except for when I was making buttercream frosting. It didn't matter how long I stood over my bowl of butter and icing sugar, it didn't matter how numb my hand managed to get, it wouldn't reach that creamy perfection I was after. But now, I can just dump my butter and sugar into my free-standing mixer and go off to read a few more pages of 'Emma' while letting it work it's magic. Whoop whoop! I can't wait to make buttercream! And bread, because it has dough hooks. Can I get another whoop?

Now on to something that doesn't require a mixer; brownies! This is another recipe from Lorraine Pascal's 'Baking made easy' and it is an interesting one because it only contains two tablespoons of flour.  This is a nice, fudgy brownie recipe but I think it lacks a certain je nais c'est quois (I bet I've just spelt that completely wrong! French has never been my strong suit).  I think it's almost too light. For me, the perfect brownie is one where one square fulfills all my carnal chocolate desires. One square, and even me, the ultimate chocoholic, is sated. This wasn't that brownie. I know I said this when I made these cheesecake brownies but the more brownies I eat and the more brownie recipes I try, the more convinced I am that my original brownie recipe is one of the best there is. And I know I always say I'll share it but this time I mean it, as I'll be baking them for a work Valentines Day bake sale. I'll also try my recipe with Oreos in in so watch out for a 2nd take on these brownies. 

Till then, enjoy! Because while my overly critical self might not be 100% happy with these, they are nice brownies and as with all brownies, pretty easy to make but amazingly rewarding to eat.

Ingredients

165g butter, plus extra for greasing
200g dark chocolate
3 free-range eggs
2 free-range egg yolks
2 tsp vanilla extract
165g soft light brown sugar
2 tbsp plain flour
1 tbsp cocoa powder
pinch salt
154g pack Oreo Cookies

1 - Preheat oven to 180C/350F/Gas Mark 4.
2 - Grease and flour a 20cm/8in square baking tin
3 - Melt the butter and chocolate together in a bain marie. Alternatively melt the butter in a pan over a medium heat. When the butter has melted, remove the pan from the heat and add the grated (or chopped) chocolate. Leave to stand for a few minutes, or until the chocolate melts, and then stir together. 
Another alternative is to put the chocolate and butter in a bowl and melt in the microwave in 25-second blasts, stirring well each time.
4 - Whisk the eggs, egg yolks and vanilla together in a large bowl until the eggs begin to get light and fluffy. 
5 - Add the sugar in two additions, whisking between each. Pour it around the side of the egg mix so as not to knock out the air that has been whisked in. Keep whisking until the mixture becomes stiffer. 
6 - Once the egg mixture is ready, pour the chocolate into it - again around the sides so as knock the air out.
7 - Add the flour, cocoa powder, salt and a third of the biscuits and stir until fully combined, then pour the mixture into the prepared tin.

8 - Scatter the remaining biscuits over the top, pressing them in slightly. 
9 - Bake on the middle shelf of the oven for 25-30 minutes. The middle should be ever so slightly gooey. Leave the brownies to cool in the tin - the top will sink and crack a little.
10 - Cut into squares and serve

Tuesday, 1 February 2011

Pumpkin Pie

Who says you can only have pumpkin pie at Thanksgiving? 
And mulled wine at Christmas??
Or turkey at .... actually, I don't like turkey, I'm happy to only have it only once a year. 
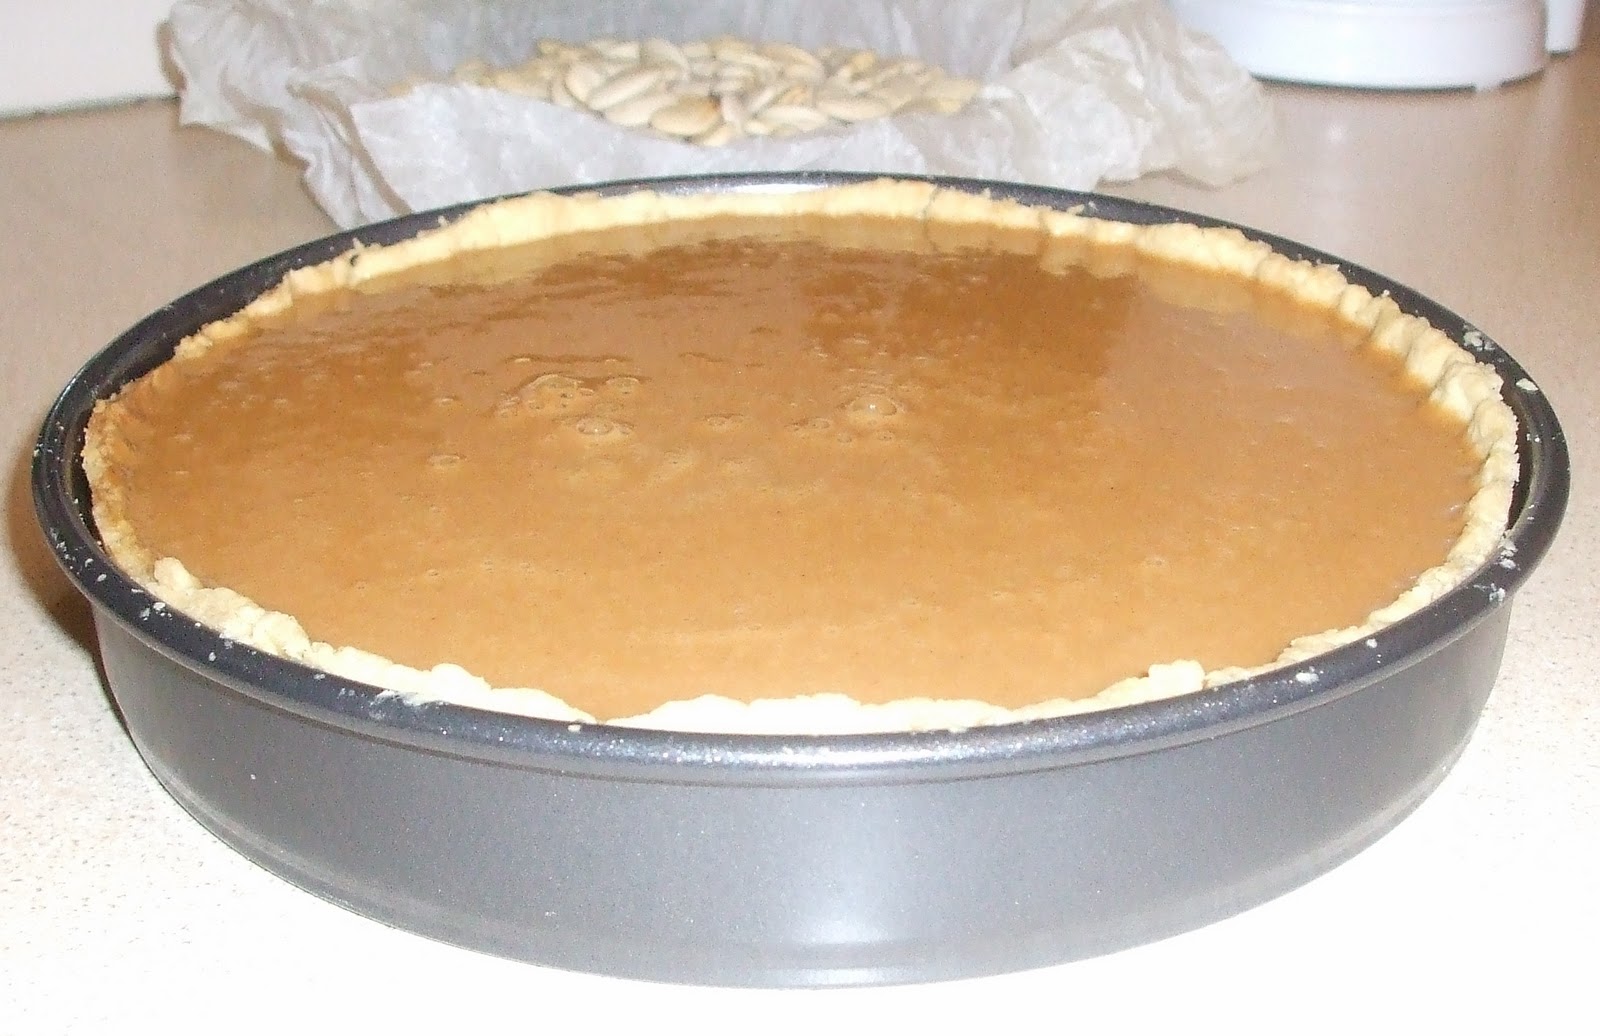
My point is I hate food rules! So one Friday night in late January found me in my kitchen, flagrantly disregarding the Thanksgiving rule and making pumpkin pie for a friend who I hadn't seen in 7 years and who would be visiting early on Saturday morning. It was my first pie and I chose pumpkin pie because I had it once in Canada at Thanksgiving 8 years ago. I remember being very doubtful of it because I didn't think I liked pumpkins and couldn't understand why anyone would use them to make a pie. One bite however, and I was hooked! Well, obviously not so hooked because it would be 8 years before I would have it again.


I intend to make LOTS of pies this year and this was a great start! I have one more tin of pumpkin puree (For readers in the UK, Waitrose stock tins of this around Autumn every year) and instead of experimenting with cupcakes and muffins, I might just save it for another pie.


I used a shortcrust pastry recipe from Lorraine Pascal's 'Baking Made Easy' TV show. I found it very crumbly and had to patch lots of it together in the baking tin. I think perhaps I could have added 1 more tablespoon of water. The pumpkin custard that goes in the pie is the recipe on the tin of Libby's pumpkin puree.


Short Crust Pastry


Ingredients
250g/9oz plain flour
125g/4 1/2oz cold butter, cubed
2 free-range egg yolks
large pinch salt
1-4 tbsp water, if needed


1 - Put the flour and butter in a food processor and pulse to make breadcrumbs
2 - Alternatively use your hands and rub the butter and flour together in a bowl until the mixture resembles fine breadcrumbs (I used this method)
3 - Add the egg yolks and a pinch of salt, and stir together with a knife. Press the mixture together into a ball. If the pastry feels very dry, add a little water, but try to avoid adding water if you can. (I added 2 tbsp water)
4 - Once the pastry is all pressed together, wrap in cling film and pop it in the fridge to rest for 30 minutes
5 - After 30 minutes, remove the pastry from the fridge and set it aside to warm up a little (if you use it straight from the fridge and try to roll it out, the pastry will just be a hopeless crumbly mess)
6 - Preheat the oven to 180C/350F/Gas Mark 4
7 - Roll the pastry out on a floured work surface to the thickness of half a £1 coin and use it to carefully line a 20 x 30cm/8 x 12in rectangular fluted tin. Homemade pastry is often quite crumbly. Don't be alarmed by this. You can always patch it together in the tin.


8 - Take a small ball of the pastry (the size of a £1) coin and use it to gently ease the dough down into the tin. Press the handle of a wooden spoon against the pastry all round the edges to coax it into the fluted grooves. Trim off the excesses around the top. Put in the fridge for about 15 minutes, or until firm
9 - Remove from the fridge. Take a piece of baking paper slightly larger than the tin and scrunch it up, then unscrunch it and line the tin with it. Fill it with baking beans or dried beans and 'blind bake' in the oven for 20 - 25 minutes, or until the pastry feels sandy to the touch. Remove from the oven and set aside.


Filling


Ingredients
2 eggs, lightly beaten
1 x 425g can of pumpkin puree
171g granulated sugar (I used brown sugar)
1/2 teaspoon salt
1 teaspoon ground cinnamon
1/2 teaspoon ground ginger
1/4 teaspoon ground cloves
234ml evaporated milk


1 - Oven should be on 180C/350F/Gas Mark 4
2 - Combine filling ingredients together and pour into pastry case


3 - Bake for 40-50 minutes (turning pie tin round halfway) or until a knife inserted near the centre comes out clean.
4 - Allow to cool
I served mine with double cream, flavoured with vanilla and icing sugar and whipped until thick.

Wednesday, 26 January 2011

Raspberry Blondies

I am a huge advocate of equality for everybody regardless of race, gender, sexuality, religion, class ... But *gulp*, I've realised I have my prejudices too. Here goes. *Deep breath* I. am. . . chocolatist. And no, I don't mean that some chocolate is superior to other chocolate - though that is certainly true. Lindt; good. Hershey's; Bad. Nope, what I am trying to say is that I have issues with white chocolate. It's white, chocolate is by definition brown. Issue number 1. It is not made of cocoa, it is made of cocoa butter. The fact that they can even get away with calling it chocolate is beyond me!


This prejudice extends to their use in a moist cakey goodness known as a brownie; or a 'Blondie' as they are known when they're made with white chocolate. However, though I LOVE brownies and don't think Blondies are comparable; I have to admit that when I consider them on their own, instead of comparing them to their darker, richer counterpart, they're actually pretty good. They are essentially dense, white chocolate cakes and although rich in flavour, not overly cloying. The raspberries and clotted cream make it a wonderful summer dessert. I made these as part of a tea-party spread.


I'm not sure what happened when I made this batch but the mixture seemed way too thick which is why I didn't take any photographs. However, the finished blondies were the perfect combination of crispy top layer, and moist, cakey inside. I'll have to make them again at some point and post pictures. In the meantime, give them a go yourself; they're very easy to make!


Ingredients
175g butter, softened
400g golden caster sugar
2 large eggs
pinch of salt
1/4 tsp bicarbonate of soda
1 tsp baking powder
100g white chocolate, chopped
50g raspberries
clotted cream (To serve)


1 - Preheat your oven to 180°C/350°F/Gas mark 4
2 - Grease and flour a 23cm (9in) square cake tin
3 - In a large bowl, beat together the butter and caster sugar
4 - Beat in the eggs, one at a time
5 - Stir in the flour, salt, bicarbonate of soda and baking powder and mix well until combined
6 - Stir in the white chocolate and spoon the mixture into the prepared tin
7 - Scatter over the raspberries and bake for 50 minutes or until a skewer inserted into the centre comes out clean
8 - Leave to cool completely then cut into squares in the tin
9 - Serve with a dollop of clotted cream

Saturday, 22 January 2011

Happy (and Healthy) New Year - Apple and Sunflower Seed Muffins

I'm not usually one for following the crowd. But this new year, I'm jumping on probably the biggest bandwagon there is. You know, that one that comes round once a year (maybe twice if you count pre-summer), right at the beginning of the year, straight on the heels of Christmas excesses. Yup, that's right, I am going on a diet! I have Christmas and two weeks in Lagos straight after, gorging on all the foods I love, to blame. 


My diet of choice is Weight Watchers, which I'm constantly touting as the best diet around. There's no self deprivation, or cutting out entire food groups. Instead, with a daily point value, it just teaches you how to make healthier food choices so you can get the most for your points. Don't worry, though, this does not mean I'm going to stop baking all the other fattening stuff! Thanks to the new WW ProPoints system, I have an extra allowance each week, which I'll spend some having a slice or portion of the stuff I bake! However, I'll also be experimenting with healthier recipes so bear with me my anti-diet readers, there will be plenty for you too!


First up are these muffins. I can't lie, these do taste like diet muffins but they're tasty, filling make a good and healthy substitute for a muffin breakfast or in place of your afternoon cake. I believe that there are low-fat muffin recipes out there that are tastier than this, but these were a good start. 


5 WW ProPoints per muffin
Makes 8


Ingredients


3 eggs
100ml skimmed milk
7 tsp artificial granulated sweetener
150g apples, grated
100g carrots, grated
2 tbsp sunflower oil
30g sultanas
10g sunflower seeds
300g plain flower
3 tsp baking powder
1 tsp mixed spice
1 tsp ground cinnamon
pinch of salt


For the icing
1 - 2 tbsp lemon juice
40g icing sugar


1 - Preheat oven to Gas Mark 4/180°C/fan oven 160°C. 
2 - Line two muffin tins with 8 muffin cake cases
3 - Whisk together the eggs, milk, sweetener, apples, carrots, sunflower oil, sultanas and sunflower seeds
4 - In a separate bowl, stir together the flour, baking powder, mixed spice, ground cinnamon and pinch of salt
5 - Stir the dry ingredients into the wet ingredients until just combined
6 - Spoon into the muffin cases and bake for 30 - 35 minutes. Remove from oven and cool on a wire rack

7 - Mix the icing sugar with the lemon juice and drizzle over the muffins.
These are best eaten on the day they're made or the can be frozen. Defrost and warm through in a microwave (medium power) before eating.

Thursday, 13 January 2011

Peanut Butter Blossom Cookies, Chocolate Chip Tea Cookies and Baking Resolutions


Happy New Year everyone!! I hope you all had a lovely Christmas and a slightly more eventful New Year’s Eve than I did. I fell asleep at 11pm on the 31st so I slept right through the countdown and all the fireworks. As a result, the fact that it is a new year hasn’t hit me quite yet. I hope it hits soon!

The last cookies I made on my cookie baking spree are these Peanut Butter Blossom Cookies and Chocolate Chip Tea Cookies. I'm not sure why they're called 'Tea' cookies but when they taste this good, who cares? And I can't believe it's taken me three whole posts to toot my own horn about how amazingly all my cookies turned out! Actually, I might have already hinted at how great I , ahem, I mean, they were, I can't remember ;) But considering that before that day, any thoughts of cookie dough (or any kind of dough for that matter) made me break out in a cold sweat, I was pretty impressed with my efforts! So impressed that I now want to take on the dough world! On that note, here are my baking resolutions for 2011:

 - Bake bread. Bake lots of bread. Bake lots of bread style stuff; cinnamon swirls, stollen, honey rolls, regular bread, bread, bread bread!
- Bake a pie. I have never baked a pie before but on my list are Pecan pie, Apple pie and Pumpkin pie.
- Bake more cookies
- Bake more cheesecakes
- Practice decorating layer cakes

Basically there's lots of dough in my future. I can't wait!

These recipes are both from Brown Eyed Baker. Learn her name as I'm going to try out a gazillion of her recipes next year! Till then, I leave you with these.

Peanut Butter Blossom Cookies

Oh, we don't have Hershey's kisses in England, which is what the original recipe calls for, so I used Lindt mini chocolate balls. I think they were the perfect size, and Lindt chocolate is far superior to Hersheys, so I was happy. But you can use either - or any other chocolate of around that size.

Ingredients
48 Lindt Chocolate Balls, unwrapped
½ cup shortening
¾ cup peanut butter
1/3 cup granulated sugar
1/3 cup packed light brown sugar
1 egg
2 tablespoons milk
1 teaspoon vanilla extract
1 ½ cups flour
1 teaspoon baking soda
½ teaspoon salt
Sugar

1 - Preheat oven to 190° C / Gas Mark 5. Remove wrappers from chocolates and put the unwrapped chocolate in a plastic bag in the freezer.
2 - Beat shortening and peanut butter in a large bowl until well blended.
3 - Add the granulated sugar and brown sugar; beat until fluffy.
4 - Add egg, milk and vanilla; beat well.
5 - Stir together flour, baking soda and salt; gradually beat into peanut butter mixture.
6 - Shape dough into 1-inch balls. Roll in sugar; place on ungreased cookie sheet.
7 - Bake 8-10 minutes or until lightly browned. Immediately press a chocolate kiss into the centre of each cookie; cookie will crack around edges. Remove from cookie sheet to wire rack. Cool completely.
Makes about 4 dozen.

Chocolate Chip Tea Cookies

Ingredients
2 cups plain flour
226g butter
½ cup icing sugar
1 teaspoon vanilla extract
1-1/2 cups miniature chocolate chips, divided

1 – Preheat oven to 190°C / Gas Mark 5
2 – Beat butter and sugar with an electric mixer until fluffy. Add vanilla and mix well.
3 - Gradually add flour. Stir in 1 cup miniature chocolate chips.
4 - Shape into 1” balls and place 2 inches apart on an ungreased cookie sheet. Bake 10-12 minutes.
5 - Remove to wire rack to cool.
6 - Place ½ cup miniature chocolate chips in a sealed plastic bag and microwave until melted; about 30 seconds. 
7 - Snip off a small corner of the bag and drizzle chocolate on top of cold cookies. Chill for 5 minutes or until chocolate is set. 
Store at room temperature.

Tuesday, 14 December 2010

Christmas Cookies - Sugar Cookies

With these cookies intended as centrepiece of my cookie goody bags, I had grand plans and pipe dreams of decorating them magnificently. They would be so beautiful that people would refuse to eat them because they would be quite simply, miniature, edible, works of art greatness! Yup, when I dream, I dream big!
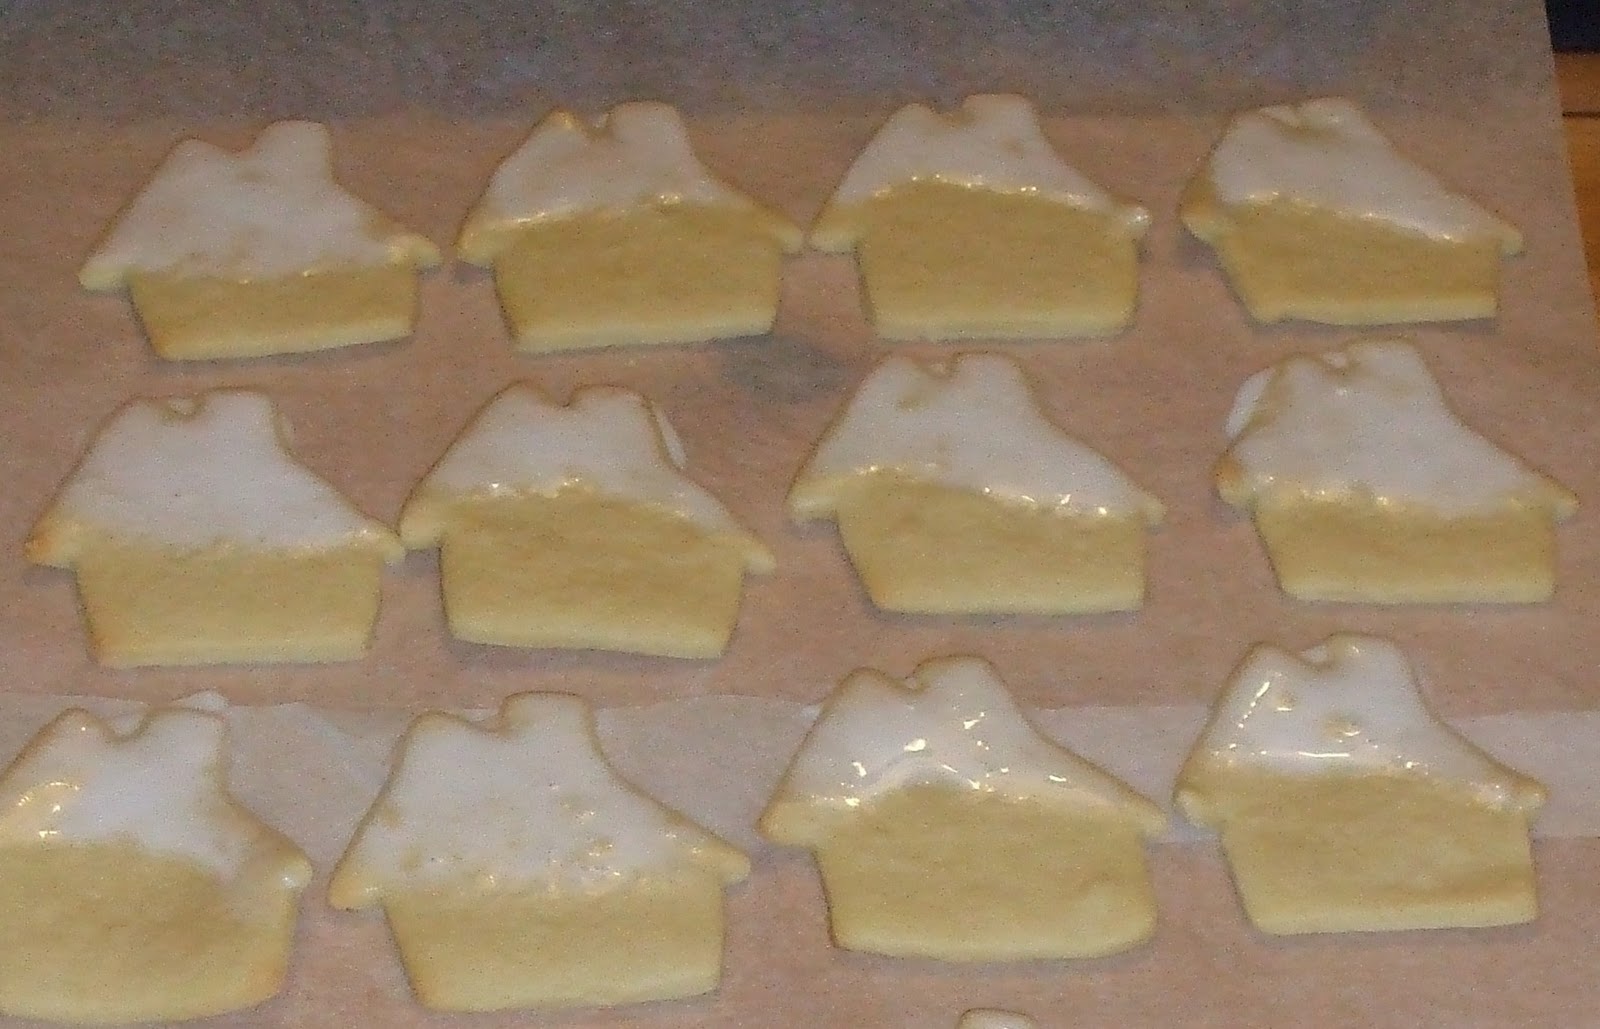
But by the time these cookies had cooled enough to be frosted; I had been baking for almost eight hours and was exhausted. So I resorted to part dipping them in coloured Royal Icing; which was so half heartedly put together that it was too watery.

Oh well, thanks to a great recipe (which I've adapted very slightly) from Annie's Eats, the cookies tasted so great that it didn't matter too much that they weren't perfectly decorated. They’re soft but biscuity with a delicate almond flavour that had a few of my friends describing them as marzipan cookies. Just so you're still slightly enthused by mine, please don't look too closely at hers, they're only, oh, about a hundred times better decorated than mine :)

I would suggest trying not rolling the dough as thin as the recipe requires. I've heard it said that slightly thicker cookies have a little something going for them. Note that if you make slightly thicker cookies, it will affect the yield slightly and perhaps also the baking time.

These don't have to be decorated. They're just as tasty plain. Or you could dust them with of icing sugar.

Yields 40 cookies

Ingredients

1 cup butter
1 cup icing sugar
1 egg, beaten
1 ½ teaspoons almond extract
2 teaspoons vanilla
1 teaspoon salt
2 ½ cups sifted flour

1 - Cream butter. 
2 - Add powdered sugar. 
3 - Blend in egg, almond extract, vanilla, salt and flour. 
4 - Chill dough until firm. 
5 - Roll to ¼ inch thickness on well-floured surface. 
6 - Cut with cookie cutters. 

7 - Place on baking trays lined with grease proof paper. Bake at 190° C / Gas Mark 5for 8-10 min. Cookies should not brown. 
8 - Frost and decorate when cool.

My cookie goody-bags

Monday, 6 December 2010

Christmas Cookies : Salted Chocolate Shortbread Cookies

Every year I say I'll celebrate Thanksgiving. Every year, that last week in November rolls round (very quickly!) and I think of all the cooking it will involve and I think to myself, "Next year. Definitely".
Every year, I say I'll run a marathon. The last couple of years I've run a half marathon and as I cross the finish line and I feel like I've literally run every single step my body is capable of running, it hits me that a marathon would mean doing that 2 hours 21 minutes all over again (but slower) and I think to myself, "Next year. Definitely".
Every year I think to myself that I'll be little miss domestic goddess and make home-made Christmas treats and deliver them round all my friends enjoying the oohing and aaahing that would inevitably follow (They definitely ooh and ahh when I imagine it). Chunks of Christmas cake, pretty bags of white chocolate fudge, intricately decorated sugar cookies; there is no end to the goodies I’ll make in these fantasies.


This year, Christmas has come around really quickly! I would put money on the fact that somebody is playing games with a ginormous calendar up in the sky! I thought about my Christmas goodie bag fantasy, and I thought ... Bring it on!! Yup, I actually did it! I decided to make a variety of Christmas cookies; which is either really brave or really foolish considering I think I might be genetically incapable of baking a good cookie. I'm going with brave! But I did it. It did take up my entire Saturday, and I was only able to listen to X-Factor, but I ended up with 4 different types of perfectly edible, no, make that friggin’ amazing cookies! Even if I do say so myself.


Please note that I haven't delivered said cookie goodie bags yet so if you haven't received yours yet, don't shower my blog with abuse, just be patient, it’s probably winging its way to you right now. Unless of course I don't know you and then it’s safe to say it is never coming ;p


Thanks to Brown Eyed Baker from whom I nicked 3 of the 4 recipes.
First up are Salted Chocolate Shortbread Cookies which were my absolute favourite of the bunch. I LOVE the salty chocolate taste!


Makes about 30 cookies
Prep: 10 minutes | Chill Time: 3 hours | Bake Time: 12 minutes


Ingredients
1¼ cups flour
1/3 cup unsweetened cocoa powder
½ teaspoon baking soda
11 tablespoons unsalted butter, at room temperature
2/3 cup light brown sugar
¼ granulated sugar
½ teaspoon fleur de sel or ¼ teaspoon fine sea salt, plus extra for sprinkling
1 teaspoon vanilla extract


1 - Whisk together the flour, cocoa and baking soda in a small bowl; set aside.
2 -  Beat the butter on medium speed until soft and creamy. Add both sugars, the salt and vanilla extract and beat for 2 minutes more.

3 - With the mixer off, add the dry ingredients. Turn the mixer on and off low speed (pulse) for a second or two about 5 times so that the flour mixture gets incorporated. Then mix on low speed for about 30 seconds, just until the flour disappears into the dough (the dough will look crumbly).
4 - Turn the dough out onto a work surface and divide it in two. Shape each half into a 9-inch log. Wrap the logs in plastic wrap and refrigerate for at least 3 hours. (The dough can be refrigerated up to 3 days or frozen for up to 2 months. If you’ve frozen the dough, you don’t need to defrost before baking – just slice the logs into cookies and baking the cookies 1 minute longer.)
5 - Center a rack in the oven and preheat the oven to 170 degrees C/ Gas Mark 3. Line two baking trays with grease proof paper.
6 - Using a sharp thin knife, slice the logs into rounds that are ½-inch thick. Arrange the rounds on the baking sheets, leaving about 1 inch between them. Sprinkle a small amount of extra salt on top of each round.
7 - Bake the cookies one sheet at a time for 12 minutes – they won’t look done, and won’t be firm, but that’s how they should be. Transfer the baking sheet to a cooling rack and let the cookies rest until they are only just warm, at which point you can serve them or let them reach room temperature.
Store the cookies in an airtight container at room temperature.