Pages

Showing posts with label Pie. Show all posts

Sunday, 7 October 2012

Easy Peasy Banoffee Pie


On Friday night, the lovely Ceri of Cucina Ceri (a great food blog full of recipes influenced by Paleo nutrition) cooked dinner for Adura (who has an inspiring blog that covers everything from exercise and nutrition to natural haircare) and I. The plan was to eat and watch Disney movies - yup, I know it's a pretty wild thing to do on a Friday night, but what can I say, that's just how we roll - but as we're all bloggers, we frequently interrupted 'Beauty and the Beast' and 'Tangled' to share blogging wisdom.
I left pretty inspired because they film videos and update their blogs frequently and I at that time had not updated my blog for a few weeks!

So as a result, I'm making it a small mission to start blogging regularly. You can expect to see new recipes and ignore enjoy my going ons at least once a week and maybe, just maybe, even more regularly. But don't hold me to that last bit!

Today's recipe is a classic dessert that is pretty easy to make. If my mum who is one of the world's most incompetent cooks, can nail this every time, then that is saying something. In my mum's defence, she is one of the most intelligent human beings in the world (no exaggeration - she is a doctor whowas third or something in the whole of Greece in her university entrance exams) but she has no interest in cooking whatsoever. She never has. Despite this, she has a pretty good repertoire of dishes she makes wonderfully for when we have guests.

The ease of Banoffee Pie is that the pastry case is ready, you can buy ready made whipped cream in a can with a nozzle thingie but I much prefer to make my own and slicing bananas, well, anybody can do that. So give it a go and I guarantee you it'll become your go-to dessert when you want to make something quick and amazing. I completely forgot how good it is till someone made one for a church lunch a few months ago and as soon as I remembered, I couldn't wait to make it again!

ps: I check the spelling of 'dessert' every time I write it to make sure it's referring to puddings rather dry land without water that gets really cold at night. This is particularly embarrassing for me since a) I LOVE desserts and I should know how to spell it and b) I pride myself on my spelling skills. Ah well, to paraphrase something I saw on Pinterest recently, it just wouldn't have been fair if God had made me as awesome as he did AND given me flawless spelling skills ;)

Ingredients
1 sweet pastry case (I bought mine at Waitrose but Sainsburys Taste the Difference range do a good one)
1 397g tin of condensed milk (Carnation also does the caramel - if you can find it, skip the step below for making caramel from condensed milk)
3 medium bananas, sliced
300ml double or whipping cream
1 tablespoon caster sugar

1 - To make caramel: I recommend you do this the night before. Place the tin of condensed milk in a pot, side down, cover with water and bring to the boil. Then reduce heat till water is simmering and leave it covered, for three hours. Please watch it and top up the water frequently so that it is never dry. (Apparently the tin will explode if the water dries up). I often make more than one tin at a time and just keep the spare unopened tins in the cupboard till I'm ready to use them again.


2 - Take it off the heat and leave it until it is completely cool. This might take a few hours. Now you have your caramel.


3 - To make whipped cream: Pour cold cream into a bowl. Add in the caster sugar. Using an electric mixer with the whisk beaters (if you have them) and starting on a low speed, whisk cream slowly increasing speed as it thickens until it is so stiff that you could turn the bowl upside down and it wouldn't fall out.

4 - Assembly: Place your sweet pastry case on a plate. Spread your tin of caramel evenly over the base of your case. Arrange your bananas over the caramel sauce. Finally, using a spatula, spread or pipe your whipped cream over the layer of bananas.


Tuesday, 24 April 2012

Strawberry and Almond Crumble and Being a Bonafide Marathon Runner


I did it! I did it! I did it, did it, did it! If you're wondering what 'it' is, duh, 'it' is the Virgin London Marathon 2012. I did it! Ran it (with a bit of walking ;p), completed it, crossed the finish line and am currently in possession of a nice bit of  gold bling (medal) to show for my efforts as well as a t-shirt which I've slept in every night since and intend to sleep in for the rest of my life!

It was tough! I walked more than I would have liked, and sooner than I would have liked but I expected it to be tough. What I didn't expect it to be was fun! When people talked to me about the atmosphere and enjoying it, truth be told I was thinking "It's a marathon crazy person! How the heck am I supposed to enjoy running 26.2 miles?!" But I did! I really did! The first 15 miles were honestly fun! Running through residential areas where everyone had come out of their houses with sweets, music, banners, home baked treats and orange segments, hi fiving outstretched children's hands as we ran past, singing along to "I'm Slim Shady, yeah I'm the real Shady, all you other Slim Shadies are just here maintaining so won't the real Slim Shady please stand up, please stand up, please stand up" and running next to my sister who pretty much danced the whole way, I honestly felt like I was at a party. Albeit a party full of crazy people whose idea of a good time is running!

And then mile 17 hit and it got hard. I was way past halfway and felt like I was almost there till I did the math and realised that I had 9 more miles to go. And it was kinda a long hard slog from then but you know what? The good definitely outweighed the bad! Or maybe it's like childbirth and the adrenalin has made me forget how tough it was?  Whatever. All I know is there are definitely more marathons in my future!

I made this the day before the marathon as part of our huge carb-loading lunch. It's from the lovely Nigella Lawson's book 'Kitchen'.

Ingredients

For the filling
500g strawberries, hulled
50g caster sugar
25g ground almonds
4 tsp vanilla extract

For the topping
110g plain flour
1 tsp baking powder
75g cold butter, diced
100g flaked almonds
75g demerara sugar
Double cream or vanilla ice cream to serve


1 - Preheat the oven to 200C/400F/Gas Mark 6. Put the hulled strawberries into your pie dish (approx. 21cm/10in diameter x 3cm/2in deep and 1.25 litre/2 pints capacity) and sprinkle over the sugar, almonds and vanilla extract. Give the dish a good shake or two to mix the ingredients.
2 - Now for the crumble topping: put the flour and baking powder in a mixing bowl and rub in the cold, diced butter between thumb and fingers (or in a freestanding mixer or food processor). When you've finished, it should resemble rough, pale oatmeal.
3 - Stir in the flaked almonds and demerera sugar with a fork.
4 - Tip the topping over the strawberry filling, covering the strawberries in an even layer and pressing the topping in a little at the edges of the dish.
5 - Set the dish on a baking sheet and bake in the oven for 30 minutes, by which time the crumble topping will have darkened to a pale gold and some pink-red juices will be seeping and bubbling out at the edges.
6 - Leave to stand for 10 minutes before serving.
7 - Serve with chilled double cream or vanilla ice cream.
Tip: The crumble can be assembled one day ahead. Cover with cling film and store in fridge until needed. Bake as directed in the recipe, but allowing an extra 5 - 10 minutes' cooking time. Check crumble is piping hot in the centre.
Crumble topping can also be made and frozen in resealable plastic bags, for up to 3 months. Sprinkle the topping direct from the freezer over the fruit, breaking up large lumps with your hands.
Alternatively, the assembled but unbaked crumble can be frozen, wrapped in a double layer of cling film and aluminium foil, for up to 3 months. Defrost for 24 hours in the fridge and bake as above.

Tuesday, 1 February 2011

Pumpkin Pie

Who says you can only have pumpkin pie at Thanksgiving? 
And mulled wine at Christmas??
Or turkey at .... actually, I don't like turkey, I'm happy to only have it only once a year. 
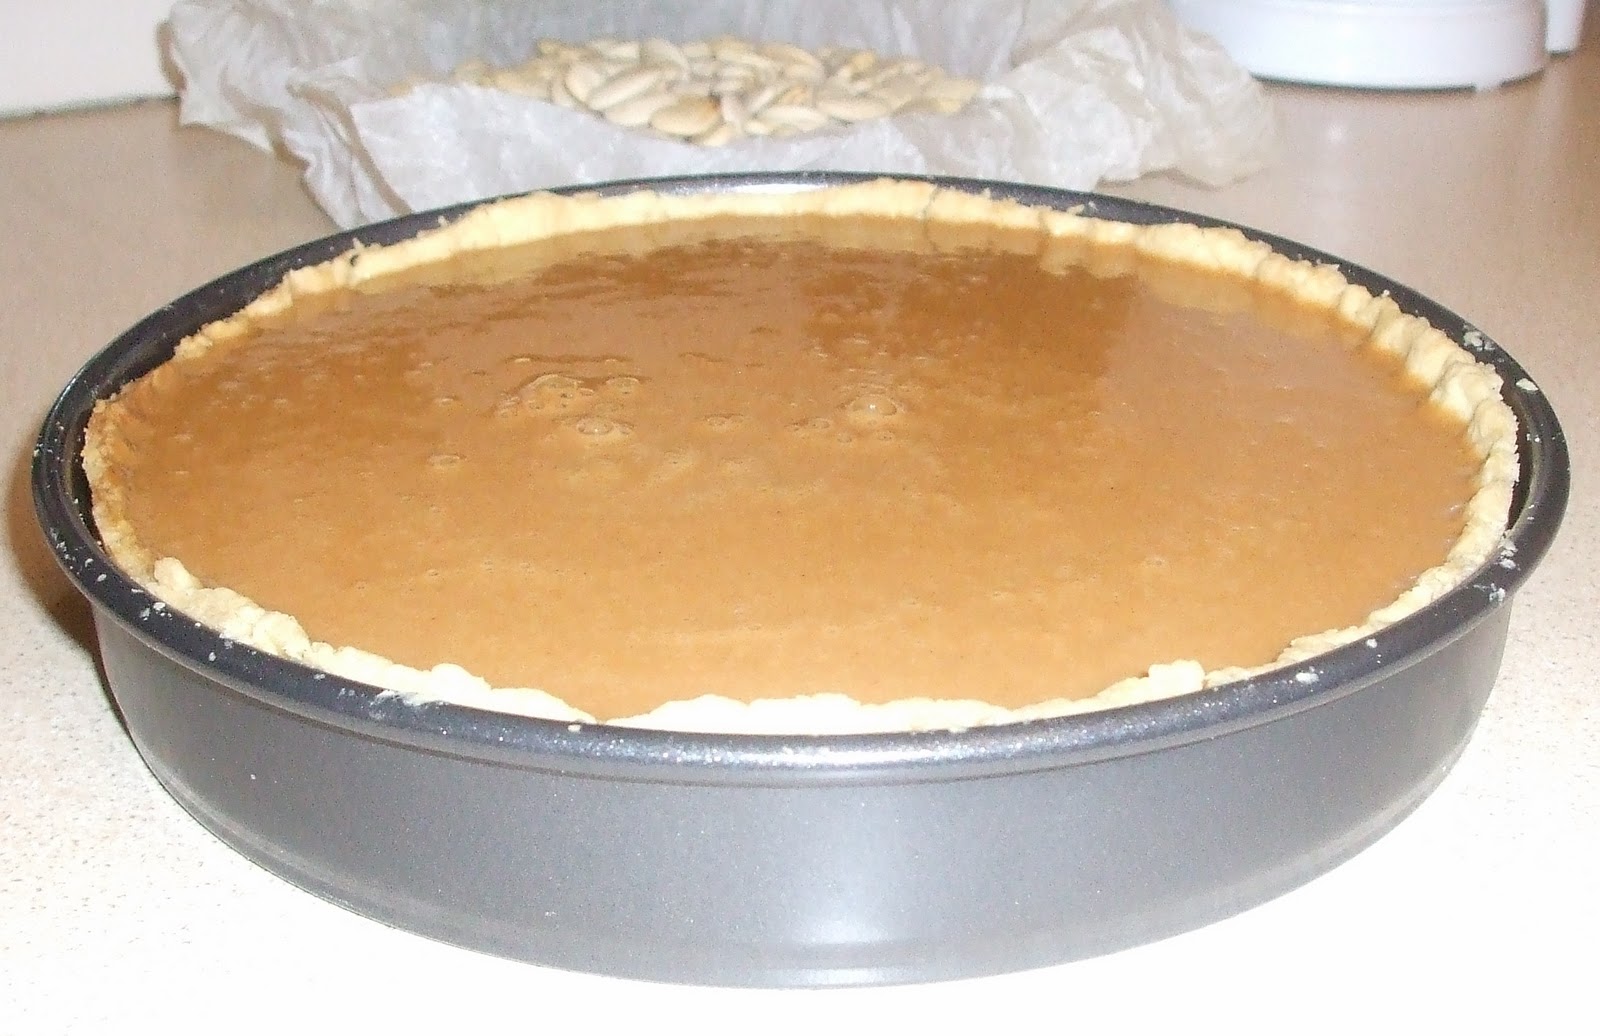
My point is I hate food rules! So one Friday night in late January found me in my kitchen, flagrantly disregarding the Thanksgiving rule and making pumpkin pie for a friend who I hadn't seen in 7 years and who would be visiting early on Saturday morning. It was my first pie and I chose pumpkin pie because I had it once in Canada at Thanksgiving 8 years ago. I remember being very doubtful of it because I didn't think I liked pumpkins and couldn't understand why anyone would use them to make a pie. One bite however, and I was hooked! Well, obviously not so hooked because it would be 8 years before I would have it again.


I intend to make LOTS of pies this year and this was a great start! I have one more tin of pumpkin puree (For readers in the UK, Waitrose stock tins of this around Autumn every year) and instead of experimenting with cupcakes and muffins, I might just save it for another pie.


I used a shortcrust pastry recipe from Lorraine Pascal's 'Baking Made Easy' TV show. I found it very crumbly and had to patch lots of it together in the baking tin. I think perhaps I could have added 1 more tablespoon of water. The pumpkin custard that goes in the pie is the recipe on the tin of Libby's pumpkin puree.


Short Crust Pastry


Ingredients
250g/9oz plain flour
125g/4 1/2oz cold butter, cubed
2 free-range egg yolks
large pinch salt
1-4 tbsp water, if needed


1 - Put the flour and butter in a food processor and pulse to make breadcrumbs
2 - Alternatively use your hands and rub the butter and flour together in a bowl until the mixture resembles fine breadcrumbs (I used this method)
3 - Add the egg yolks and a pinch of salt, and stir together with a knife. Press the mixture together into a ball. If the pastry feels very dry, add a little water, but try to avoid adding water if you can. (I added 2 tbsp water)
4 - Once the pastry is all pressed together, wrap in cling film and pop it in the fridge to rest for 30 minutes
5 - After 30 minutes, remove the pastry from the fridge and set it aside to warm up a little (if you use it straight from the fridge and try to roll it out, the pastry will just be a hopeless crumbly mess)
6 - Preheat the oven to 180C/350F/Gas Mark 4
7 - Roll the pastry out on a floured work surface to the thickness of half a £1 coin and use it to carefully line a 20 x 30cm/8 x 12in rectangular fluted tin. Homemade pastry is often quite crumbly. Don't be alarmed by this. You can always patch it together in the tin.


8 - Take a small ball of the pastry (the size of a £1) coin and use it to gently ease the dough down into the tin. Press the handle of a wooden spoon against the pastry all round the edges to coax it into the fluted grooves. Trim off the excesses around the top. Put in the fridge for about 15 minutes, or until firm
9 - Remove from the fridge. Take a piece of baking paper slightly larger than the tin and scrunch it up, then unscrunch it and line the tin with it. Fill it with baking beans or dried beans and 'blind bake' in the oven for 20 - 25 minutes, or until the pastry feels sandy to the touch. Remove from the oven and set aside.


Filling


Ingredients
2 eggs, lightly beaten
1 x 425g can of pumpkin puree
171g granulated sugar (I used brown sugar)
1/2 teaspoon salt
1 teaspoon ground cinnamon
1/2 teaspoon ground ginger
1/4 teaspoon ground cloves
234ml evaporated milk


1 - Oven should be on 180C/350F/Gas Mark 4
2 - Combine filling ingredients together and pour into pastry case


3 - Bake for 40-50 minutes (turning pie tin round halfway) or until a knife inserted near the centre comes out clean.
4 - Allow to cool
I served mine with double cream, flavoured with vanilla and icing sugar and whipped until thick.