Pages

Sunday, 20 July 2014

Strawberry Champagne Layer Cake for Marathon #2!


I have three cake recipes to share with you. Not now. In the (hopefully not too distant) future! I had chosen to post this one first because it is a Champagne cake. Champagne = celebration. Me successfully completing my 2nd Virgin London marathon = a reason to celebrate.
But that was soon after the marathon which was on the 13th of April. Now, 3 months later, when I'm finally getting round to sharing it with you, the link between the cake and my race isn't quite as poignant but I'm still going to tell you all about it anyway!

It was a hot day. 18C! Well not hot hot, but hot for running. Anyone who knows me knows I love to run in winter and I refuse to run in any temperature over 16 degrees. Well ... it was 18 degrees and it was what it was, so I ran.

My sister and I were both running it but as she had gotten a charity place and I was running on a ballot place, we were in different colour group things (That actually the official name ;p). Red and blue. Or red and green. I forget. We just assumed that we would be able to start together anyway only to get there and realise that there were completely different starting points for the different colours. Still cool we thought. Until I tried to walk into her starting group and we were stopped by security who explained that I could very well start with her but my chip would not be activated upon crossing the start line as it could only be activated when I crossed my own colour start line. Ain't nobody running an entire marathon only for it not to be recorded anywhere!
We were running late as usual so we hurriedly made plans to meet at the mile 1 marker as we assumed  the different colour groups would have converged by then.

We go off, start the race. Separately. I had planned to run some of the marathon without music and just take in the crowds. That lasted all of about 2 minutes and I stuck my headphones in and got lost in some no-doubt expletive filled hip hop track (which seem to make up most of my running soundtrack) *shame faced*. I passed a man walking the marathon on crutches(!) on my way to the mile 1 marker and it helped me adjust my attitude to the weather. This man knew it would take him forever to complete this marathon and yet here he was giving it his all. I have two legs, some decent training under my belt and therefore no excuses! I got to mile 1, waited 30 seconds and then asked a girl next to me who was also waiting for someone just to make sure that my sister's colour would be passing through here and she said they wouldn't be. They wouldn't be converging with us till mile 3. At that point, I pretty much thought it would be impossible for Kitty and I to find each other out of 36,000 people and just really hoped that she hadn't waited too long at her mile 1 before finding out that we weren't going to be meeting there. I also prayed she would have a good race and feel okay running it on her own - as she was very stressed, wasn't feeling 100% the week before, and is generally less confident about running alone - and off I went.

At mile 4, I noticed the hoardes of runners from the other colour group joining the rest of the runners so I stopped again, and decided to give it 5 minutes to look for her. I knew it was a long shot! After 4 minutes passed, I saw her white cap! Against all the odds! I ran under the rope separating her group from ours, ran up to her and joined her stride to continue the race.

It was a tough race, but I just took it one mile at a time. I was waiting to get through the first half, and then the first 16 miles, because it was at mile 16 two years ago that I realised that despite being over half way, I still had a while to go and I started to struggle. In 2012, up till about mile 16, I had such a blast! But then I felt crappy, had blisters and just felt like there was no end in sight and that mindset led to me struggling for a while and then stopping to walk.

This time, the first half wasn't as fun, it was a race. But I also didn't hit a downer. One mile at a time till mile 18 where I started to get hot and tired and wanted to slow down to a walk. My strategy was to give myself permission to walk, all I had to do was run till the following mile and then if I wanted to walk then, fine. It was always one more mile, then walk if I want. I never walked.

I saw a work friend at mile 19 and another just after mile 20 I think and then I was on the home stretch and I just wanted to get it done. The last couple of miles - which last time dragged longer than the rest of the marathon put together - flew by and I people watched. I saw two people walking, supporting a friend between them. I saw people see their families and break down in front of them and the families hugging them and encouraging them to finish. I saw people walking, exhausted. I saw my family with about 900 metres to go. My cousin said later I had a huge smile on my face before I even saw them. I genuinely enjoyed that last couple of miles. I ran under the finish line listening to Coldplay's "Magic"and then burst into tears - again that didn't happen last time. The line "And if you had to ask me, after all that we've been through, do you believe in magic? Yes I do. Of course I do" particularly resonated.

My official time was about 5 hours 4 minutes and something. My watch time was 5:00:17 due to the wait for my sister. I just missed running a sub 5 hour marathon. But I don't care. I slowed down for a while with my sister which I don't regret as I know how I felt last year when I just wanted her to go off so I could stop and I wasn't going to let her stop. I was proud of myself for running the whole way and really pushing myself. And it'll just make my sub 5-hour marathon next time that much better!
Our before and after. We look better after. Weird.
Highlight for me were the showers - I ran into every single one of them with this smile of bliss on my face! I must have looked crazy!

Sorry for the long marathon post - it just sort of came out of me :) I didn't have this cake after the marathon but it was very good cake when I did have it. It's very rich; I think that's the swiss meringue buttercream - with a really nice dense cake that has just the right amount of champagne flavour!


Recipe (adapted very slightly) from Beantown Baker

For the Champagne Cake
3 3/4 cups plain flour
1 3/4 tsp baking powder
1/2 tsp baking soda
1/2 tsp salt
3 1/3 cups sugar
213g unsalted butter, melted and cooled slightly
1 1/2 cup champagne, flattened
5 tbsp vegetable oil
1 tbsp vanilla
9 egg yolks, room temperature
5 egg whites, room temperature

For the Strawberry Swiss Meringue Frosting
5 egg whites
1 1/4 cup sugar
1 1/2 cup butter, cut into cubes
2 tsp vanilla
1/4 cup strawberry puree, or good quality strawberry jam
pinch of salt

10-12 strawberries, thinly sliced.

Directions

  1. For the cake: Adjust oven rack to middle position and preheat oven to 180C / Gas Mark 4 / 340C. Grease three 9" round cake pans and line bottoms with grease proof paper.
  2. Whisk flour, baking powder, baking soda, salt and 2 1/2 cups sugar together in a large bowl. In mixing bowl whisk together melted butter, champagne, oil, vanilla, and yolks.
  3. In clean bowl of a mixer fitted with the whisk attachment/beaters, beat egg whites at medium-high speed until just foamy, about 30 seconds, gradually adding in remaining sugar; continue to beat until stiff peaks just form. Transfer to a bowl and set aside.
  4. Add flour mixture to now empty mixing bowl fitted with whisk attachment. Gradually add in butter mixture and mix until just incorporated. Stop mixer and scrape whisk and sides of bowl. Return mixer to medium-low and beat until smooth and fully incorporated.
  5. Fold the egg whites into the batter, pour into cake pans and bake for approximately 35 minutes or until a toothpick comes out clean. Let cake rest in cake tins for 10 minutes before turning out onto a wire cooling rack. 
  6. Cool completely before frosting. When cool, level tops of cake with sharp knife and discard cake cuttings. Set aside until ready to decorate.
  7. For the Strawberry Swiss Meringue Frosting: If making your own strawberry puree, place three to four strawberries into food processor and puree. Set aside 1/4 - 1/3 cup of strawberry puree.
  8. Wipe the mixer bowl and attachments with lemon or vinegar to make sure they are all completely clear of any residual grease. Add egg whites and sugar to mixing bowl, and place it over a sauce pan of simmering water. Whisk constantly but gently, until temperature reaches 160F (I don't have a food thermometer and simply leave it over the heat for 7 minutes exactly), or until the sugar is totally dissolved and the eggs are hot.
  9. With the whisk attachment of mixer, begin to whip until the meringue is thick, glossy, and the bottom of the bowl feels nearly room temperature. DON'T begin adding butter until the bottom of the bowl feels neutral, and not warm.
  10. Switch over to the paddle attachment / regular beaters and add butter one cube at a time until all has been added and is incorporated. Mix until it becomes smooth. If mixture is too soft and runny, place in refrigerator for about 15 minutes and continue mixing with paddle attachment until it all comes together. Add vanilla and salt, continuing to beat on low speed until well combined.
  11. Add strawberry puree/jam and beat until evenly incorporated. Add small amount of pink food colouring, if desired. I didn't.
  12. To assemble cake: Level cakes and invert one cake layer on cake plate so that the bottom of the cake is on top. Dollop frosting onto it and spread evenly. Add a layer of thinly sliced strawberries. Repeat with other two layers. Frost top layer and smooth. Frost sides of the Cake. Garnish with fresh strawberries if desired.

Sunday, 6 April 2014

Chocolate Truffles with Sea Salt


Hellooooooo!

Is anybody out there???

Not that I blame you if you're not since it's been 5 months since my last post. I come bearing chocolate - peace offering?

In fact, I made these truffles a couple of weeks after my last post; they were goodie bags for my annual Thanksgiving get together. Now this Thanksgiving "dinner" has little resemblance to the traditional celebration except for the part where lots of people come together to eat and have a good time - which is actually the most important part if you ask me! Year after year I mean for us to go round in a circle and say what we are thankful for but we're mostly too busy playing a really loud, noisy game and trying really hard to cheat. And by "we", I mean everybody else. Obviously.

It differs on the whole turkey and traditional Thanksgiving food thing. I don't like turkey and it's bad enough that I eat it at Christmas, I'm definitely not cooking or serving it at anything I host. I just don't 'get' turkey! It's so dry! Except for the dark meat but even then, there's better meats. I am on a personal mission to change the traditional British Christmas meat from turkey (dry, boring) to lamb (succulent, so tasty) and the dessert from Christmas Pudding (ewww) to Sticky Toffee Pudding (hella sweet but amazing!) - that reminds me, I have been saying I'll make and blog Sticky Toffee Pudding for literally years now.  I will.

But I digress ... I guess that's what happens when I don't blog for half a year, I have LOTS to say!

Anyway, my mum reckons she reads all of my blogs and has be hassling me for a while now to update my blog because she wants something to read. I know, I know, I have suggested that books and magazines make for wonderful reading material but apparently, if I didn't write it, she doesn't really enjoy it. Mothers eh?

Well Mama, I have updated my blog. Let's see how long before you read it. Readers, I'll update you on how long it takes her to read it so that we can know once and for all if she really reads it or if it's just something for her to hassle me about (I'm pretty perfect so there's very little she gets to tell me off about).

Back to these truffles, they are wonderful! Rich and dark (just how I like my .... coffee), not usually how I like my chocolate - I'm a milk girl through and through - but these are perfect. And you know how much I LOVE the salty sweet combo!

These are easy to make but depending on how many you make, the rolling and dipping process can be time consuming. I made over a hundred of these bad boys - yup, guests ain't getting truffles again. Next time I'm going  make a cake and break them all of a chunk; no dipping and rolling, no siree!


Recipe from The Pioneer Woman 

Ingredients

452g good dark chocolate
1 x 396g can condensed milk
1 tablespoon vanilla extract
226g milk chocolate
Sea salt

Makes about 36 truffles

  1. Heat dark chocolate and condensed milk in a double boiler/bain marie over medium low heat until chocolate is melted. Stir - the mixture will have a slight marshmallow texture. Stir in vanilla.
  2. Remove from heat, cover and refrigerate for two hours, until the chocolate becomes firm and workable.
  3. Once chilled, roll in balls about 1/2 - 3/4 inches in diameter (mine were probably double that) and place on a cookie sheet or baking tray lined with grease proof paper. Place the cookie sheet containing the truffles into the freezer for 15 - 30 minutes to firm them up before you place them in the hot melted chocolate.
  4. Melt your milk chocolate in the microwave, and then coat your truffle balls in the melted milk chocolate one by one (Put your truffle in the chocolate, retrieve with a fork - this will allow the excess chocolate to drain back into the bowl - and tap the fork lightly against the bowl to let the excess chocolate drain back).
  5. Transfer the truffle back onto the baking sheet and sprinkle on a small amount of sea salt or whatever coarse salt you have on hand (just be sure to sprinkle on the salt while the chocolate is still soft. This will ensure the chocolate will stay on the truffle.)
  6. Allow the chocolate to harden and voila - yummy yummy chocolate truffles.


Tuesday, 12 November 2013

Biscoff and Kahlua Crunch Cupcakes


I have just come off four days on the Dr. Oz 3 Day Juice Cleanse. Yup. I realise it is a three day cleanse, and I did four days but y'know, in the words of the great Justin Timberlake "#that's how we do"!

What can I say? I'm just one of those people who always goes the extra mile. Or maybe I'm one of those people who eats so much sugar that they need at least one extra day more than normal people to cleanse their bodies of all the stuff. I'll leave you to draw your own conclusion. If you jump to the latter (unfairly and unfounded), then we're over. O-V-E-R!

Anyway, I didn't mention my cleanse just to show off (well, I did a little).
I mentioned it so as to use it as an excuse.
I would have posted this two days ago but I couldn't really write about cupcakes when I hadn't eaten solid food for 2 days. Nobody has that kind of strength! (Except maybe everybody else in the whole world).

I realise I might be hitting you with some unfamiliar ingredients with these cupcakes - roll with it, new is good. Luckily, I have put together a handy glossary to help you along on very delicious road less travelled. You're welcome :)

Biscoff: Recognise these amazing biscuits?


Well these biscuits are to Biscoff spread what peanuts are to peanut butter. They make up 65% of it. It's basically these cookies in spread form! Incredible for eating out of the jar with a (large) spoon and baking! To be honest, I can't really think what else you'd do with them - the thought of spreading it on toast as suggested really doesn't appeal.

Kahlua: A coffee liqueur. True story, I discovered this while I was doing an exchange programme in Victoria, Canada. If memory serves me right, my Japanese friend Rieko introduced me to it. Mixed with milk, this tastes amazing! And you can drink lots of it! And we did. Though I don't know if it has that much alcohol in it so go ahead and start having it with your milk in the morning. I did and I turned out fine! (ish)

The combination of these two and the Daim bars make for an amazing cupcake! I think I went wrong with my cupcake somewhere as it fell but honestly, it made for a wonderfully moist, dense, slightly sticky chocolate cupcake. As I've said before, I'm not a big fan of chocolate cake but this was really good! It was my favourite part of this cupcake!

Everyone else's favourite part though was the frosting. It is a Swiss meringue buttercream which has the advantage of being really creamy and not too sweet. I have to say it's not my favourite frosting (but I am someone who can list her top 5 frostings, spelt backwards, with the ingredients listed alphabetically) but objectively, it is a brilliant frosting.

These cupcakes have been on my "to bake list" for ages and I'm so glad I finally got round to making them!


Recipe from the amazing Bakers Royale

Makes 12 cupcakes

Ingredients
Chocolate Cupcake
1 cup all purpose flour
1 cup plus 2 tablespoons sugar
1/3 cup cup plus 2 tablespoons unsweetened cocoa powder
1/2 teaspoon baking soda
1/4 teaspoon salt
113g unsalted butter, melted and warm
2 large eggs
1 teaspoon vanilla extract
2 tablespoons instant coffee
1/2 cup Kahlua


Biscoff Frosting
5 large egg whites
1 1/2 cup sugar
454g unsalted butter, diced and softened
1/4 teaspoon salt
1 tablespoon vanilla
1/4 cup of Biscoff spread

Chocolate Pouring Sauce
2/3 cups dark chocolate
2 tablespoons double cream
4 tablespoons icing sugar, sifted
4-5 tablespoons, warm

Decoration
2 Daim chocolate bars
  1. Position a rack in the lower third of the oven. Heat the oven to 180C / Gas Mark 4 / 350F. Line 12 cup muffin tin with cupcake liners.
  2. To make cupcake: Add flour, cocoa powder, sugar, baking soda, and salt in a bowl and mix thoroughly to combine. 
  3. Add in the butter, eggs, and vanilla and beat on medium speed for one minute.
  4. Add half of the Kahlua into the mixture and beat for 20 seconds. Scrape the sides of the bowl and add remaining Kahlua. Beat for 20 - 30 seconds until the batter is smooth. The batter will be thin enough to pour.
  5. Divide batter evenly among the lined cups. Bake 18-22 minutes or until a toothpick inserted into a few of the cupcakes comes out clean. Set the pan on a rack to cool. Frost the cupcakes when they are completely cool.
  6. To make chocolate pouring sauce: Place chocolate and double cream in a bowl over simmering water. Let chocolate and cream sit for 2-3 minutes to melt without stirring. Then slowly stir mixture to combine.
  7. Add the icing sugar and mix to combine. Add water 1 tablespoon at a time, mixing after each addition until pouring consistency is reached. Remove 5 tablespoons and place reserve in a separate bowl. Set aside all chocolate pouring sauce to cool until warm.
  8. To make frosting: Combine egg whites and sugar in a bowl placed over simmering water. Bring mixture to 160F/ 71C while whisking constantly. If you don't have a candy thermometer (I don't), whisk for 7 minutes over simmering water.
  9. Transfer mixture to stand mixer bowl (or the bowl for your hand mixer), fitted with a whisk attachment and beat on medium high speed (speed 8 on a KitchenAid stand mixer) until mixture cools and doubles in volume and forms stiff peaks; about 10 - 12 minutes.
  10. Add butter in a piece at a time, mixing to incorporate after each addition. The mixture may appear clumpy and almost curdled looking - this is normal. Keep mixing and it will become even and smooth again. Add salt and vanilla and mix to combine. 
  11. Add in Biscoff and mix until well combined. Add reserved chocolate pouring sauce into frosting. Using a spatula, gently fold it into the frosting, DO NOT over mix so that chocolate streaks remain.
  12. Assembly: Cut Daim bars into shard shapes (or try to - I struggled and got block like shapes instead ;p); set aside. Finely chop any leftover crumbs.
  13. Fill pastry bag with round tip. Hold pastry bag at 90 degrees above the cupcake and starting from the perimeter, pipe inward and upward.
  14. Using a spoon drizzle chocolate on top of frosting. (If it is too thick to drizzle, thin slightly with an addition tablespoon of warm water, or two). Sprinkle Daim crumbs on chocolate. Insert Daim shards into top of frosting.

Sunday, 27 October 2013

White Chocolate Chunk Macadamia Nut Cookies


So, I am just going to pretend like it hasn't been 4 months since the last time I blogged. And I'd appreciate it if you just all went along with it - thank you :)

Instead, I'm just going to tell you some of what I've been up to since the last time you ... err ... heard from me ... on this page at least.

1) I stopped my market stall at Archway Market. Come to think of it, I can't remember if I mentioned on here that I started a market stall but I did. And then I stopped it because it wasn't busy enough to warrant all the effort I was putting in. I'm on the look-out for a new London market - and in the meantime, I'll err, blog. Or not.

2) I went to Vienna for the first time ever. It was very pretty, and very hot! Austrian food though ... how do I put this delicately? It's not great.
I also didn't see or have any amazing desserts but lucky for Vienna, they had AMAZING ice cream! Like, really truly amazing! Like except for a select few Ben & Jerry's flavours (sold only in the US obvs), some of the best ice cream I have ever eaten anywhere. Yup Italians, I hate to say it but Viennese ice cream is better than Italian Gelato! I had one every single night!

3) I also went to Greece and Xilocastro which I've written about on here before so I'll leave that as a one line entry.

4) This past weekend, I ran the Bupa Birmingham half marathon which I've run for the last three years and I beat my half marathon personal best by almost 6 minutes! And my time was almost 18 minutes faster than last years time!
I keep going on about it but I've been trying to beat that damn 2:21 for four years! And finally I did it! And on a hard, hilly course too! Like fine wine, and everything else that gets better with age, I'm totally getting fitter with age - whoop!

5) Oooh speaking of fitness, I've probably sampled pretty much every gourmet (and not so gourmet) burger London has to offer in recent months. Meat Liquor (go for the Dead Hippy Burger), Patty & Bun (give it a miss), Burger & Lobster (though I've never had the burger), Shake Shack (see Patty & Bun comment), Five Guys (THE BEST burger in London in my learned opinion), Burger and Shake (meh) ... you name it, if it's a burger between a burger bun (brioche buns are my favourite), I've eaten it! I think that might be the secret to my getting fitter? Hmmm ... I'mma work on that theory and get back to you.

Anyway, I made these cookies MONTHS ago. And yes, I'm suitably ashamed that it's taken me this long to blog them.
I think macadamia nut and white chocolate, like in this cheesecake), is always a winning combo - and cookies are nice and easy to make (says the girl who once thought she lacked the cookie baking gene) so give these rich, buttery, melt-in-your-mouth cookies a try!


Yield: about 2 dozen cookies

Ingredients

3 cups plain flour
1 tsp course salt
1 1/4 tsp baking powder
1/2 tsp baking soda
227g unsalted butter, cold and cut into large chunks
1 cup granulated sugar
1/2 cup packed light brown sugar
2 large eggs
1 tsp vanilla extract
1/2 tsp coconut extract (optional)
300g white chocolate, coarsely chopped
1 1/2 cups coarsely chopped macadamia nuts

  1. In a medium bowl, combine the flour, salt, baking powder and baking soda. Whisk to blend.
  2. In the bowl of a stand mixer, combine the cold butter and the sugars. Beat on medium-high speed until smooth and just combined, 1 - 2 minutes.
  3. Blend in the eggs one at a time just until incorporated, scraping down the bowl as needed. Blend in the vanilla and coconut extracts.
  4. With the mixer on low speed, mix in the dry ingredients just until incorporated. Fold in the white chocolate and macadamia nuts with a spatula. Cover and refrigerate the dough for about 30 - 60 minutes.
  5. Preheat the oven to 180C / Gas Mar 4 / 350F. Line baking sheets with grease proof paper.
  6. Roll a scant half-cup of dough into a ball. Holding dough balls in fingertips of both hands, Pull apart into two equal halves. Rotate halves 90 degrees and, with jagged surfaces facing up, place formed dough onto cookie sheet, leaving ample room between each ball. (I know this shaping stuff may seem like shenanigans but I promise, it gives the cookies a nice appearance after they are baked.)
  7. Bake the cookies, rotating halfway through, until light golden and just set, about 14 - 16 minutes total. Let cool on baking sheets for a few minutes, then transfer to a wire rack to cool completely. Store in an airtight container.
Recipe from Annie's Eats, who adapted them from "Confections of a Foodie Bride"


Sunday, 16 June 2013

Maple Cream Bundt Cake


Lets get the formalities over and done with - hi! Happy Sunday! Yeah I haven't blogged for a while. I promise I will be more consistent at blogging from now on. I'm shocked and offended that you don't believe me - have I done anything to give you the impression that that is a promise I won't keep? Let me clarify, have I done anything specifically in the last 5 minutes to make you think that I would break that promise? Nope, I did not think so!

Now that we're done with that, can I have a little moan? And I ask rhetorically because y'know, it is my blog and I'm only asking to be polite, I am going to have a moan.
It is June! June! Half way through the year ... summer in most places that have summer at this time of year (except England obvs) ... the 6th month of the year ... y'know, June!
And I haven't been on holiday yet! I don't even have a holiday booked! Yup, I know. The tragedy.
I was thinking Trek America but it's pricey, Malta maybe, but let's be honest, I'll probably just end up in  Greece (which is beautiful and amazing but I've been a hundred times) and call it a day. So this is a shameless appeal to anybody with a holiday home or 5 star hotel in the Seychelles, Bora Bora, Hawaii or Tahiti to please have me over for a week. No less. I'll consider Cape Town and the Caribbean too. Please don't all get in touch at once ;p

While we're on the topic (or not), have you guys checked out the website for my business? www.ermionisbakeshop.com ?! There is only one correct answer to that question. ("Yes", in case it is unclear what the right answer should be). Thank you to the amazing Kylie Larsson for designing it for me. As well as doing all my branding!

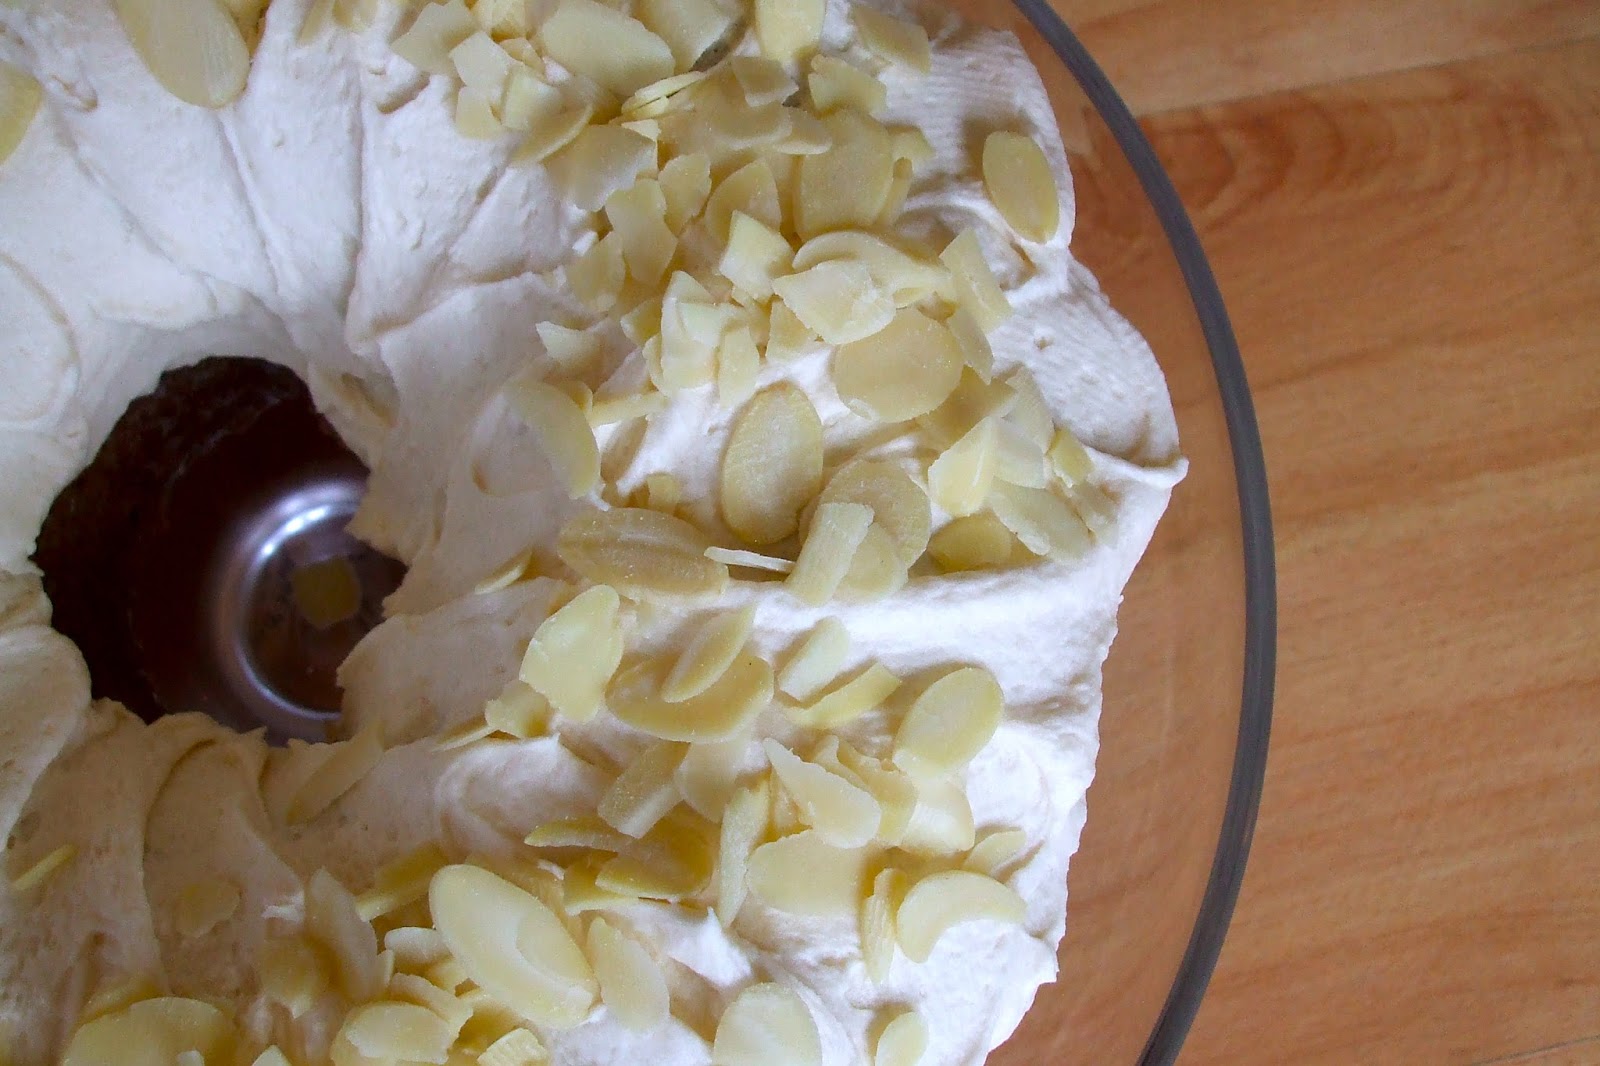
I was very excited to get to use my bundt cake tin on this cake! To me, bundt cakes epitomise what a cake should look like and when I got a bottle of maple syrup from a friend as a gift, this was the first thing I thought to make - it is a dense, not too sweet cake (despite all the condensed milk) with a wonderful maple flavour that's just there enough; perfect with a coffee!


Recipe from Lauren's Latest, adapted very slightly here.

Ingredients
For the cake
3/4 cup vegetable oil
1/2 cup granulated sugar
1/2 cup packed brown sugar
1 teaspoon vanilla extract
3 eggs
1 cup sour cream
1/2 cup milk
1/4 cup pure maple syrup
2 3/4 cup plain flour
2 teaspoons baking powder
1/2 teaspoon bicarbonate of soda
1/4 teaspoon salt
1 teaspoon cinnamon

1 can of sweetened condensed milk (396g)

For the frosting
57g softened unsalted butter
1/4 cup pure maple syrup
1 cup icing sugar
1/2 teaspoon vanilla extract
1/2 cup chopped walnuts (for garnish) - I used slivered almonds


  1. Preheat oven to 170C / Gas mark 3 / 325F. Coat bundt cake tin liberally with non-stick cooking spray. (I buttered and floured my tin). Set aside.
  2. In a large bowl, whip oil, sugar, vanilla and eggs together until combined.
  3. In a small bow, stir together sour cream, milk and maple syrup.
  4. Combine flour, baking powder, baking soda, salt and cinnamon together.
  5. With mixer on low, alternate dry ingredients with milk mixture (dry ingredients in three batches, milk mixture in two) until everything is just incorporated. Scrape sides of bowl and mix briefly.
  6. Pour batter into prepared bundt tin, level the top and bake for 55 minutes to 1 hour 5 minutes or until a toothpick inserted comes out clean.
  7. Remove from oven and cool in the pan 15 minutes. Poke small 1 inch deep holes (using a toothpick) into the top (which ends up being the bottom) of the cake and spoon 1/3 of the sweetened condensed milk into the holes and over the visible cake. Let this soak in 15 minutes and then turn cake out of pan onto cooking rack. (You may want to run a knife along the sides to ensure the cake will come out of the pan nicely).
  8. Poke more small holes (about 2 inches deep) into the top of the cake and brush the remaining sweetened condensed milk into the holes and over the entire cake using a pastry brush so it is completely covered. Let cake sit 1 - 2 hours so sweetened condensed milk can be absorbed. (Don't be afraid to use all of the condensed milk - your cake will not be too sweet I promise!),
  9. Carefully remove cake from cooling rack and place onto cake stand (It will be sticky).
  10. For the frosting, whip butter and maple syrup together until combined. Stir in vanilla and icing sugar until completely smooth (I would do this with a mixer). Spread frosting over top of cake and down the sides slightly. Top with chopped walnuts.
  11. Store in a cool dry place in an air tight container or cake tin/stand.


Wednesday, 10 April 2013

Deep Dish Pumpkin Pie with Dulce de Leche Walnut Streusel


Because I am so late posting this delicious recipe, it is with great shame that I announce that there is a picture of my Christmas dinner to follow. No. Your eyes do not deceive you. I am posting a recipe from the 25th of December on the 10th of April. To be fair though, it's pretty much the same weather here in London now in April as it was at Christmas. Oh. Except that it didn't snow at Christmas.

Here is a picture of the wonderful Christmas spread cooked by my sister and brother in law - we call them Gavity for convenience sake; Gavin and Kitty ... geddit?
As usual they cooked an amazing spread and probably out of pity and a desire to help me feel included, asked me to bring dessert. I just want to say I BROUGHT dessert though ;p I made this amazing pumpkin pie on crack as I like to call it, for my Thanksgiving get together and thought I would make it again and take some pictures this time and blog it. Unfortunately the lighting wasn't great so please forgive my sub-par photos and trust me when I say they are no reflection on how yummilicious this dessert is. It is a bit like a cheesecake on pie crust. My friend Susan reckons it's her favourite dessert ever! And despite the many elements to it, it is a reasonably easy dessert to make.


Recipe only slightly adapted from Sprinkle Bakes
Yield: One 9-inch pie

Walnut Streusel
1/2 cup firmly packed light brown sugar
1/4 cup plain flour
1/2 tsp ground cinnamon
Pinch of salt
85g cold unsalted butter
1 cup chopped walnuts

1. Combine sugar, flour, cinnamon and salt. Cut in butter until crumbly. Stir in nuts. Cover and store in refrigerator until ready to use.

Crust
240g unsalted butter
170g cream cheese, softened
2 cups plain flour
1/4 cup granulated sugar
Pinch of salt

1. In a stand mixer fitted with the paddle attachment, or with an electric mixer, beat butter and cream cheese at medium speed until creamy. Gradually add flour, 1/4 cup sugar and salt. Mix until a soft dough forms.
2. Turn dough onto a well-floured surface and knead together until smooth. Roll dough with a floured rolling pin to 1/4 inch thickness. Gently lay dough inside spring-form pan and press up the sides. Allow a little of the crust to overhang the edges of the pan. Place dough-lined pan in the freezer and freeze until dough is stiff.
3. Preheat oven to 200C / Gas Mark 6 / 400F.

Pumpkin Pie Filling
1 1/4 cups packed light-brown sugar
3/4 teaspoon fine salt
2 teaspoons ground cinnamon
1/2 teaspoon ground nutmeg
2 teaspoons pumpkin pie spice (substitute mixed spice if you're in the UK)
4 eggs, lightly beaten
822g canned pumpkin puree
340g evaporated milk
1/2 cup double cream
2 teaspoons pure vanilla extract

1. In a large bowl, combine brown sugar, salt, cinnamon, nutmeg and pumpkin pie spice (or mixed spice). Whisk in eggs, then pumpkin puree; beat until smooth. Slowly whisk in milk, cream, and vanilla. Pour filling into frozen pie crust. Cover edges of pie crust with aluminium foil.
2. Reduce oven temperature to 180C / Gas Mark 4 / 350F. Bake pie for 1 hour, then top with walnut streusel. Bake for 25 minutes more, then tent a piece of foil over the pie so that the streusel does not over-brown. Bake for an additional 20 minutes, or until the pie is set but still slightly wobbly in the centre. Cut away the overhang crust if desired. Allow pie to completely cool then thoroughly chill in the refrigerator overnight.

Serve
397g Carnations Caramel

1. Just before serving, warm dulce de leche / caramel in the microwave or in a saucepan on the stove top until loosened. Drizzle about 1/2 cup over the top of the pie and transfer the rest to a gravy boat and serve alongside pie.

Tuesday, 22 January 2013

Double Decker Oreo Fudge ... and Exciting News


I always start off my blog posts after a long absence  by saying "I apologise it's been so long since I last blogged but in my defence ..."

Well, why break the habit of a lifetime - or y'know... a couple of years? So here goes... I'm so sorry it's been a while since I last posted on this blog but in my defence, I've been busy starting a business over the last couple of months. Yup, me, a business ... I know right?

I've wanted a cake shop since I got into the whole baking thing, but it was this shadowy idea that probably wouldn't come true unless I could be bothered to write a business plan and borrow lots of money. Don't get too excited, I don't have a cake shop ... yet, but I have a sort of starter cake shop otherwise known as a market stall.

This Saturday just gone ... yup, the one that was below zero. The one so cold that at one point my hands were shaking so violently that a cup of coffee I was holding threatened to spill all over my lovely stall ... good times.  Yup, I spent that Saturday selling cake at my very own stall. It's at Archway market and only every other Saturday but it's a start, and one I'm really excited about :) Check out a couple of pictures from Saturday below.


Umm yeah, don't go to my website yet because it's not up quite yet. It will be soon though! But if you're in London, get in touch and please come and visit my stall!

So I've always wanted to make fudge! And finally, this Christmas (yes I'm that far behind on updating my blog), I finally ... finally ... gave my sister some fudge recipe suggestions, licked the bowl while she made fudge and ate the fudge when it was ready. Yup, I still haven't made fudge. So thank you to my sister Christiana for making this incredible fudge to round off a delicious five-course Christmas lunch that she and my brother in law made us.

This is simple - I know I say that about most of the recipes I post but it really is. So no excuses, go make some fudge!

Recipe from the incredible Bakers Royale

Ingredients
1 can of sweetened condensed milk, divided into two
10 Oreos, chopped
170g white chocolate
170g dark chocolate
28g butter

  1. Line an 8 x 8 inch pan with foil.
  2. Split condensed milk in half and set aside. Chop Oreos and set aside
  3. Place white chocolate, one half of the condensed milk and the butter in a heat proof bowl over simmering water. Stir and mix until melted and combined. Fold in Oreos and stir to combine. Pour mixture into pan.
  4. Place dark chocolate and the remaining half of the condensed milk in a heat proof bowl over simmering water. Stir and mix until melted and combined. Pour mixture on top of Oreo layer and refrigerate for 1 hour to set.
  5. Remove from fridge and peel away foil once set. For ease of cutting, make sure to clean knife between cuts to prevent sticking.

Sunday, 23 December 2012

Coca-Cola Cupcakes with Salted Peanut Butter Frosting


Merry Christmas and happy holidays!

Yes, I know nothing says Christmas less than chocolate and peanut butter, but in my defence, these were meant to go up weeks ago! Umm, yeah, I realise that's not a great defence but also ..., also..., nothing says Christmas like forgiveness and a bit of tolerance, so if you all would just exercise your Christmas spirit and pretend these are Christmassy cupcakes then we all win :)

Whatever you're doing this festive season, however you celebrate, or not, I hope you're surrounded by people you love and you have a wonderful wonderful wonderful few days. Rest like I've been doing a lot of since yesterday at my parents house. Oh. And bake. Because also, nothing says Christmas like the smell of home baking wafting through a house :)

See you in the new year!


Slightly adapted from Sprinkles Bakes

Yield: 12 - 14 cupcakes

Ingredients

Cupcakes
1 cup Coca-Cola (Not diet!)
1/2 cup unsweetened cocoa powder
57g unsalted butter, cut into pieces
1/2 cup plus 2 tbsp granulated sugar
1/4 cup firmly packed dark brown sugar
1 cup plain flour
1/2 tsp plus1/8 tsp baking soda
1/2 tsp salt
1 egg

Frosting
3 cups icing sugar
227g butter, softened
1 cup creamy peanut butter
1/4 tsp salt
3-4 tbsp double cream
Sea salt for sprinkling
Ground salted peanuts
  1. Cupcakes: Preheat the oven to 180C / Gas mark 4 / 350F. Line a cupcake tin with cupcake wrappers.
  2. In a small saucepan, heat the Coca-Cola, cocoa powder and butter over a medium heat until butter is melted. Add sugars and whisk until dissolved. Remove from heat and let cool.
  3. In a large bowl, whisk flour, baking soda, and salt together.
  4. In a small bowl, whisk egg until just beaten, then whisk it into the cooled cocoa mixture until combined. Gently stir flour mixture into cocoa mixture.
  5. Use a 1/4 cup measure to pour batter into the cupcake wrappers. Bake cupcakes for 25 minutes or until cake springs back when pressed in the middle.
  6. Allow cupcakes to cool completely before frosting.
  7. Frosting: In the bowl of a stand mixer fitted with a whisk attachment (or with the whisk beaters on a hand mixer), combine icing sugar, butter, peanut butter and salt. Mix on low speed until just combined, then switch to high speed.
  8. Add double cream one tablespoon at a time and beat until mixture is lightened and smooth. Transfer to a piping bag or a sandwich bag with the corner snipped. Pipe onto cooled cupcakes.
  9. Garnish with ground peanuts and a sprinkling of sea salt.


Thursday, 22 November 2012

Soft Bake Chocolate Chip Cookies


I am going to ask you a question. And I would urge you to think very carefully about your answer. Because while I might make out like it's all fun and games, there is a wrong answer and I will not-so-secretly secretly judge you if you get it wrong. Okay. Here goes.

*Deep breath*
...
Are you ready?
...
How do you like your cookie?

I watched the movie "Think like a man" last night which is why I feel the need to clarify that I am talking about baked goods here ;p

There are two answers to that question. (Only one of them is correct). You either like your cookie crispy/crunchy or you like your cookie the best other way; soft and slightly chewy.

If you answered crispy/crunchy, then I think it's safe to say that this; me and you,  isn't going to work out. We're just too different. It's not you, it's ... hang on, it's definitely you! You're weird!

If you like your cookie the normal way, you're in luck! Because I have some amazing chocolate chip cookies for you. These are soft and chewy and choc-full of chocolate chips; just like every good cookie should be! The secret ingredient to making them all tender-y and soft is cornflour. Cornflour in cookies are taking the cookie world by storm right now, and while mine look nothing like the the ones in Sweet Pea's blog (hers are so cute and puffy!), I'm certain they taste just as good! But don't take my word for it - give them a go :)


Recipe adapted (only very slightly changed) from this one from Sweet Pea's Kitchen.

Ingredients
2 cups plain flour
2 teaspoons cornflour
1 teaspoon baking soda
1/2 teaspoon salt
170g butter, softened
3/4 cup brown sugar
1/4 cup white sugar
1 egg
2 teaspoons vanilla extract
1 cup milk chocolate chips

  1. Preheat the oven to 180C / Gas Mark 4 / 350F. Line two baking sheets with grease proof paper.
  2. In a medium bowl, combine the flour, cornflour, baking soda and salt; set aside
  3. Using an electric mixer, cream the butter and both sugars on medium speed until light and fluffy, about 2 minutes. 
  4. Scrape down the sides of the bowl then add the egg and vanilla and beat until well combined.
  5. Add half of the flour mixture and mix for 15 seconds. Add the remaining flour mixture and beat until just incorporated. Fold in the chocolate chips.
  6. Roll about a tablespoon's worth of dough into balls and place onto the prepared baking sheets, leaving about 2 inches between them. Bake for 8 - 10 minutes or until barely golden brown around the edges.
  7. Let cookies cool on sheets for 5 minutes before transferring cookies to wire racks to cool completely.
Makes about 36 cookies.


Tuesday, 13 November 2012

Bittersweet Chocolate Tart and Stylist Magazine


Stylist Magazine - yeah ... it's one of the highlights of my week. For those that don't live in the UK or those lucky people who do live in the UK but don't have to take public transport to work, it's a free women's magazine that is distributed in train and tube stations on Tuesday evenings and Wednesday morning. They don't distribute it at any of my tube stations on my way to or from work so a lovely friend at work delivers it to my desk on Wednesday morning whoop whoop!

It is pretty amazing for a free magazine, or just for a magazine generally; full of fashion (it's actually a bit too high-fashion and pricey for me but that's okay, I can gloss over those pages), beauty, a great column and so on. My favourite bits are where they get someone with a (mostly) really cool job such as the MD of a Literary Agency or the organiser of the MOBO awards to talk about their typical day and how they got to do what they do, and the recipes! I have ripped many a recipe page out of the magazine only to pass it on to my sister (an unfortunate Stylist-deprived person) half torn and tattered. She reads it anyway!

This Cappuccino Pavlova is from the magazine as is this incredible Spinach and Coconut Milk Soup and these AH-MAZING Champagne and Raspberry Cupcakes. And I have in my pile of Stylist cut outs, still to make, a pistachio cake with white chocolate frosting, a lemon pudding of sorts, a wild rice salad and lots of other luscious-sounding recipes!
Each week, I read and savour the magazine knowing that I have yet to come across the best bit - the recipe at the end (save the best till last and all)! Even better is that there are also recipes at Stylist Magazine Online ; which is where today's recipe is from.

So Stylist Magazine, don't say I never gave you anything. You just had an entire blog post dedicated to you!

Recipe from Stylist Magazine Online. They published it from The Newlywed Cookbook by Sarah Copeland.

Ingredients
1/2 cup / 115g unsalted butter, melted
3 tbsp sugar
1/2 tsp pure vanilla extract
pinch of fine sea salt
1 cup / 115g all-purpose/plain flour
1/2 cup / 120ml double cream
1/2 cup / 120ml whole milk
2 tbsp sugar
pinch of fine sea salt
7oz / 200g high-quality bittersweet (dark) chocolate, chopped (1 heaping cup)
1 large egg, beaten
smoked sea salt (I used normal sea salt flakes)
Creme fraiche (optional)

1 - Preheat the oven to 350F / 180C / gas mark 4.

2 - To make the crust: Whisk together the melted butter, sugar, vanilla and salt. Add the flour and stir until it feels like damp sand. Press the dough evenly along the bottom and up the sides of an 8-inch/20-cm square or 9-inch/23-cm round tart pan/flan tin with a removable bottom (which makes it easier to remove the tart in one piece. If you don't have a tart pan/flan tin, you can make this tart in a springform pan; press the dough evenly across the bottom and only about 1 1/4 to 1 1/2 inches or 3 to 4 cm up the side of the pan). Use wax/greaseproof paper or buttered fingers to even out and press the dough tightly into the corners.

3 - Prick the crust all over with a fork and chill in the fridge until ready to bake, about 30 minutes. Set the pan on a baking sheet/tray and bake until the crust is golden brown, about 25 minutes. (Mine took 20 minutes so check at 20 minutes).


4 - While the crust bakes, bring the cream, milk, sugar and salt to a simmer in a medium saucepan over low heat. Remove from the heat and add the chocolate. Let it sit for about 2 minutes, without stirring. Starting in the middle of the pan, whisk together until the chocolate is evenly melted and the mixture is smooth and a shiny dark brown.


5 - Whisk the beaten egg into the chocolate filling and pour the filling directly into the hot crust. Decrease the oven to 300F/150C/gas mark 2 and return the tart to the oven.

6 - Bake until the filling is set, but still a little wiggly in the centre, about 15 minutes (temperatures vary from oven to oven, so the visual clue is more important than time). Set your timer for 13 minutes.

7 - If it looks mostly set at that point, test it by opening the oven door a crack and carefully jiggle the tart pan/flan tin with the edge of your oven mitt. Only the centre third should wobble.

8 - Remove the tart and cool completely on a rack at room temperature. Just before the tart cools and sets completely, sprinkle a few large flakes of smoked salt on the surface, or leave plain.

9 - Remove the tart from the pan sides and carefully transfer to a platter before serving. Let it cool just until it slices easily, and serve slightly warm, with a dollop of creme fraiche. Or cool completely, and serve by itself.


Serves 12


Monday, 5 November 2012

Chocolate Chip, Chocolate Orange Loaf Cake


I'm on a bit of a Nigella Lawson roll innit?

I don't know about you but when I was growing up, every cake apart from birthday cake was a loaf cake. Or a bundt cake - which is the same but in a fancier tin.
More specifically in my home, it was a chocolate and vanilla marble cake with a faint hint of lemon as my mum and yaya always put lemon zest in every cake. I bet my mum will be surprised that I remember her cakes so well :) I remember not being able to understand, no matter how many times she explained, why she put the zest of lemon in cakes. Finally, I totally get it!

So yeah, loaf cakes have  all sorts of great associations for me - treats, home, comfort, guests, mummy-time ... when I grow up and have kids, I want to always have home-made cake in my kitchen.  Try and recreate these great memories for my kids. In a large raised cake stand with a glass lid, there will always be some home-made goodness. Yup, I know, hello obesity! We'll balance it out somehow :)

I think the main thing with loaf cakes is that despite being very un-fancy, they're usually really good cake! They don't have any fancy frosting or ganaches to hide behind - at most a drizzle of a glaze - so the cake has to be great. And it usually is. This one by Nigella Lawson is pretty incredible. I made it for church and because I'd sliced it up and didn't get a chance to tell anyone what it was, every one thought they were brownies. It is a dense cake but not too much so, chocolatey but not overwhelming, perfectly citrussy and I think the addition of chocolate chips makes it the perfect loaf cake; understated but so incredibly satisfying.

With the weather getting very cold, I am getting the overwhelming urge to bake lots of loaf cakes so while I get on with that, how about you give this one a go? And make sure you feed back okay? I love hearing how your baking goes; especially when it's a recipe from my blog.

Have a wonderful week!


Recipe adapted from Nigella Lawson's Kitchen

Ingredients

150g soft unsalted butter, plus some for greasing
dab flavourless vegetable oil, for greasing syrup spoon
2 x 15ml tablespoons golden syrup
175g dark muscovado sugar
150g plain flour, plus about 1 tablespoon for tossing chocolate chips
1/2 teaspoon bicarbonate of soda
25g best-quality cocoa powder, sifted
2 eggs
zest 2 regular oranges and juice of 1
100g dark chocolate chips

1 x 900g (2Ibs) loaf tin

  • Preheat the oven to 170C / Gas mark 3 and line your loaf tin with baking parchment or a paper loaf-tin liner.
  • Beat the already soft butter with the syrup - if you dab a little oil on your tablespoon measure with a sheet of kitchen roll, the syrup shouldn't stick to the spoon  - and the sugar until you have a fairly smooth caffe Americano cream, though the sugar will always have a bit of grit about it.
  • Mix the flour, bicarb and cocoa powder together, and beat into the syrup mixture 1 tablespoon of these dry ingredients before beating in 1 egg. Then add another couple of spoonfuls of the dry ingredients before beating in the second egg.
  • Carry on beating in the remaining dry ingredients and then add, still beating, the orange zest and finally, gradually, the juice. At this stage, the batter may suddenly look dimpled as if slightly curdled. No need to panic!
  • Put the chocolate chips in a bowl, sprinkle over a tablespoon of flour and toss until they are completely coated in flour. (This is to stop them sinking to the bottom of the cake batter while the cake is baking). Now fold them into your batter.
  • Pour and scrape into the prepared tin and bake for 45 minutes, though check 5 minutes before and be prepared to keep it in the oven 5 minutes longer if need be. A cake tester won't come out entirely clean, as the point of this cake, light though it may be, is to have just a hint of inner gunge. Leave it to cool a little in its tin on a wire rack, then turn out with care and leave on the rack to cool.
Notes:
1 - The cake can be baked up to 3 days ahead. Wrap tightly in clingfilm and store in airtight container. Will keep for 5 days total.
2 - The cake can be frozen, tightly wrapped up in a double layer of clingfilm and a layer of foil, for up to 3 months. Defrost overnight at room temperature.


Monday, 29 October 2012

Nigella's Victoria Sponge


I don't have much to say about this cake other than doesn't it just have the prettiest name? I'm speaking totally objectively here - Victoria is THE best name in the world. Innit?

If I'm being honest, I never buy Victoria Sponge cakes or order them in coffee shops but every once in a while, I'll have a good one that reminds me why this is such a classic cake. The flavours are simple but when done well, are the perfect accompaniment to most hot drinks, perfect for tea time or y'know, breakfast.
And who better than Nigella Lawson to turn to for the best recipes? This is from her book "How to be a domestic goddess.

Ingredients

For the cake
225g unsalted butter, very soft
225g caster sugar
1 teaspoon vanilla extract
4 large eggs
200g self-raising flour
25g cornflour (note you can use 225g self-raising flour instead - Nigella believes the addition of corn-flour makes for a "lighter, more tender sponge".
1 teaspoon baking powder (if using processor method)
3-4 tablespoons milk

For the filling
2-4 tablespoons raspberry or other jam, depending on the berries
1 punnet raspberries or berries of choice
125ml (or simply a 142ml tub) double cream

For the topping
1-2 tablespoons caster sugar (I prefer to use icing sugar)

2 x 21cm sandwich tins (about 5cm deep), buttered

  • Preheat the oven to 180C / gas mark 4. If the tins are loose-bottomed, you don't need to line them, otherwise do. 
  • To make this basic sponge cake in the food processor: put all the ingredients except the milk in the food processor and process till you've got a smooth batter. Then pulse, pouring the milk gradually through the funnel till your cake mixture's a soft, drooping consistency. 
  • To make it the traditional way (which is what I did): Cream the butter and sugar, add the vanilla and the eggs, one at a time, adding a spoonful of flour between each. Fold in the rest of the flour and the cornflour, adding no baking powder, and when all incorporated, add a little milk as you need.
  • Pour and scrape the batter into the tins and bake for about 25 minutes, until the cakes are beginning to come away at the edges, are springy to the touch on top and a cake tester comes out clean. Leave the cakes in their tins on a wire rack for 10 minutes before turning out and leaving to cool completely. 
  • When you're ready to eat the cake, put one layer on a plate, right-way up, spread with jam and scatter fruit on top. Whip the cream till it's thickened but still soft and spread over the jammy fruit. Sit the other cake on top, and sprinkle over a tablespoon or so of caster sugar. Or sieve over a tablespoon or so of icing sugar which is my personal preference.
Note: I used a bigger cake tin which is why I have a larger, thinner cake. I also didn't use any fresh fruit in mine.

Monday, 22 October 2012

Toasted Marshmallow Squares

Who likes Mondays?

If you answered "yes" to that question, then I'm sorry but we can't be friends. Because you're obviously a bit insane. I mean, nobody likes Mondays! Except for my brother who is one of those people who likes to get the week started because it is a whole new opportunity to get things done and done right and be who you were meant to be and blah blah ... let's just say we live on two different continents. Literally and metaphorically. (Disclaimer: I love my brother very much and get on with him really well!)

I don't like Mondays because despite the fact that I don't usually sleep in on weekends, Monday removes ALL possibility of sleeping in for at least five days!

I don't like Mondays because I've usually not done half of the chores I set myself to do over the weekend.

I don't like Mondays because I have to go to work and much as I appear to be a not-lazy sort of person, I'm pretty sure I would make a great bum if I could afford to just not work ever!

I don't like Mondays because ... ah, I'm going to stop with the Monday blues! How was your weekend? I went to visit my family in Birmingham and ran the Bupa Half Marathon yesterday which despite my doing very little actual running training, I really enjoyed! I did it last year and it seemed like everything went wrong - I had painful shin splints for the first 5 miles, I nicked my tongue in the bottle cap at mile 3 and therefore had a bleeding tongue (it was minor but in my head I thought I might have to lose my tongue from the sheer amount of blood loss), one of my headphones didn't work so I didn't have the loud pumping music I like to run to and as it was my first hilly marathon, when we got to the hills at the end, I could have sworn they were the steepest hills in the whole wide world! Turns out they weren't that steep and despite my complete lack of training, I did a similar time as last year (less than a minute quicker) - 2 hours and 33 minutes which I was more than happy with. My sister blew 12 WHOLE MINUTES off her last year's time and finished in 2 hours and 15 minutes so I'm much happier for her!

So that was my weekend. Tell me about yours and enjoy my pretty pictures in the meantime. By the way, these bars are great! All the flavours are familiar but together, they are really wonderful and unexpected. I love them and can wait to try different flavour combos as Joy recommends.


Recipe from the wonderful Joy the Baker

Ingredients
113g unsalted butter, softened
1/2 cup granulated sugar
1 vanilla bean, scraped or 1 teaspoon pure vanilla extract
1 large egg yolk
1 cup plus 2 tablespoons plain flour, plus more for pressing dough into pan
1/4 teaspoon salt
1/4 cup plus 1 tablespoon fruit preserves
25 marshmallows

1 - Place rack in the center of the oven and preheat oven to 180C / Gas Mark 4 / 350F. Line an 8-inch square pan with greaseproof paper (leaving some overhanging paper flaps on two ends) and grease paper. Set aside.

2 - In the bowl of an electric stand mixer, fitted with a paddle attachment, beat together butter and sugar until pale and fluffy, about 3 minutes. Stop the mixer, scrape down the sides of the bowl, then beat in vanilla bean scrapings (or vanilla extract) and egg yolk. Beat until well incorporated. Stop the mixer and add flour. Beat on low speed until completely incorporated.

3 - Spoon batter into prepared pan. Sprinkle with flour. With clean fingers, press the dough into the bottom of the pan. Use a bit more flour as necessary so that the dough doesn't stick to your fingers. Try to make the crust as even as possible.


4 - Bake crust for 20 - 24 minutes until golden brown around the edges, but still slightly soft in the center. Remove from the oven and allow to cool for 20 minutes.

5 - Run a thin butter knife around edges of the pan. Use the two greaseproof paper flaps to carefully remove the crust from the pan. Run a butter knife between the crust and the paper and carefully slide the crust from the paper and onto an unlined baking sheet.

6 - Top crust with a thin layer of fruit preserve (I used Strawberry). Arrange marshmallows on top of jam.


Return to the oven for about 4 minutes. This will warm and soften the marshmallows. Remove from the oven and turn the oven on to the grill setting. Use the back of a spoon to gently press and smash the top of each marshmallow.

7 - Once all the marshmallows are smashed, return to the grill. Keep a very very very very close eye on the marshmallows. They'll toast in seconds. They'll burn in seconds.


8 - Remove toasted marshmallow cookie from the oven. Allow to rest for 10 minutes before slicing. Cookies can be served slightly warm or at room temperature. Cookies can be left, well wrapped at room temperature, for up to 4 days.

Makes 9 squares in an 8-inch square pan.