Pages

Monday, 30 May 2011

Weight Watchers Banana Bread

Let us call a cake a cake. Banana 'bread' is cake. It is unashamedly cake. It's not even straddling the fence between cake and bread like say Brioche or Stollen. It is a cake. Someone suggested that perhaps it's called bread because it is baked in a loaf tin. But the problem with that argument is that so many other cakes are baked in loaf tins. Most of the pound cake family is baked in loaf tins and we don't go round calling them bread willy nilly.


You might be wondering why I'm so hung up on whether it is called banana 'bread' or 'cake'. What's in a name eh? I'll tell you. You call something 'bread' and in my opinion, that means it is fine to eat several slices of it for breakfast. I mean, I've only just come to accept that despite the fact that muffins are called 'muffins' instead of 'cake', there ain't no hiding the fact that they're fatty cake fully of chocolate chips and toffee and banana and all sorts of other calorific goodness naughty stuff and hence, I should avoid them for breakfast. 


Which is why I love this recipe. While it is called a bread, it is actually a cake. It doesn't taste diet-y even though it only contains about half the butter and sugar of this other recipe, it is easy to make and a great way to get rid of very ripe old bananas and best of all, I can eat a slice or two for breakfast!


Recipe adapted from Weight Watchers UK


Propoints per slice - 5
Makes 12 slices


Ingredients
5 sprays cooking spray, calorie controlled
200g self raising flour
1/4 tsp bicarbonate of soda
75g butter, softened
75g dark brown sugar
1 level tablespoon honey
2 eggs, beaten
2 medium ripe bananas, mashed
100g sultanas
1 tsp vanilla


 - Spray a 450g loaf tin with cooking spray. Preheat the oven to Gas Mark 4/180C/350F
 - Combine the flour and bicarbonate of soda
 - Cream the butter for 2-3 minutes until light and fluffy. Add the sugar and beat for another 2 minutes. 
Add the honey and beat for 1 more minute 
 - Add the eggs and vanilla and beat for 2 more minutes
 - Fold in the flour until combined. (Do not beat)
 - Fold in the mashed bananas and sultanas. 
 - Spoon into the tin
Bake for 45 minutes - 1 hour until a skewer inserted comes out clean. (Check after 45 minutes and using your judgment, every 5 or 10 minutes thereafter)
 - Turn out and cool on a rack
Note
Very ripe bananas are best for all banana breads as they have a natural sweetness and mash easily


Monday, 23 May 2011

Cake Pops!!!

The overwhelming response when I told people I was making cake pops was "What are cake pops?"Well my dears, in case you're asking yourselves the same question, cake pops are cake balls on a stick. Kinda like lollipops but with cake. Got it? I'd heard about and seen pictures of cake pops and would have gotten round to making them sooner or later but well, fate decided it was sooner when my friend Doyin asked me to make them for her friend's one year old's birthday party.


Now cake pops are very pretty, and pretty straight forward to make - a lot of people make them with boxed cake mixes and ready made icing - but man are they time consuming! It's more the final stage that is a bit of a pain in the butt - dipping the cake balls into your melted chocolate and decorating them. For the decoration and chocolate not to drip, you have to hold each ball upside down for a couple of minutes till the chocolate sets a tiny bit more - pain in the butt I tell ya!


Despite not tasting any of these, I have it on good authority that they were amazing so go on, give 'em a go. Especially if you have kids. I think they'll love the idea of cake on lollipop sticks. Though it might leave them on a sugar high like never before ... ummm, sorry about that in advance but I blog about food not children, you really shouldn't have listened to me ;p


Ingredients


For the Cake - Adapted from  (From Joy of Baking)
2 1/2 cups / 250g sifted cake flour
1/2 teaspoon salt
2 tablespoons / 15g cocoa powder
1/2 cup / 113g unsalted butter, at room temperature
250g granulated white sugar
2 large eggs
2 teaspoons vanilla extract
1 cup / 240ml buttermilk
2 tablespoons liquid red food colouring
1 teaspoon white distilled vinegar
1 teaspoon baking soda


For the frosting
100g unsalted butter, at room temperature
1 cup icing sugar
1 tsp vanilla extract


For the covering and decoration
400g white chocolate
2 teaspoons vegetable oil
Whatever sprinkles you want to use


lollipop sticks
a couple of blocks of florist foam


Makes about 30 cake pops


1 - Preheat oven to 175C / 350F and place rack in center of oven. Butter and flour a 12 inch round cake tin. Set aside.
2 - In a mixing bowl, combine the flour, salt, and cocoa powder. Set aside
3 - In the bowl of your electric mixer, or with a hand mixer, beat the butter until soft (about 1-2 minutes). Add the sugar and beat until light and fluffy (about 2-3 minutes)
4 - Add the eggs, one at a time, beating well after each addition. Scrape down the sides of the bowl. Add the vanilla extract and beat until combined
5 - In a measuring cup, whisk the buttermilk with the red food colouring.
6 - With the mixer on low speed, alternately add the flour mixture and the buttermilk to the butter mixture, in three additions, beginning and ending with the flour until all just combined
7 - In a small cup combine the vinegar and baking soda. Allow the mixture to fizz and then quickly fold into the cake batter.
8 - Pour batter into your cake tin and bake in the preheated oven for approximately 25-30 minutes, or until a toothpick inserted in the center of the cakes comes out clean
9 - Cool cake for a couple of hours or overnight
10 - For the frosting, whisk softened butter for 2 minutes. Add vanilla and icing sugar and whisk together until  you have a creamy frosting (about 5 minutes). I use my electric mixer. It would take longer by hand.


For the cake pops (Note that you can ignore the first part of this recipe and buy a cake mix and some ready made frosting)
11 - Break cake into a bowl and adding about half the frosting and smush it all together with your fingers. 

Keep adding frosting and smushing (isn't this such a wonderful non-word?!) until the mixture binds to itself and not to the bowl. I used all the frosting but you might not (especially if you are not using my frosting recipe).
12 - Line a baking sheet with grease-proof paper
13 - Shape mixture into round balls and place on your baking sheet. I used a tablespoon of mixture per ball to get the size I wanted and also get evenly sized balls
14 - When you have finished shaping your balls, put them in the fridge for 30 minutes
15 - After 30 minutes, melt about 50g of the white chocolate in a bain marie (leaving the chocolate bowl in the hot simmering water). Take out your cake balls from the fridge and your lollipop sticks
16 - Dip the lollipop sticks in the melted chocolate and insert into the cake balls, going more than halfway through
17 - Repeat for all the cake balls and put them back into the fridge for about an hour
18 - Melt the remaining chocolate with the 2tsps of oil (Again leaving the bowl on the simmering water as the next part can take a while and you don't want your chocolate to solidify)
Taking each cake ball on stick, dip into the chocolate until covered, then swirl round gently until chocolate stops dripping
19 - I did this next part over the sink as it can be messy, hold the cake ball over the sink and gently sprinkle sprinkles (or whatever decorations you are using) in whatever pattern you want and then I recommend holding it upside down for a couple of minutes before sticking it in the florist foam (stick side down!) as when I didn't, the chocolate and sprinkles dripped a bit onto the foam slightly misshaping my cake pops.

20 - Repeat until your foam is full of decorated cake pops and put in the fridge for about half an hour for the chocolate to set


Voila! The prettiest things you would have made in a very long time!

Sunday, 15 May 2011

My Wonky Black Forest Gâteau

Hey! Hey! Sorry I've been rather, umm, delayed, on the posting front. I wish I had a good excuse I have great excuses; I've been lazy and busy and I've been on holiday! Whoop whoop! I went to LA and San Francisco and Atlanta. It was my first time visiting the West Coast of the US so I was very excited! Plus I got to see a couple of lovely friends get married. Have I mentioned that I love weddings? Well, if I haven't, I'm mentioning it now; I love weddings! 


You probably know me well enough by now to know that I love eating when I'm on holiday. Especially in the US. And this trip was no exception. Some new things I tried were Love at first Bite cupcakes in Berkeley, California (AMAZING! One of the only times that I've found cupcakes to live up to their looks and description), In 'n' Out Burger (I'm not much of a burger person but these were incredible. Their milkshakes are great too. Plus they're a Christian company!) and Crumbs cupcakes (HUGE and great looking with lots of wonderful sounding flavour combinations but rather underwhelming). And some old favourites I just had to have; Cheesecake Factory (I had the Reese's peanut butter cheesecake and it was scrumptious. I'm going to find a similar recipe because I need it in my life!) and Five Guys burger (as good as the first time I had it!). Something else I discovered were peanut butter M&Ms. Wow! Why has nobody ever told me how amazing they are???


Anyway, before I get too carried away, back to today's post. I made this for a friend of mine who had been harassing me ever since he found out I baked to make him a Black Forest Gâteau. Now I have to say, I'm not the biggest fan of this cake. Mainly because the only way I like my cherries is fresh and washed. But after a lot of hassling, I found this recipe and gave it a go. My cake was pretty tall and it ended up rather wonky when I put it together. All in all, I wasn't too impressed with it when I had a slice later. It was rather dry, despite soaking the sponge layers in the black cherry syrup, and it just wasn't as tasty as other cakes I've had. And I've had a lot! However, if you still want to give it a go - here's the recipe. It is by Antony Worrall Thompson from the BBC Food website.


Ingredients


For the chocolate cake
340g/12oz golden caster sugar
340g/12oz unsalted butter
6 eggs
240g/8.5oz self raising flour
100g/3.5oz cocoa


For the filling
2 cans black cherries in syrup
2 tbsp kirsch


For the icing
600ml/21 fl oz double cream
200g/7oz good quality dark chocolate, broken into small pieces


To decorate
50g/2oz dark chocolate, for shaving


1 - Preheat oven to 170c/325F/Gas Mark 3
2 - Lightly butter a 20cm (8in) loose-bottomed cake tin then dust with a little plain flour and shake off any excess. Line the tin with greaseproof paper
3 - For the cake, place butter and sugar in a bowl and whisk until light and fluffy. 
Beat in the eggs one at a time 
Then fold in the flour and the cocoa powder
4 - Spoon the mixture into the prepared cake tin, smooth the surface with a knife and bake in the pre-heated oven for 35-40 minutes until firm and springy. 
To test if the cake is done, insert a clean skewer into the middle of the cake - if it comes out clean then the cake is ready
5 - Remove from the oven and leave to cool in the tin for five minutes before turning out onto a wire rack
6 - Drain the cherries, reserving 200ml (7 fl oz) of the cherry syrup. Add the kirsch to the reserved syrup
7 - Use a large serrated knife to slice the cake horizontally into three equally sized rounds
8 - Place each round on a chopping board and spoon the cherry syrup evenly over each disc and leave to soak in
9 - For the icing, heat 200ml (7 fl oz) of the double cream to scalding point then add the chocolate pieces. Remove from the heat and stir gently until the chocolate is melted and smooth. Pour into a bowl and allow to cool in the refrigerator, to thicken slightly
10 - Whip the remaining double cream until thick. Spread one of the cake discs with half of the cream then cover with half of the cherries, pressing them in lightly.


Top with the second disc of sponge and repeat this process, finishing with the third disc left plain on top. Gently press the whole cake together with the palm of your hands
11 - Remove the chocolate icing from the fridge and give it a quick stir. Use a palette knife to thickly spread the top and sides of the cake with the icing, starting with the top first. This way, if the chocolate oozes down the sides of the cake, it won't matter.
12 - Garnish with chocolate shavings. I pressed them into the sides of the cake
13 - Leave the cake to set in a cool place then slice into large wedges and serve

Friday, 15 April 2011

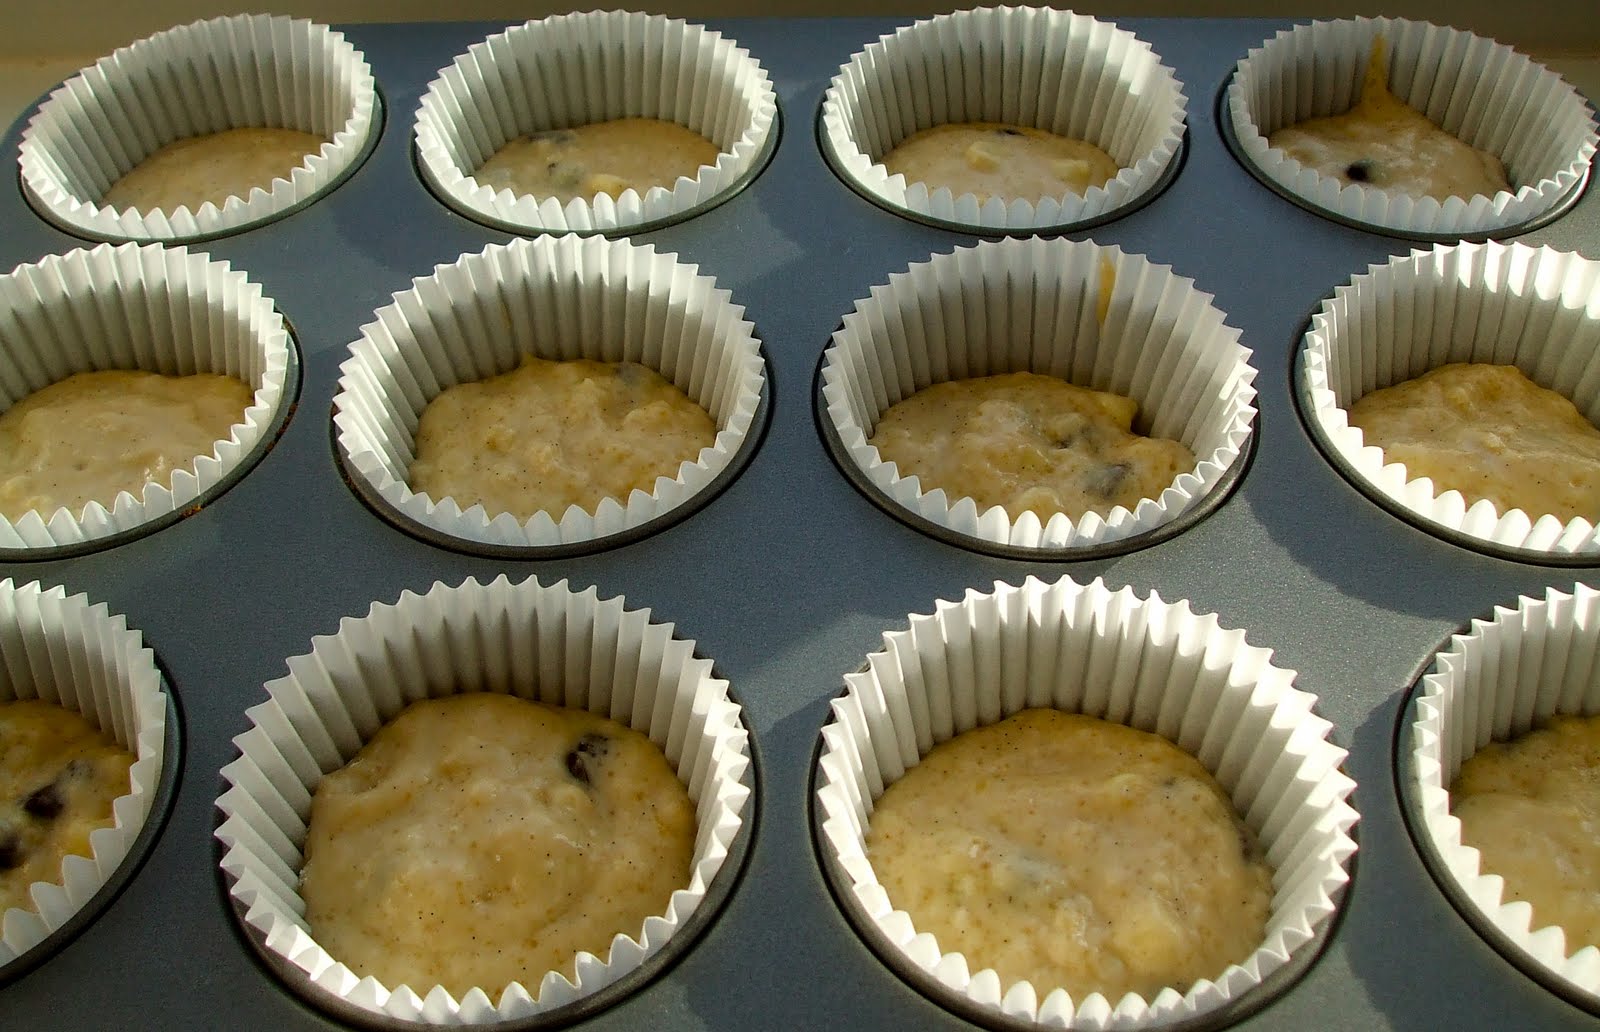
Light Chocolate Chip Muffins

Ahem, so I know I said I would be posting some healthier baking recipes but ummm, the thing is ... that I've been too busy making full butter, full sugar, full chocolate recipes to fit in any healthy baking. *sigh* I'm just one of those people who would much rather have a small piece of something decadent and thoroughly bad for me (though I hardly ever stop at one piece), than a huge chunk of something healthier but not as tasty! But I know I'm going to have to readjust my attitude a bit and there are some advantages to healthier baking. For example, whereas I try to have the naughty stuff I bake only on weekends, I could have one of these muffins every day during the week without feeling guilty and still enjoying some sort of treat. 
So I'll bake more healthy stuff more often. I promise. Or I'll at least try really hard!

These muffins from Weight Watchers "Seriously Satisfying" cook book are pretty good. Apart from the low fat margarine and skimmed milk, everything else is normal, full fat stuff. And like most muffins, they're very easy to put together, so give 'em a go. I'm glad I did.


ProPoints value per recipe: 46
ProPoints per muffin: 4
Makes 12


Ingredients
200g plain flour
2 tsps baking powder
75g caster sugar
a pinch of salt
1 egg, beaten
200ml skimmed milk
25g low fat spread, melted
1 teaspoon vanilla extract or 1 vanilla pod
40g dark chocolate chips
40g white chocolate chips


1 - Preheat oven to Gas Mark 6/200C/fan oven 180C
2 - Line the muffin tin with the muffin cases
3 - Sift the flour and baking powder into a large bowl and stir in the sugar and salt
4 - In a separate bowl, beat together the egg, milk, low fat spread and vanilla
5 - Add the egg mixture to the flour with the chocolate chips and stir together until just combined. As with all muffins do not over stir; it is better to have a slightly lumpy texture
6 - Spoon into the muffin cases and bake for 15-20 minutes until golden and risen


7 Cool on a wire rack

Saturday, 9 April 2011

Come Dine with Vickii - Dessert!


You must know me well enough by now to not be surprised when I tell you that my dessert was the first part of my 'Come Dine with Me' menu I decided on.
And I was pretty set on these Crème brûlées from the get-go. The story with these is I went round to my sister's a couple of years ago (co-incidentally after they had just done their 'Come Dine with Me'. Their group scored though. And they won!) and she had a few of these left over in the fridge. And I might have maybe eaten a couple all of them. This is why I always go and visit my sister when I'm in Birmingham. Her and her husband are total foodies and they see me rarely enough that they still consider it a treat so they ALWAYS feed me. 
Side note: Sometimes people think that because I bake and cook, I might be overly critical of other people's cooking or just prefer to do the cooking myself. NOT TRUE. I love love love being cooked and baked for and never ever think 'I could do this better' or any thoughts along those lines. So please; let the dinner invites roll on in.

A few months after I first tried this wonderful dessert; my sister and brother-in-law were hosting a pre-Christmas dinner and I begged for them to make these; thereby forcing them to make two desserts. It was a tough job eating them both but someone had to do it ;p And I might have maybe helped some other people finish theirs; I don't recall. After that though, she wised up, gave me the recipe and told me to make them myself. They're so easy to make and pretty damn amazing! I think it's up there with the best of the Crème brûlées. And there's none of that fiddly stuff that usually goes along with making custard. They're also really good without the caramelised sugar on top. I guess they wouldn't be called Crème brûlée then but they're still something pretty damn amazing; albeit nameless.

I went to some posh Michelin-starred restaurant once and they served their Crème brûlées with two warm, gorgeous biscuity things on the side. I couldn't remember what they were called (I believe the name starts with an 'M' though) so I decided to look for an alternative to serve mine with. I settled on these Nigella-style macaroons from her 'Nigella Express' book as I liked the simple flavours and they were quick to make. They were alright. I think they went well with the Crème brûlée but I don't think they're wonderful enough to make on their own. Yet another recipe from this particular Nigella book I'm not too impressed with. 

I hope you've enjoyed my 'Come Dine with Me' series. Till next time :D

White Chocolate Crème brûlée (I got this recipe from my sister and I'm not sure what the original source is so if I'm plagiarising; I'm sorry!)
Makes - 6

1 punnet raspberries
400ml thick double cream
1 vanilla pod or 2 tsps vanilla essence
150g white chocolate (I would recommend really good quality chocolate)
A few tablespoons golden caster sugar
6 egg yolks

1 - Divide washed raspberries into 6 ramekins
2 - Melt white chocolate in a bain marie
3 - Take melted chocolate off the heat and stir in the egg yolks until combined
4 - Put cream in a saucepan, add vanilla and bring to boil over a low heat; stirring regularly to prevent a skin forming on top
5 - Add the chocolate and egg mixture to the cream and simmer; whisking continuously until it is custardy and coats the back of a spoon
6 - Divide custard among the 6 ramekins; allow to cool then chill in the fridge for a few hours (I usually leave them overnight)
7 - A few hours before you serve them, take them out of the fridge evenly sprinkle the tops with a layer of caster sugar
8 - If you're lucky enough to own a torch; torch the tops until the sugar melts, browns and bubbles slightly.
9 - I put mine under a hot grill, turning every minute or so and keeping a very close eye on them
10 - Put back in the fridge until they are ready to serve


Chocolate Macaroons 
Makes about 25

2 egg whites
200g ground almonds
30g cocoa powder
175g icing sugar

1 - Preheat the oven to 200C/ Gas Mark 6 and line a baking sheet with parchment paper
2 - Mix egg whites (unbeaten) with the ground almonds, cocoa powder and icing sugar until you have a sticky but cohesive mixture
3 - Fill a large bowl with cold water and dip your hands in to wet them before rolling the mixture into little balls the size of small walnuts. You will probably have to redunk your hands to keep wetting them as you go
4 - Arrange the macaroon-balls on the lined baking sheet and put them in the oven to bake for 11 minutes. 
It's hard to tell when they're ready, as they will seem squishy but they harden up a little as they cool and should be damp within; that's what makes them chewy, so don't worry that the underneaths of the macaroons look sticky.

Tuesday, 29 March 2011

Come Dine with Vickii - Greek Salad


Wow! I'm writing a blog post. About salad. Who woulda thunk it? Definitely not my mum who if she is reading this, will be reading it open-mouthed and wide eyed with disbelief. And she'll definitely call me after to say "Wow Vickii, you wrote about salad. I'm very impressed". Actually this is a great test for whether she regularly reads my blog or not - mama, if you read this, call me and tell me how proud you are of me for eating green food!


I do eat force down salads. Just not regularly. And usually for no other reason other than I know they're good for me. That, my friends, should be proof positive of just how good Greek salad is. In Greece, almost every meal is accompanied by a Greek salad; tomatoes full of the taste of summer, beautiful red onion, creamy Greek feta cheese all drizzled with Greek extra virgin olive oil. Y-U-M-M-Y. And bread. Did I forget to mention that Greek salad (and all Greek meals generally) are always accompanied by fresh french stick-style bread cut into chunky slices? The best part of any such meal is the end when all the salad is gone and all that is left is the tomatoey, feta-ey, salty olive oil flavoured juices at the bottom of the salad bowl just begging to be mopped up with a crusty piece of bread ... please give me a minute, I've just been transported to my Yaya's balcony in Xilocastro with the bread and salad juices...

... Okay, I'm back. 

I made this to accompany the Pastitsio for my 'Come Dine with Me' but unfortunately, I gave the bread a miss as I thought my meal was pretty carb-heavy already. I decided to use the recipe in 'My Greek Family Table' as even though I know all the ingredients and usually wing it, I wanted to do it the right way - and I have to say, this was my best effort at a Greek Salad.

ps: You'll find this on most Greek menus as 'Horiatiki salata' which translates into 'Villager's salad'
pps: I'm half Greek, hence the fall back on a Greek menu and references to Greece - I'm not just some strange Greek-o-phile (yeah, yeah, I know it's not a word)

Serves 4

Ingredients
4 large ripe tomatoes
1 cucumber
1 large red onion
18 Kalamata olives
200g Greek feta, sliced through to make two thin slices
sea salt
dried oregano, to taste
extra virgin olive oil, for drizzling

1 - Wash and dry the tomatoes and cucumber. Cut the tomatoes into quarters. Cut the cucumbers into thin rounds
2 - Peel the onion and slice into thin rounds
3 - Combine the tomato, cucumber, onions and olives in a large bowl, sprinkle sea salt and oregano to taste and mix through
4 - Balance the pieces of feta on top, sprinkle a bit more oregano over the feta and drizzle generously with extra virgin olive oil

Friday, 25 March 2011

Come Dine with Vickii - Pastitsio

Pastitsio in four words. Like. Lasagne. But. Better.
Pastitsio. What can I say about Pastitsio? I guess I can start by saying it is a traditional Greek dish and one of my favourite foods of all time. Maybe I could tell you that every time my mum and/or yaya have guests, they ALWAYS make Pastitsio as one of the meals. Although the question should be 'what don't they make?' seeing as they always make FIVE times as much food as required for the number of people they're feeding! Guess who has to eat left-overs for a week after? But that's a whole different post. It's interesting that they say you turn into your parents, because I find that Pastitsio is my go-to meal for dinner parties for the simple reason that EVERYBODY LOVES IT! No matter where they're from, everybody thinks this is yummy!


I must point out here that my recipe probably isn't as traditional as say, if you had it in a small family owned restaurant in Greece, as I like my mince slightly spicier and full of flavour but it's pretty damn good all the same (even if I do say so myself).


My lovely friend Anna (I need to refer to her like that or she might stop getting me books ;p) got me a Greek cook book for Christmas which is great as I have a few recipes passed down from my yaya but there are so many more Greek foods that I love and haven't got a clue how to make. It's called My Greek Family Table by Maria Benardis. I got the wonderful tip of mixing egg whites into the pasta so that it doesn't fall apart when served from this wonderful book!


Without further ado, here is my Pastitsio recipe :)


Ingredients
750g penne pasta
2 egg whites


For the mince meat sauce
500g lean minced beef
2 tablespoons olive oil
1 large onion, chopped finely
3 cloves garlic, minced
1 tin chopped tomatoes
2 chicken/beef stock cubes
Herbs and spices (including but not limited to) 1 tsp curry powder, 1 tsp dried chili flakes, 2 tsps oregano, 2 tsps freshly ground black pepper, 1 tsp ginger
salt, to taste


For the bechamel sauce
100g butter
10 tablespoons plain flour
800ml whole milk
1 tsp freshly ground black pepper
salt, to taste
2 eggs


1 - Put olive oil, mince, onions and garlic into a non-stick frying pan or wok over a medium/high heat. 
Cook until onions have softened and mince has browned. Continue to cook, stirring regularly until mince has produced some of it's own juices and those juices are absorbed.
2 - Pour in the tin of tomatoes and reduce heat till mince is simmering. 
Crumble in the stock cubes, add in the herbs and spices and stir.
3 - Simmer for 20 minutes, stirring every few minutes. Taste and add more salt or spice according to your taste.
4 - Cook pasta in salted, boiling water according to manufacturer's instructions. I suggest cooking for one minute less than is recommended as it will cook further in the oven.
5 - While pasta is boiling, whisk egg whites until foamy
6 - When pasta is cooked and drained, transfer back to the pot and stir in the egg whites. 
7 - Once egg whites are stirred in, drain again in case there is excess liquid from the egg whites.
8 - Transfer half the pasta into your baking dish or tray (approx 35 x 22cm), making sure it is spread in the baking tray in one even layer
9 - Layer the mince meat sauce over the pasta in an even layer covering all of the pasta and right up to the edges of the dish
10 - Layer the rest of the pasta over the mince meat sauce, again in an even layer. Place to one side while you make the bechamel
11 - Melt the butter in a saucepan over a very moderate heat. When melted, take it off the heat, add in the 10 tablespoons of flour and using a whisk, mix in until well combined. The French call this the 'roux'.
12 - Put saucepan back on the burner and start to add the milk a little bit at a time. It's difficult to say exactly how much to add each time but using time, I'd say pour for 2 seconds.
13 - Whisk after each addition of milk till sauce thickens slightly, then add more milk. (Making bechamel can be slightly tedious as it requires you to whisk constantly over a low heat, making sure you're reaching the edges of your saucepan. Dont' panic if you end up with a lumpy bechamel, just stick it in the blender till smooth)
14 - After you've added the last of your milk, continue to whisk over the heat till sauce is thick enough that when you pour it over the pasta, it remains in a layer over the top rather than running through to the bottom of your dish. 
17 - Take it off the heat and add the pepper and salt - it should be quite tasty :)
18 - Whisk in your two eggs into your bechamel until thoroughly combined.
 Pour over the top layer of pasta making sure you get it right up to the edges and using a spatula to level it out.


19 - Place in a preheated oven at 180C/350F/Gas Mark 4 for 35 - 45 minutes or until the top is browned


Cut into squares and serve with a Greek salad; recipe coming your way next post.