Pages

Showing posts with label Chocolate. Show all posts

Sunday, 6 April 2014

Chocolate Truffles with Sea Salt


Hellooooooo!

Is anybody out there???

Not that I blame you if you're not since it's been 5 months since my last post. I come bearing chocolate - peace offering?

In fact, I made these truffles a couple of weeks after my last post; they were goodie bags for my annual Thanksgiving get together. Now this Thanksgiving "dinner" has little resemblance to the traditional celebration except for the part where lots of people come together to eat and have a good time - which is actually the most important part if you ask me! Year after year I mean for us to go round in a circle and say what we are thankful for but we're mostly too busy playing a really loud, noisy game and trying really hard to cheat. And by "we", I mean everybody else. Obviously.

It differs on the whole turkey and traditional Thanksgiving food thing. I don't like turkey and it's bad enough that I eat it at Christmas, I'm definitely not cooking or serving it at anything I host. I just don't 'get' turkey! It's so dry! Except for the dark meat but even then, there's better meats. I am on a personal mission to change the traditional British Christmas meat from turkey (dry, boring) to lamb (succulent, so tasty) and the dessert from Christmas Pudding (ewww) to Sticky Toffee Pudding (hella sweet but amazing!) - that reminds me, I have been saying I'll make and blog Sticky Toffee Pudding for literally years now.  I will.

But I digress ... I guess that's what happens when I don't blog for half a year, I have LOTS to say!

Anyway, my mum reckons she reads all of my blogs and has be hassling me for a while now to update my blog because she wants something to read. I know, I know, I have suggested that books and magazines make for wonderful reading material but apparently, if I didn't write it, she doesn't really enjoy it. Mothers eh?

Well Mama, I have updated my blog. Let's see how long before you read it. Readers, I'll update you on how long it takes her to read it so that we can know once and for all if she really reads it or if it's just something for her to hassle me about (I'm pretty perfect so there's very little she gets to tell me off about).

Back to these truffles, they are wonderful! Rich and dark (just how I like my .... coffee), not usually how I like my chocolate - I'm a milk girl through and through - but these are perfect. And you know how much I LOVE the salty sweet combo!

These are easy to make but depending on how many you make, the rolling and dipping process can be time consuming. I made over a hundred of these bad boys - yup, guests ain't getting truffles again. Next time I'm going  make a cake and break them all of a chunk; no dipping and rolling, no siree!


Recipe from The Pioneer Woman 

Ingredients

452g good dark chocolate
1 x 396g can condensed milk
1 tablespoon vanilla extract
226g milk chocolate
Sea salt

Makes about 36 truffles

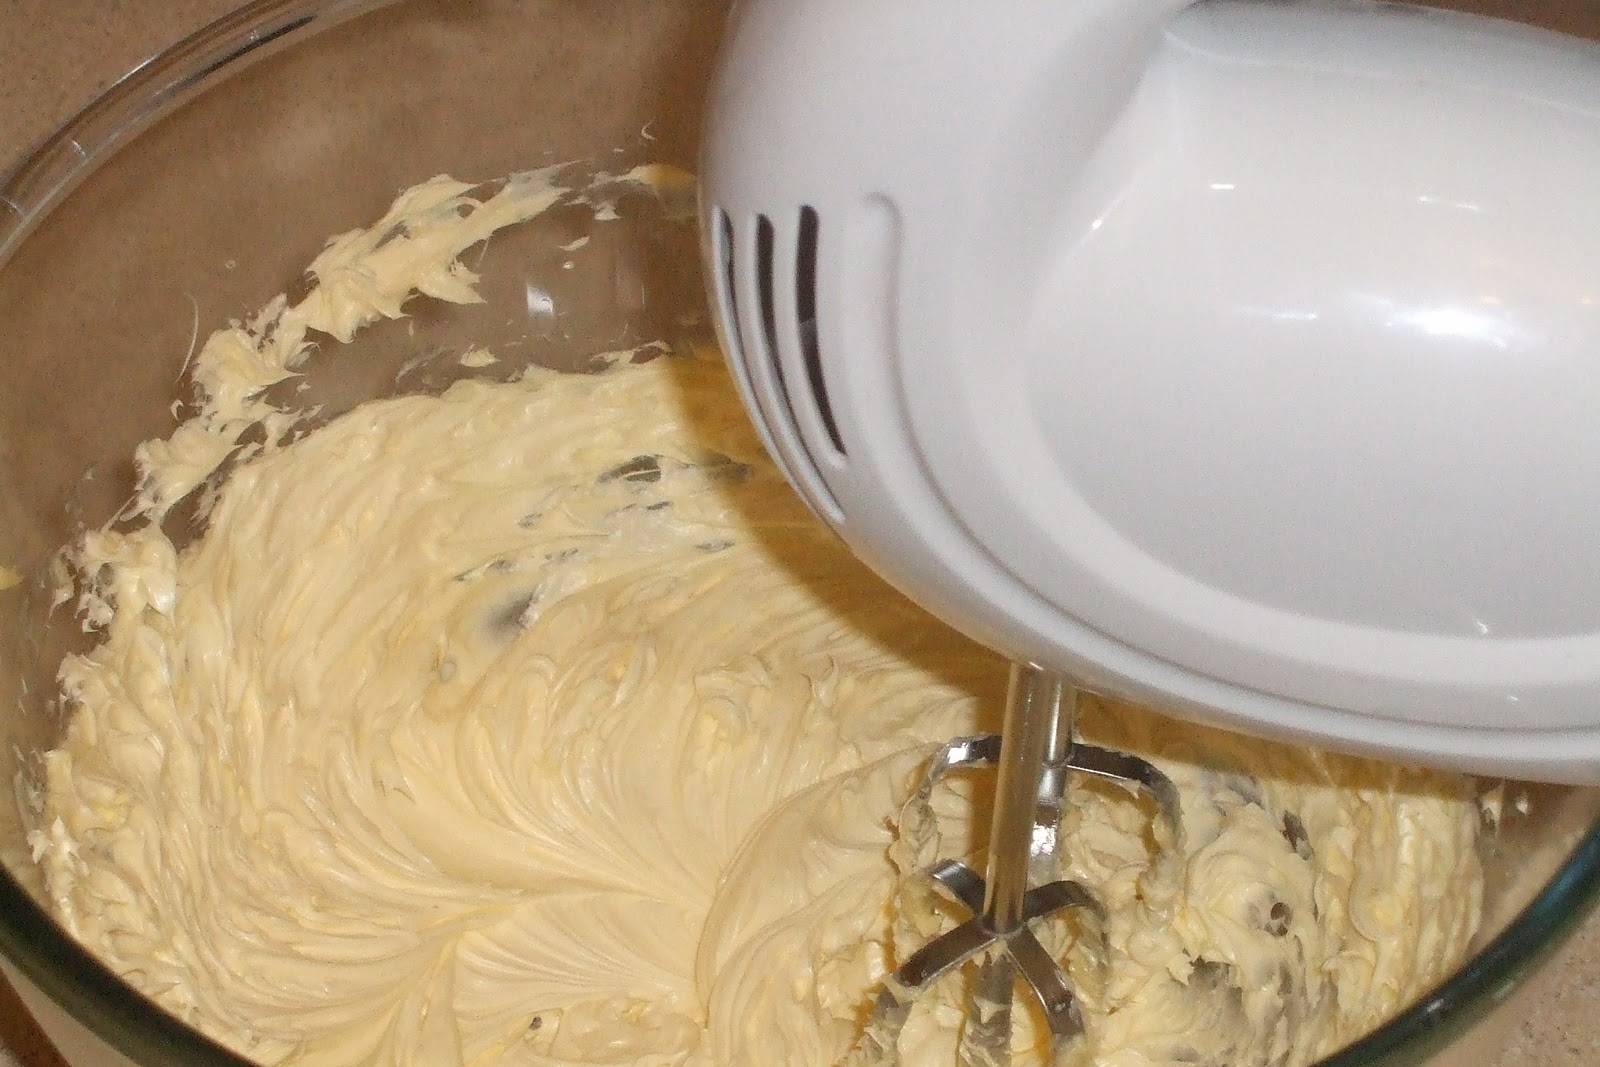
  1. Heat dark chocolate and condensed milk in a double boiler/bain marie over medium low heat until chocolate is melted. Stir - the mixture will have a slight marshmallow texture. Stir in vanilla.
  2. Remove from heat, cover and refrigerate for two hours, until the chocolate becomes firm and workable.
  3. Once chilled, roll in balls about 1/2 - 3/4 inches in diameter (mine were probably double that) and place on a cookie sheet or baking tray lined with grease proof paper. Place the cookie sheet containing the truffles into the freezer for 15 - 30 minutes to firm them up before you place them in the hot melted chocolate.
  4. Melt your milk chocolate in the microwave, and then coat your truffle balls in the melted milk chocolate one by one (Put your truffle in the chocolate, retrieve with a fork - this will allow the excess chocolate to drain back into the bowl - and tap the fork lightly against the bowl to let the excess chocolate drain back).
  5. Transfer the truffle back onto the baking sheet and sprinkle on a small amount of sea salt or whatever coarse salt you have on hand (just be sure to sprinkle on the salt while the chocolate is still soft. This will ensure the chocolate will stay on the truffle.)
  6. Allow the chocolate to harden and voila - yummy yummy chocolate truffles.


Monday, 5 November 2012

Chocolate Chip, Chocolate Orange Loaf Cake


I'm on a bit of a Nigella Lawson roll innit?

I don't know about you but when I was growing up, every cake apart from birthday cake was a loaf cake. Or a bundt cake - which is the same but in a fancier tin.
More specifically in my home, it was a chocolate and vanilla marble cake with a faint hint of lemon as my mum and yaya always put lemon zest in every cake. I bet my mum will be surprised that I remember her cakes so well :) I remember not being able to understand, no matter how many times she explained, why she put the zest of lemon in cakes. Finally, I totally get it!

So yeah, loaf cakes have  all sorts of great associations for me - treats, home, comfort, guests, mummy-time ... when I grow up and have kids, I want to always have home-made cake in my kitchen.  Try and recreate these great memories for my kids. In a large raised cake stand with a glass lid, there will always be some home-made goodness. Yup, I know, hello obesity! We'll balance it out somehow :)

I think the main thing with loaf cakes is that despite being very un-fancy, they're usually really good cake! They don't have any fancy frosting or ganaches to hide behind - at most a drizzle of a glaze - so the cake has to be great. And it usually is. This one by Nigella Lawson is pretty incredible. I made it for church and because I'd sliced it up and didn't get a chance to tell anyone what it was, every one thought they were brownies. It is a dense cake but not too much so, chocolatey but not overwhelming, perfectly citrussy and I think the addition of chocolate chips makes it the perfect loaf cake; understated but so incredibly satisfying.

With the weather getting very cold, I am getting the overwhelming urge to bake lots of loaf cakes so while I get on with that, how about you give this one a go? And make sure you feed back okay? I love hearing how your baking goes; especially when it's a recipe from my blog.

Have a wonderful week!


Recipe adapted from Nigella Lawson's Kitchen

Ingredients

150g soft unsalted butter, plus some for greasing
dab flavourless vegetable oil, for greasing syrup spoon
2 x 15ml tablespoons golden syrup
175g dark muscovado sugar
150g plain flour, plus about 1 tablespoon for tossing chocolate chips
1/2 teaspoon bicarbonate of soda
25g best-quality cocoa powder, sifted
2 eggs
zest 2 regular oranges and juice of 1
100g dark chocolate chips

1 x 900g (2Ibs) loaf tin

  • Preheat the oven to 170C / Gas mark 3 and line your loaf tin with baking parchment or a paper loaf-tin liner.
  • Beat the already soft butter with the syrup - if you dab a little oil on your tablespoon measure with a sheet of kitchen roll, the syrup shouldn't stick to the spoon  - and the sugar until you have a fairly smooth caffe Americano cream, though the sugar will always have a bit of grit about it.
  • Mix the flour, bicarb and cocoa powder together, and beat into the syrup mixture 1 tablespoon of these dry ingredients before beating in 1 egg. Then add another couple of spoonfuls of the dry ingredients before beating in the second egg.
  • Carry on beating in the remaining dry ingredients and then add, still beating, the orange zest and finally, gradually, the juice. At this stage, the batter may suddenly look dimpled as if slightly curdled. No need to panic!
  • Put the chocolate chips in a bowl, sprinkle over a tablespoon of flour and toss until they are completely coated in flour. (This is to stop them sinking to the bottom of the cake batter while the cake is baking). Now fold them into your batter.
  • Pour and scrape into the prepared tin and bake for 45 minutes, though check 5 minutes before and be prepared to keep it in the oven 5 minutes longer if need be. A cake tester won't come out entirely clean, as the point of this cake, light though it may be, is to have just a hint of inner gunge. Leave it to cool a little in its tin on a wire rack, then turn out with care and leave on the rack to cool.
Notes:
1 - The cake can be baked up to 3 days ahead. Wrap tightly in clingfilm and store in airtight container. Will keep for 5 days total.
2 - The cake can be frozen, tightly wrapped up in a double layer of clingfilm and a layer of foil, for up to 3 months. Defrost overnight at room temperature.


Monday, 17 October 2011

Chocolate Cupcakes with Chocolate Fudge Frosting


You all know my favourite chocolate cake recipe is Guinness Chocolate Cake. And that is the recipe I use for most of my cupcakes and cakes. However, when I was asked to make some small cupcakes for a friend's nephew to take to school on his 6th birthday, I deduced all on my lonesome that the parents might not be too pleased with their 6 year old eating Guinness cake. Despite the fact that all the Guinness evaporates in the bakingand that it doesn't taste of Guinness *spoilsports*.

So I decided to make these cupcakes from 'The Crabapple Bakery Cupcake Cookbook'. I've made them before and my chocoholic housemate thinks they're the best chocolate cake he's ever tried! Since that accolade very clearly belongs to Guinness cake, we can dismiss his opinion as crazy but it is still pretty good compliment right?

It was fun making these cupcakes as they were so small and cute and I had a ball decorating them! I made 30 and apparently the kids at his school were so enthused that kids from other classes came in to have cake too. The amazing little birthday boy kept one cake for himself but ended up giving it to another kid who didn't get one. So he didn't get to have any of his own birthday cupcakes. I think there is a lesson in there for us all right? DO NOT SHARE CAKE! No. Not really. Caring. Sharing. More along those lines.

However, he did threaten to fight his aunt if she didn't get him more cupcakes which is how I ended up making a few more of these yesterday :)

Makes 24 normal sized cupcakes


Ingredients

For the cakes
3 cups plain flour
2 teaspoons bicarbonate of soda
1 teaspoon baking powder
1 teaspoon salt
3 teaspoons instant coffee granules
1 cup hot water
1 cup cocoa powder
1 cup cold water
200g softened unsalted butter
2 1/2 cups caster sugar
4 eggs
1 tablespoon vanilla extract

For the chocolate fudge frosting 
6 cups icing sugar (I reduced this from the original amount of 8 cups)
1 cup cocoa powder
200g softened butter
3/4 cup milk
1 tablespoon vanilla extract

1 - Preheat oven to 170C / 325F / Gas Mark 3. Line two 12-hole muffin trays with chocolate-coloured cupcake papers.
2 - Sift together the flour, bicarbonate of soda, baking powder and salt. In a separate bowl whisk together the coffee, hot water and cocoa until you have a smooth paste. Add the cold water and whisk until evenly combined.
3 - In a separate bowl, cream the butter for 1-2 minutes. Add the caster sugar a third at a time, beating for 2 minutes after each addition. After the last addition, beat until the mixture is light and fluffy and the sugar has almost dissolved.
4 - Add eggs one at a time, beating for 1 minute after each addition or until mixture is light and fluffy. Add the vanilla extract and beat until combined.
5 - Add a quarter of the flour to the creamed mixture and beat on low speed until combined. Add a third of the cocoa mixture and beat until combined. Repeat this process twice more. Add the remaining quarter of the flour and beat until thoroughly combined; do not over-beat as this will toughen the mixture.
6 - Spoon mixtures into cupcake papers, filling each about three quarters full. To prevent the cupcakes cracking on top, allow the mixture to sit in the cupcake papers for 20 minutes before baking.
7 - Bake for 18-20 minutes or until a fine skewer inserted comes out clean. Remove cupcakes from trays immediately and cool on a wire rack for 30 minutes before frosting.
8 - While cooling make the frosting. Sift the icing sugar and cocoa into a bowl.
9 - In a separate bowl, cream the butter for 1-2 minutes. Add the milk, vanilla extract and half of the icing sugar mixture, and beat for at least 3 minutes or until the mixture is light and fluffy.
10 - Add the remaining icing sugar and beat for a further 3 minutes or until the mixture is light and fluffy and of a spreadable consistency. Add extra milk if the mixture is too dry or extra icing sugar if the mixture is too wet.

Tuesday, 5 July 2011

Weight Watchers Mini Double Choc Chip and Orange Cookies and Giveaway Winner!

First things first, the winner of my giveaway (picked by using random.org) to win a copy of James Ramsden's 'Small Adventures in Cooking' was this comment:

YAY a giveaway!!!

Hmm considering I have never really tried to impress anyone with my cooking ... ( or maybe I have) ... I guess it'll have to be my chicken/salmon fried rice (its always on demand and it is so easy and fast to make! Oh and EXTREMELY TASTY :-P) 

Twitter follower.
beelatweets

Congratulations Beelatweets!!!

  8Powered by RANDOM.ORG

And for today's recipe:
Recipe Source - Weight Watchers Your Week Magazine

5 Pro Points per 4 cookies
Makes 24 cookies

Ingredients
100g low fat spread
10g artificial sweetener
1 egg, beaten
Grated zest of 1 orange
100g plain flour
20g cocoa powder
40g milk chocolate chips (I used white chocolate chips)

1 - Preheat the oven to gas mark 4/180C/fan oven 160C
2 - Beat the low fat spread and the sweetener together until combined (about 2 minutes)
3 - Beat in the egg, a little at a time, and then beat in the orange zest
4 - Combine the flour and cocoa powder into the low fat spread and beat in until combined, then stir in half of the chocolate chips. Cover with cling film and chill in the fridge for 1 hour or until starting to firm up
5 - Line two large baking trays with grease proof paper and set aside
6 - Scoop 24 teaspoons of the cookie mix onto the baking trays, spacing the spoonfuls well apart, then pat into flat rounds with your fingertips - the dough will be sticky, so be gentle as you pat them into shape
7 - Press in the remaining chocolate chips and bake for 15 minutes until crisp. 
8 - Leave to cool and store in an airtight container. They will keep for 2 - 3 days.

Tuesday, 7 June 2011

Triple Layer Oreo Cake (Warning: You might put on weight just LOOKING at this cake)

It was my mum's *cough* 40th *cough* birthday on the 27th of May and as I told you in this post, she's LOVES chocolate. So I knew I had to make her a cake that was loaded with chocolate. This cake came to mind pretty quickly because it was love at first sight as soon as I saw it but as it's such a big cake, I wanted to save it for a special occasion. And what better occasion than my amazing mum's birthday eh?


This recipe has been adapted slightly from Beantown Baker's. She's one of my favourite baking bloggers and I want to make layer cakes like her when I grow up!


I won't lie to you - this is a very involved cake. It took me about 7 hours to make but it is totally worth it in the end! I also had a few issues with the chocolate layers - my cake mixture was too watery and they rose unevenly making for very ugly uneven cakes; I'm amazed at the multitude of sins I was able to hide with the frosting! I've adapted the recipe slightly to try and resolve the issues I had but I haven't tested it yet. I'll update you guys when I do.


However, the time it takes is totally worth it. Even with their problems, the chocolate cake layers were wonderfully moist cake - I think they might be my favourite chocolate cake recipe (after Guinness chocolate cake) and the Oreo filling ... wow. It's creamy and vanilla-ey and not too sweet but still full of flavour. Yum. Yum. Yum. I'm using it to frost every cake I ever make EVER! Well. Okay. That is an exaggeration but this filling is that good! The whole cake is rich and decadent and incredible. It's just an amazing cake! And I'll stop now because I'm gushing. But you try it and see if you don't gush too!
Steps it takes to put this cake together
1 - Bake the cake layers. The cake layers can be made in advance and refrigerated or frozen. Layers should be completely cooled prior to assembling the cake
2 - Make the Oreo filling
3 - Stack the cake - Place 1 chocolate layer, flat side up, on a flat plate or cake pedestal. With a knife or spatula, spread the top with half of the Oreo filling. Place the Oreo cake layer on top and spread with the remaining Oreo filling. Place the last chocolate cake layer on top.
4 - Make the chocolate frosting
5 - Frost and decorate the cake. Spread frosting evenly on the top and sides of the cake and decorate with Oreo cookies and reserved filling. I used mini cookies.
Chocolate Cake Layers
Butter for greasing the cake tins
1 3/4 cups flour
2 cups sugar
3/4 cups cocoa powder
2 tsp baking soda
1 tsp baking powder
1 tsp salt
1 cup buttermilk
1/2 cup vegetable oil
2 eggs, at room temperature
2 tsps vanilla
1/2 cup freshly brewed hot coffee (I used instant)
1 1/2 packs of Oreos (about 21 cookies), cut  into quarters


1 - Preheat oven to 180C/Gas Mark 4/350F.Grease and flour 2 (8 inch) round cake pans
2 - Combine the flour, sugar, cocoa, baking soda, baking powder and salt
3 - In another bowl, combine the buttermilk, oil, eggs and vanilla
4 - With the mixer on low speed, slowly add the wet ingredients to the dry. With the mixer still on low, add the coffee and stir just to combine, scraping the sides and bottom of the bowl to make sure it is all combined
5 - Stir in the Oreo chunks and pour the batter into the prepared pans and bake for 35-40 minutes or until a skewer comes out clean.
6 - Cool in the pans for 30 minutes and then turn them out onto a cooling rack and cool completely


Oreo Cake Layer
57g unsalted butter, at room temp
1/2 cup milk
2 tsps vanilla extract
1 cup flour
1/2 tsp baking powder
1/4 tsp salt
2/3 cup + 2 tbsp + 2 tsp sugar
1 1/2 egg whites, at room temp
1 pack Oreos (14 cookies), cut into quarters


1 - Preheat oven to 180C/Gas Mark 4/350F.Grease and flour 1 (8 inch) round cake pan
2 - In a large bowl cream the butter until lighter and fluffy, about 3 - 5 minutes. Add the sugar and beat for another two minutes. Add the vanilla and beat until combined.
3 - In a separate bowl, combine the flour, baking powder and salt
4 - Add the dry ingredients in three batches, alternating with the milk. Start and end with the flour mix. Each time, beat only just combined
5 - Add the egg whites and beat for one more minute
6 - Fold in the quartered cookies, pour batter into prepared cake tin and bake for 25 - 30 minutes or until an inserted skewer comes out clean. 
7 - Allow to cool in the tin for about 10 minutes then turn out onto a rack and allow to cool completely


Oreo Filling
113g cream cheese, at room temp
1 tsp vanilla
1 cup icing sugar
1 cup whipping or double cream
7 Oreos, cut into quarters


1 - Using an electric mixer, beat the cream cheese, vanilla and icing sugar until light and creamy. 
2 - Add half of the cream and beat until smooth. Add the rest of the cream and beat until it has the consistency of whipped cream.
3 - Reserve 1/2 cup to use to decorate top of cake (I forgot to do this) and place the rest in the fridge until ready to use
4 - When ready to use, stir in the Oreo chunks


Chocolate Frosting
170g dark chocolate (70% cocoa solids)
227g unsalted butter, at room temp
1 egg yolk, at room temp
1 tsp pure vanilla extract

1 tbsp instant coffee


1 - Chop the chocolate and place it in a heat-proof bowl set over a pan of simmering water. Stir until just melted and set aside until cooled to room temperature.
2 - Using an electric mixer, beat butter on medium high speed until lighter and fluffy, about 4 minutes
3 - Add the egg yolk and vanilla and continue beating for 3 minutes
4 - Stir in the icing sugar (so that it doesn't go everywhere) and then beat until smooth and creamy, scraping down the bowl as necessary
5 - Dissolve the coffee in 2 teaspoons of very hot tap water. On low speed, add the chocolate and coffee to the butter mixture and mix until blended. Spread immediately on the  cooled cake

Saturday, 9 April 2011

Come Dine with Vickii - Dessert!


You must know me well enough by now to not be surprised when I tell you that my dessert was the first part of my 'Come Dine with Me' menu I decided on.
And I was pretty set on these Crème brûlées from the get-go. The story with these is I went round to my sister's a couple of years ago (co-incidentally after they had just done their 'Come Dine with Me'. Their group scored though. And they won!) and she had a few of these left over in the fridge. And I might have maybe eaten a couple all of them. This is why I always go and visit my sister when I'm in Birmingham. Her and her husband are total foodies and they see me rarely enough that they still consider it a treat so they ALWAYS feed me. 
Side note: Sometimes people think that because I bake and cook, I might be overly critical of other people's cooking or just prefer to do the cooking myself. NOT TRUE. I love love love being cooked and baked for and never ever think 'I could do this better' or any thoughts along those lines. So please; let the dinner invites roll on in.

A few months after I first tried this wonderful dessert; my sister and brother-in-law were hosting a pre-Christmas dinner and I begged for them to make these; thereby forcing them to make two desserts. It was a tough job eating them both but someone had to do it ;p And I might have maybe helped some other people finish theirs; I don't recall. After that though, she wised up, gave me the recipe and told me to make them myself. They're so easy to make and pretty damn amazing! I think it's up there with the best of the Crème brûlées. And there's none of that fiddly stuff that usually goes along with making custard. They're also really good without the caramelised sugar on top. I guess they wouldn't be called Crème brûlée then but they're still something pretty damn amazing; albeit nameless.

I went to some posh Michelin-starred restaurant once and they served their Crème brûlées with two warm, gorgeous biscuity things on the side. I couldn't remember what they were called (I believe the name starts with an 'M' though) so I decided to look for an alternative to serve mine with. I settled on these Nigella-style macaroons from her 'Nigella Express' book as I liked the simple flavours and they were quick to make. They were alright. I think they went well with the Crème brûlée but I don't think they're wonderful enough to make on their own. Yet another recipe from this particular Nigella book I'm not too impressed with. 

I hope you've enjoyed my 'Come Dine with Me' series. Till next time :D

White Chocolate Crème brûlée (I got this recipe from my sister and I'm not sure what the original source is so if I'm plagiarising; I'm sorry!)
Makes - 6

1 punnet raspberries
400ml thick double cream
1 vanilla pod or 2 tsps vanilla essence
150g white chocolate (I would recommend really good quality chocolate)
A few tablespoons golden caster sugar
6 egg yolks

1 - Divide washed raspberries into 6 ramekins
2 - Melt white chocolate in a bain marie
3 - Take melted chocolate off the heat and stir in the egg yolks until combined
4 - Put cream in a saucepan, add vanilla and bring to boil over a low heat; stirring regularly to prevent a skin forming on top
5 - Add the chocolate and egg mixture to the cream and simmer; whisking continuously until it is custardy and coats the back of a spoon
6 - Divide custard among the 6 ramekins; allow to cool then chill in the fridge for a few hours (I usually leave them overnight)
7 - A few hours before you serve them, take them out of the fridge evenly sprinkle the tops with a layer of caster sugar
8 - If you're lucky enough to own a torch; torch the tops until the sugar melts, browns and bubbles slightly.
9 - I put mine under a hot grill, turning every minute or so and keeping a very close eye on them
10 - Put back in the fridge until they are ready to serve


Chocolate Macaroons 
Makes about 25

2 egg whites
200g ground almonds
30g cocoa powder
175g icing sugar

1 - Preheat the oven to 200C/ Gas Mark 6 and line a baking sheet with parchment paper
2 - Mix egg whites (unbeaten) with the ground almonds, cocoa powder and icing sugar until you have a sticky but cohesive mixture
3 - Fill a large bowl with cold water and dip your hands in to wet them before rolling the mixture into little balls the size of small walnuts. You will probably have to redunk your hands to keep wetting them as you go
4 - Arrange the macaroon-balls on the lined baking sheet and put them in the oven to bake for 11 minutes. 
It's hard to tell when they're ready, as they will seem squishy but they harden up a little as they cool and should be damp within; that's what makes them chewy, so don't worry that the underneaths of the macaroons look sticky.

Sunday, 13 February 2011

Forever Nigella: Glitzy Chocolate Puddings

I am taking part in my very first food blogger event and I'm very excited!!! This one is hosted by Maison Cupcake and the theme is 'Seduced by Chocolate'! Factor in the fact that I have a foodie crush on Nigella and that I'm totally obsessed with chocolate and this month's theme couldn't be any more perfect!


On an aside, I've named my new mixer (who features proudly in some of the photos) Nigella. Oh, I should probably mention that I'm someone who names my stuff - my laptop is called Ella Mac, my spider plant Granola (my ex-boss named her) and now Nigella, the latest addition to my kitchen! I hope Nigella would be flattered, it is meant as the highest compliment.


I leafed through my three Nigella books for a recipe before finally settling on this one from 'Nigella Express'. Firstly because I liked what they were called. Secondly because thinking that I had left this till the last minute (I thought the deadline was today instead of next Sunday) as well as thinking I had two other things to bake this weekend, I wanted something relatively easy, and thirdly because I liked what they are called. Oh, hang on, I think I said that already ;p You can find the recipe on Nigella's website and I leave you with my pictures.


Monday, 6 December 2010

Christmas Cookies : Salted Chocolate Shortbread Cookies

Every year I say I'll celebrate Thanksgiving. Every year, that last week in November rolls round (very quickly!) and I think of all the cooking it will involve and I think to myself, "Next year. Definitely".
Every year, I say I'll run a marathon. The last couple of years I've run a half marathon and as I cross the finish line and I feel like I've literally run every single step my body is capable of running, it hits me that a marathon would mean doing that 2 hours 21 minutes all over again (but slower) and I think to myself, "Next year. Definitely".
Every year I think to myself that I'll be little miss domestic goddess and make home-made Christmas treats and deliver them round all my friends enjoying the oohing and aaahing that would inevitably follow (They definitely ooh and ahh when I imagine it). Chunks of Christmas cake, pretty bags of white chocolate fudge, intricately decorated sugar cookies; there is no end to the goodies I’ll make in these fantasies.


This year, Christmas has come around really quickly! I would put money on the fact that somebody is playing games with a ginormous calendar up in the sky! I thought about my Christmas goodie bag fantasy, and I thought ... Bring it on!! Yup, I actually did it! I decided to make a variety of Christmas cookies; which is either really brave or really foolish considering I think I might be genetically incapable of baking a good cookie. I'm going with brave! But I did it. It did take up my entire Saturday, and I was only able to listen to X-Factor, but I ended up with 4 different types of perfectly edible, no, make that friggin’ amazing cookies! Even if I do say so myself.


Please note that I haven't delivered said cookie goodie bags yet so if you haven't received yours yet, don't shower my blog with abuse, just be patient, it’s probably winging its way to you right now. Unless of course I don't know you and then it’s safe to say it is never coming ;p


Thanks to Brown Eyed Baker from whom I nicked 3 of the 4 recipes.
First up are Salted Chocolate Shortbread Cookies which were my absolute favourite of the bunch. I LOVE the salty chocolate taste!


Makes about 30 cookies
Prep: 10 minutes | Chill Time: 3 hours | Bake Time: 12 minutes


Ingredients
1¼ cups flour
1/3 cup unsweetened cocoa powder
½ teaspoon baking soda
11 tablespoons unsalted butter, at room temperature
2/3 cup light brown sugar
¼ granulated sugar
½ teaspoon fleur de sel or ¼ teaspoon fine sea salt, plus extra for sprinkling
1 teaspoon vanilla extract


1 - Whisk together the flour, cocoa and baking soda in a small bowl; set aside.
2 -  Beat the butter on medium speed until soft and creamy. Add both sugars, the salt and vanilla extract and beat for 2 minutes more.

3 - With the mixer off, add the dry ingredients. Turn the mixer on and off low speed (pulse) for a second or two about 5 times so that the flour mixture gets incorporated. Then mix on low speed for about 30 seconds, just until the flour disappears into the dough (the dough will look crumbly).
4 - Turn the dough out onto a work surface and divide it in two. Shape each half into a 9-inch log. Wrap the logs in plastic wrap and refrigerate for at least 3 hours. (The dough can be refrigerated up to 3 days or frozen for up to 2 months. If you’ve frozen the dough, you don’t need to defrost before baking – just slice the logs into cookies and baking the cookies 1 minute longer.)
5 - Center a rack in the oven and preheat the oven to 170 degrees C/ Gas Mark 3. Line two baking trays with grease proof paper.
6 - Using a sharp thin knife, slice the logs into rounds that are ½-inch thick. Arrange the rounds on the baking sheets, leaving about 1 inch between them. Sprinkle a small amount of extra salt on top of each round.
7 - Bake the cookies one sheet at a time for 12 minutes – they won’t look done, and won’t be firm, but that’s how they should be. Transfer the baking sheet to a cooling rack and let the cookies rest until they are only just warm, at which point you can serve them or let them reach room temperature.
Store the cookies in an airtight container at room temperature.

Friday, 26 November 2010

Guinness Chocolate Cake

Confession time! I confess so much on this blog perhaps I should have named it 'Confessions of a cake-aholic'? Ah well, as usual, I come up with my best ideas (and comebacks) much too late.

Back to my confession. While I LOVE chocolate, I'm not that keen on chocolate cake - it's just too chocolatey. If my mum is reading this, I know she's shouting at the computer screen 'There's no such thing as too chocolatey!'. Well mum, I think there is - chocolate is nice in small amounts but chocolate cake is just too much, too intense ... too everything.

So when I arranged to have friends round for a tea party - Whoever invented afternoon tea by the way is a complete genius! An entire eating occasion based on baked wonderfulness and where the closest thing resembling food is a sandwich ... that right there is my idea of heaven - it seemed like the perfect occasion to try out a new, somewhat unusual recipe and as the resulting cake would be chocolate, it also meant I could have one small piece and get rid of the rest of it. 

Luckily for my friends, this cake was good. Actually, that is a gross understatement; it was incredible!  It's my new favourite chocolate cake ever and probably the only chocolate cake I'll ever make after this. And best of all, it's pretty easy to make! 

Mini confession: once the batter has been transferred to the cake tin, I use my fingers in the only way God could possibly have intended them to be used to lick the bowl clean. At this point, I could taste the Guinness slightly but once it was baked, you couldn't taste the Guinness at all. What it did was intensify the chocolate flavour and make the cake really moist. Did I mention it was amazing??

My cake is a bit flat as I used a bigger cake tin that was recommended. And the frosting doesn't need to be piped on; I just got a bit excited with my new piping bags and nozzle :D

This recipe is by Gizzi Erskine

Makes: 12 slices
Prep time: 20 minutes
Cooling time: 3 hours

Ingredients
250ml Guinness
250g unsalted butter, sliced
100g good quality plain chocolate (70%)
35g cocoa
400g caster sugar
1 x 142ml pot plain yoghurt
2 free range eggs
1 tablespoon real vanilla extract
275g plain flour
2 ½ teaspoons bicarbonate of soda

For the Frosting
300g Philadelphia cream cheese
150g icing sugar
125ml double or whipping cream

1 - Preheat the oven to 180°C. Butter and line a 23cm spring form tin.
2 - Pour the Guinness into a large wide saucepan, and heat until the butter has melted, at which time you should stir in the chocolate, cocoa and sugar.


3 - Beat the yoghurt with the eggs and vanilla and then pour into the chocolatey, beery pan.
4 - Finally whisk in the flour and bicarbonate of soda.
5 - Pour the cake batter into the greased and lined tin and bake for 45 minutes to an hour.
Leave to cool completely in the tin on a cooling rack, as it is quite a damp cake.
6 - To make the frosting lightly whip the cream cheese until smooth, sieve over the icing sugar and then beat them both together.
7 - Separately whip the cream until it just begins to thicken but still holds it shape.
8 - Pour the cream to the cream cheese mix and beat again until combined and reaches a spreadable consistency.
9 - Frost the top of the Guinness cake.