Pages

Showing posts with label Brownies. Show all posts

Saturday, 25 August 2012

Triple Layer Oreo Brownie Peanut Butter Choc Bars


Riddle me this: If a person is said to be on a sugar high or in a sugar coma from drinking a can of full fat coke*, how would you describe a person who spends 24 subsisting on raw cake batter and frosting? I'm ... err ... asking for a friend.
A friend of mine who clearly has appalling nutrition habits!
In my my friend's defence, she pretty much spent those 24 hours baking and as such cake batter and frosting were the most readily available source of food. That's my her story and I'm she's sticking to it!

I just watched "Fracture" with Anthony Hopkins and Ryan Gosling. Why is Anthony Hopkins so good at playing creepy, genius but devious killers? Is it because we've all seen him in "Silence of the Lambs" so we subconsciously think back to that character when he does anything similar? Or was he cast in "Silence of the Lambs" because he's so good at playing those roles. Hmmm - that's a regular chicken or the egg question right there.

Oh and have I told you guys how much I love Ryan Gosling?! I LOVE Ryan Gosling! Partly because he was Noah in "The Notebook" which was my favourite film of all time and partly just because he's amazing!

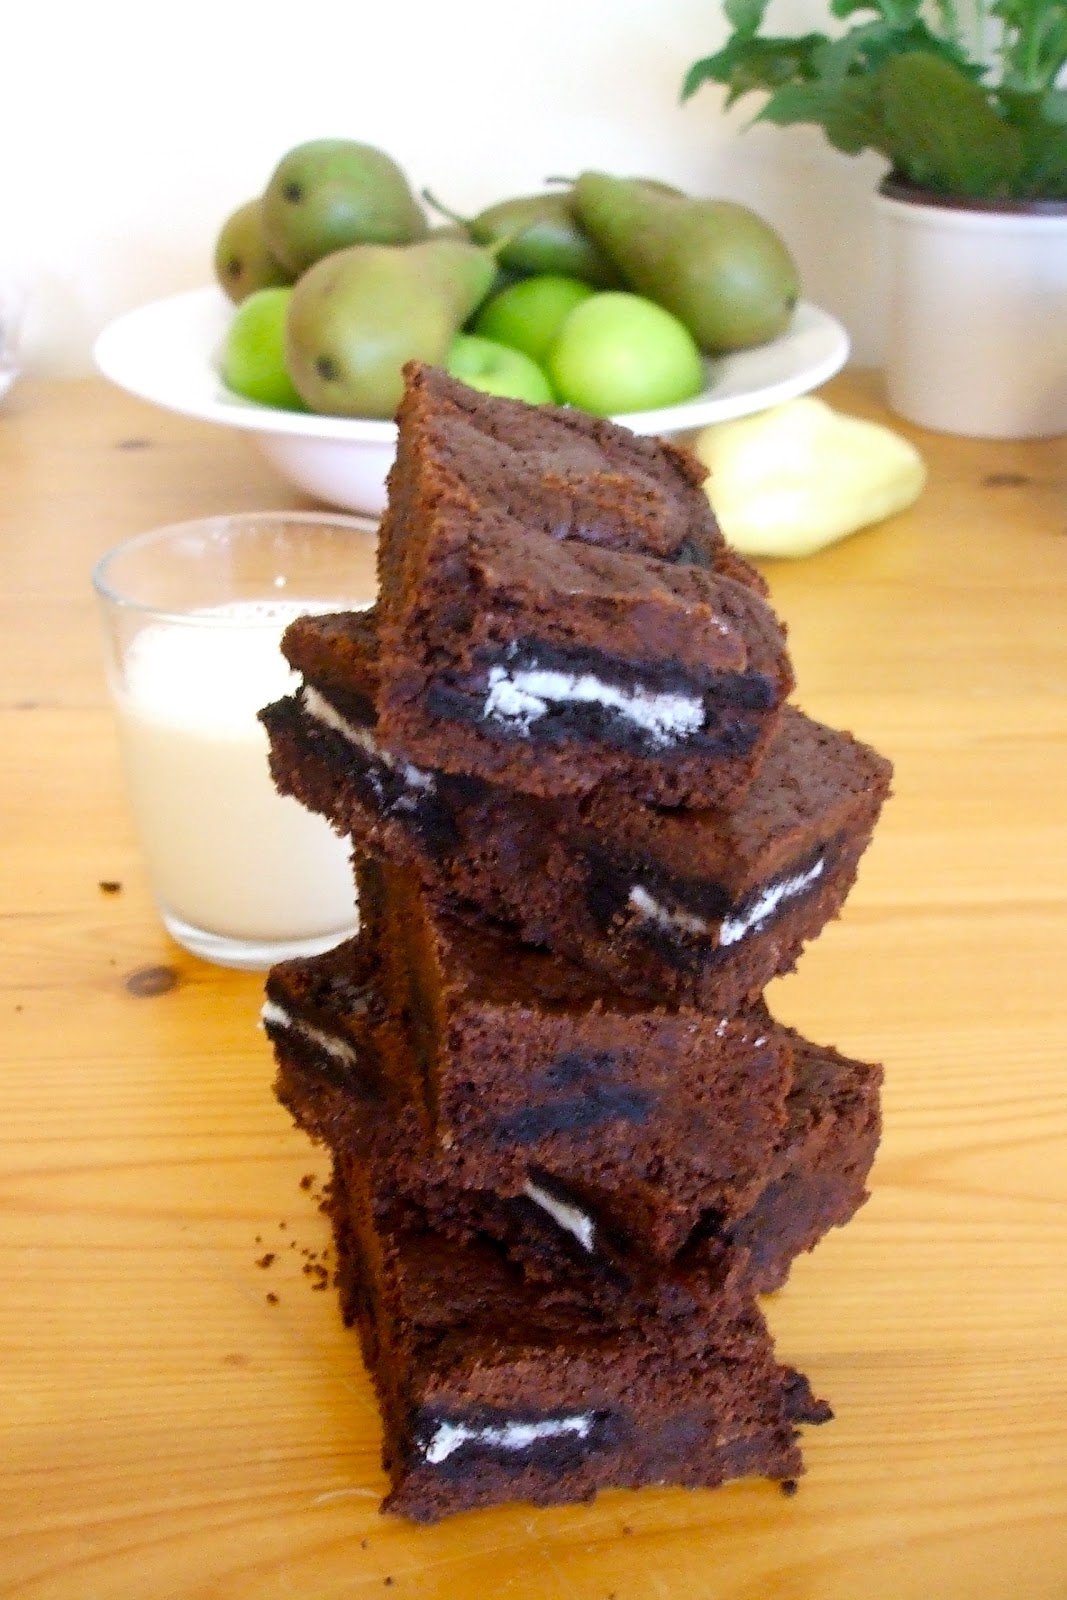
Umm yeah, so on to these bars. While I reduced the sugar in the brownies, they are still pretty sweet but also full of flavour and texture - the fudgy brownie layer, the crunchy cookies, the peanut butter infused chocolate covering mmmmmm. Definitely one for the chocolate lovers amongst you. They're also pretty simple to make so why don't you give them a try this bank holiday weekend for a sweet end to your BBQ (weather permitting).

* Why is regular coke often referred to as full fat coke when it is the amount of sugar that has increased from the diet coke versions rather than the fat?

This recipe has been adapted (only slightly) from the wonderful How Sweet It Is - another regular superwoman who seems to bake, cook AND blog something new every day! Don't know how she does it!

Ingredients

113g butter, at room temperature
1 cup brown sugar
2 eggs
2 tsps vanilla extract
1 1/2 cups plain flour
1/4 teaspoon salt
3 tablespoons cocoa powder
2 cups milk chocolate chips
1/2 cup peanut butter
20 Oreo cookies

 - Preheat oven to 180C / 350F / Gas Mark 4
 - Butter and flour an 8" x 8" cake tin or brownie pan
 - Using an electric mixer, cream butter and sugar until fluffy. Add eggs one at a time, then add vanilla
 - Add in cocoa powder and mix until combined. Add flour and salt, mixing well until batter is smooth and comes together. Fold in 1/2 cup chocolate chips
 - Spread mixture into the pan. Sink 9 Oreo cookies into the batter and press gently. Bake for 25 - 30 minutes

 - While baking, crush the remaining Oreos in a zip lock bag. 

When brownies are finished baking, remove from the oven and sprinkle with 1/2 cup chocolate chips and crushed Oreos. Place back in the oven for about 2 - 3 minutes

 - In this time, melt remaining chocolate chips and peanut butter together in the microwave checking and stirring every 20 seconds. Remove brownies from the oven and pour melted chocolate mixture on top, spreading with a spatula.Make sure chocolate gets down into the Oreo crevices, as it is the "glue" that holds the top to the bottom
 - Refrigerate for 2 hours. Let brownies sit at room temperature for 15 minutes before cutting. Don't worry if some of the cookies spill out from the middle or the top cracks - they are still delicious

Note: I made 1 1/2 times the recipe which is why I've got more Oreos in my baking tray :)


Sunday, 17 June 2012

Chocolate Chip Cookie Dough Brownies

You all know how I love brownies! Well, I don't know if I've ever expressed on here how much I love cookie dough for fear that you'll judge me but here goes ...
I love the cookies I bake but I can tell you that without a doubt, no matter the kind of cookie, the unbaked cookie dough is oh, about 1,367,192 times better!

Until a few months ago, Waitrose used to sell a block of chocolate chip cookie dough which you were supposed to bake into about nine cookies. Before I became an avid baker, I'm ashamed to say I bought a block of this cookie dough to make cookies with. The cookies were average at best. The other 99 times I bought that cookie dough, it wouldn't even make it the ten minutes home on the bus before I cracked it open and started eating away at bits of cookie dough. Dessert for a few days would be a quarter of the block of dough straight from the fridge and eaten in tiny bits.

And before you start to think I'm a total weirdo (I totally am but would hate for you all to know it ;p), once I was waiting at the bus stop outside Waitrose when three teenage girls came out each with a pack of the very same cookie dough that I was addicted to. Two of them broke it open and started to pick at it just like I do! I may or may not have gone back in to buy myself a pack.

These brownies are my amazing brownie recipe on the bottom (I'm allowed to say it's amazing because it really is!) and then eggless raw cookie dough on top. Brownie + cookie dough. Brownie and cookie dough. Brownie ... cookie dough ... however you spin it, these are amazing!
I've adapted the brownie recipe a bit by reducing the sugar, using all brown sugar and omitting the chocolate chunks to make it slightly less sweet as the cookie dough is quite sweet too. These are currently my favourite spin on my brownie recipe; yup, they're even better than the Oreo brownies.

The cookie dough recipe is slightly adapted from another one of my favourite bakers; Brown Eyed Baker.

Ingredients

For the brownie
300g dark chocolate (At least 70% cocoa solids)
250g unsalted butter
175g plain flour
1 tsp baking powder
4 large eggs, lightly beaten
2 tsps vanilla essence
275g dark brown sugar
1 tablespoon instant coffee granules

For the cookie dough
170g unsalted butter
150g light brown sugar
170g caster sugar
3 tablespoons whole milk
1 1/2 tsps vanilla extract
190g plain flour

  1. Brownie: Preheat oven to 170C/325F/Gas Mark 3.
  2. Grease and flour a 30x20x3.5cm tin
  3. Break dark chocolate into pieces and melt with the butter in a bain marie
  4. Combine the flour and baking powder in a bowl and put aside
  5. When chocolate and butter is melted, remove from bain marie and stir in the brown sugar and instant coffee granules (because brown sugar can be lumpy, make sure you break up any lumps and mix sugar in properly)
  6. Stir in the eggs and vanilla essence
  7. Fold in the flour and pour mixture into the prepared tin.
  8. Bake in the oven for 25 - 35 minutes or until a skewer inserted comes out pretty much clean
  9. Remove from oven and leave to cool completely
  10. Cookie dough: In a medium bowl, use an electric mixer on medium speed to combine the butter and both the sugars
  11. Add the milk and vanilla and mix until combined
  12. Reduce the speed to low and mix in the flour until just combined. using a rubber spatula, stir in the chocolate chips
  13. Spread the cookie dough over the cooled brownies. Refrigerate until the dough is firm, about an hour. Use a sharp knife to cut the brownies.
  14. Store the brownies in an airtight container at cool room temperature or in the refrigerator. Remember to let brownies come to room temperature before you eat them if storing in the fridge. Cold brownies aren't great. 


Sunday, 19 February 2012

Peanut Butter and Snickers Brownies and a Giveaway!


I decided to try yet another adaptation of my beloved best brownies in the whole wide world! And as I'm really into Snickers at the moment, I decided to pair it with peanut butter (naturally) and voila! - another great brownie. One thing I would do differently is chop up the Snickers into larger pieces as they disappeared in the baking process and people were surprised to learn that they contained any. I have recommended slicing them in the recipe below.

Speaking of baking (yup I know - as if we would be speaking of anything else on my BAKING blog ;p), I've got this great book 'Baking Bible' to give away. It is a great first baking book as it has recipes for EVERYTHING! From muffins to cakes and biscuits. It is a pretty hefty book too! Here is an excerpt from the Amazon blurb:
"There's a special joy that comes from creating home-baked treats. And there's nothing quite so satisfying as sharing them, fresh from the oven, with your friends and loved ones ... Boasting more than 470 recipes and 200 gorgeous colour photographs, it provides an outstanding resource for any kitchen. 'Baking Bible' has a recipe for every cake, pudding, tart, pie, slice and muffin you'll ever want to cook. There are loads of old-fashioned favourites, as well as plenty of inspired new ideas. Whether it's rich chocolate rum cake for a family birthday party, moist apricot and almond muffins for a weekend morning tea, sun-dried tomato and cheese slice for a lunchbox snack, or butterscotch date biscuits for the school fete, there's something here for every occasion"

For details of how to enter, see below the recipe. Good luck!

Ingredients
300g dark chocolate (At least 70% cocoa solids)
250g unsalted butter
4 x regular (58g) bars of Snickers, each bar sliced not too thinly, not too chunkily
175g plain flour
1tsp baking powder
4 large eggs, lightly beaten
1 tsp vanilla essence
325g caster sugar
1 tablespoon instant coffee granules
3 tablespoons smooth peanut butter (I only had crunchy at home as you can probably tell in the photos)

Here's how NOT to chop up your Snickers
  1. Preheat oven to 170C/325F/Gas Mark 3
  2. Grease and flour a 30x20cm baking tin
  3. Break the dark chocolate into pieces and melt with the butter in a bain marie
  4.  Combine the flour and baking powder in a bowl and set aside
  5. When chocolate and butter is melted, remove from bain marie and stir in sugar and instant coffee granules
  6. Stir in the eggs and vanilla essence
  7. Fold in the flour
  8. Lastly, fold in the Snickers pieces, give it one turn and pour mixture into the prepared tin. Do not stir too much as you don't want the chocolate to melt
  9. Put your peanut butter in a microwaveable bowl and heat in the microwave for 30 seconds or until it  is soft and easy to stir. Using a spoon, drop dollops of peanut butter randomly on your brownie mixture until all the peanut butter is gone
  10. Using a table knife, drag it lightly across the surface of your brownie batter marbling the peanut butter in with the brownie mixture
  11. Bake in the oven for 25 - 35 minutes or until a skewer inserted comes out pretty much clean
  12. Allow to cool in the tin and then cut into squares


I'm giving away a copy of 'Baking Bible'. There is one mandatory way to enter and additional ways to gain entries into the giveaway (Tip: Each comment only counts as one entry so you're giving yourself more chances if you leave a different comment for each entry e.g. Answer the question in one comment. Tell me you're following me in a different comment etc)

CLOSING DATE - Midnight on FRIDAY 24TH FEBRUARY

Rules and How to Enter

  • The giveaway is open to everyone with a UK mailing address
  • For the mandatory way to enter, leave a comment telling me something you would like to bake
  • For another entry, follow my blog using the Google Friend Connect 'Follow' button on the right of my blog. Leave a separate comment to tell me you have done this or that you're already following my blog
  • For yet another entry, follow me on Twitter @vickii373 and leave a comment here to tell me you're following me on Twitter and your user name. Also leave me a comment if you're already following me on Twitter.

Good luck!

Sunday, 18 September 2011

Oreo-stuffed brownies and a fairytale.

It all started with a brownie!
If my baking story were a fairytale, this is how it would go...


Once upon a time, in a land far far away (okay so Birmingham is physically only a couple of hours away, but in every other way, it's like a whole other universe!) There lived a young woman who had moved back home with her mama and baba and sister after university. Despite a history of baking with their grandmother occasionally, neither girl baked much.


Until one day, the sister; Christiana decided to bake brownies and found this wonderful looking recipe. The brownies were a bit too oily, very sweet, and so gooey that it was impossible to cut them into squares but as neither sister knew any better, they thought they were amazing!


And so they started to make these brownies all the time; for every event they were invited to and for every pot luck lunch organised at work. Over time, they reduced the amount of butter, and increased the amount of chocolate. They started to bake them in a bigger pan, toned down the sugar content a notch and replaced caster sugar with brown sugar. 
And so, our signature brownie was born! I love these brownies! And I always compare other brownies to this one. After making them oh, about a hundred times, I decided to try my hand at a few other recipes and that, my friends, is how my love of baking was born.


There is so much that can be done with brownies so it's about to get very browni-exciting up on this blog! Ha ha, like what I did there?


First off are these Oreo stuffed brownies. These are nice and simple.


Ingredients


1 portion of this brownie recipe (minus the white and milk chocolate chunks). Also, reduce the flour to 150g.
As many Oreo cookies as you need - I used 24 (almost two packs).


1 - Make brownie batter as per recipe (minus the last step which is folding in the milk and white chocolate chunks) and spread half of the batter on the bottom on your baking tin
2 - Arrange the Oreos over the brownie batter side-by-side and in one layer
3 - Pour the remaining brownie batter over the cookies and spread in an even layer to cover the cookies.
4 - Bake in a pre-heated 170C/ Gas Mark 3 / 325F oven for about 25 minutes or until a toothpick inserted comes out clean.
\

Tuesday, 22 February 2011

The Best Brownies in the World. Ever.

I know this is  a grand claim but I really believe it to be true! I LOVE brownies! But I rarely eat brownies out. Because I am always disappointed. The only other brownies I like are 'Two-bite brownies' made by Safeway in Canada. Sods law, I only know one person who lives in Canada but whenever we meet up, she very wonderfully brings me a few bags of them. Apart from those, no other brownies ever live up to these ones. And I know because I've tried lots of them. 
However, these brownies did not come by their title easily. They were first made by my sister about 7 years ago and the original recipe was an Anthony Worrall Thompson recipe for triple chocolate brownies. And while they were quite oily, wouldn't always cook all the way through and difficult to cut into defined squares, we still loved them and made them every chance we got. Slowly, Kitty (who by the way is a total domestic goddess! I highly recommend you all befriend her and get her and her husband to invite you round to dinner!!) and I made a few adjustments to the recipe. And then I moved to London and introduced it to my cousin who fell in love with them and also made an adjustment to the recipe. And then I made more adjustments to the recipe and voila, the best brownies ever! They're choc full (pun intended) of chocolate but also the perfect combination of cakey and fudgy which is just how I like my brownie. And they're the brownie that keeps on giving - they're wonderful as dessert just out of the oven with with vanilla ice cream and I personally think at their peak a day or two after with a glass of milk.


Anyway, as I've been promising for months, here is the recipe. I made these for a bake sale at work. I always make brownies for bake sales because they're a crowd pleaser, easy to transport and oh so simple to make! Let me know what you think of them if you give my recipe a go :)


Ingredients


300g dark chocolate (At least 70% cocoa solids)
250g unsalted butter
100g milk chocolate cut into large chunks
100g white chocolate, cut into large chunks
175g plain flour
1tsp baking powder
4 large eggs, lightly beaten
2 tsps vanilla essence
200g dark brown sugar
125g caster sugar
1 tablespoon instant coffee granules


1 - Preheat oven to 170C/325F/Gas Mark 3
2 - Grease and flour a 30x20x3.5cm tin
3 - Break the dark chocolate into pieces and melt with the butter in a bain marie
4 - Combine the flour and baking powder in a bowl and put aside
5 - When chocolate and butter is melted, remove from bain marie and stir in the sugars and instant coffee granules (because brown sugar can be lumpy, make sure you break up any lumps and mix sugar in properly)
6 - Stir in the eggs and vanilla essence
7 - Fold in the flour
8 - Lastly, fold in the chunks of white and milk chocolate, give it one turn and pour mixture into the prepared tin - do not stir too much as you don't want the chunks to  melt

9 - Bake in the oven for 25 - 35 minutes or until a skewer inserted comes out pretty much clean.
10 - Allow to cool in the tin and then cut into squares

Tuesday, 8 February 2011

My New Toy and Cookies and Cream Brownies

I promise that one day, I'll bore you with an ENTIRE post on my kitchen gadget wish list, but for now, you'll have to make do with my exciting news that I've added the Breville SHM2 Twin Hand and Stand Mixer to my kitchen! 
This is my pretty new mixer! It is not quite the Kitchenaid mixer in a variety of beautiful pastel colours that I'm constantly lusting after but it's a definite step up from my crappy Sainsbury's mixer. They say you shouldn't speak ill of the dead so in defence of my (now dead) mixer, it mostly did the job. For several good months. Except for when I was making buttercream frosting. It didn't matter how long I stood over my bowl of butter and icing sugar, it didn't matter how numb my hand managed to get, it wouldn't reach that creamy perfection I was after. But now, I can just dump my butter and sugar into my free-standing mixer and go off to read a few more pages of 'Emma' while letting it work it's magic. Whoop whoop! I can't wait to make buttercream! And bread, because it has dough hooks. Can I get another whoop?

Now on to something that doesn't require a mixer; brownies! This is another recipe from Lorraine Pascal's 'Baking made easy' and it is an interesting one because it only contains two tablespoons of flour.  This is a nice, fudgy brownie recipe but I think it lacks a certain je nais c'est quois (I bet I've just spelt that completely wrong! French has never been my strong suit).  I think it's almost too light. For me, the perfect brownie is one where one square fulfills all my carnal chocolate desires. One square, and even me, the ultimate chocoholic, is sated. This wasn't that brownie. I know I said this when I made these cheesecake brownies but the more brownies I eat and the more brownie recipes I try, the more convinced I am that my original brownie recipe is one of the best there is. And I know I always say I'll share it but this time I mean it, as I'll be baking them for a work Valentines Day bake sale. I'll also try my recipe with Oreos in in so watch out for a 2nd take on these brownies. 

Till then, enjoy! Because while my overly critical self might not be 100% happy with these, they are nice brownies and as with all brownies, pretty easy to make but amazingly rewarding to eat.

Ingredients

165g butter, plus extra for greasing
200g dark chocolate
3 free-range eggs
2 free-range egg yolks
2 tsp vanilla extract
165g soft light brown sugar
2 tbsp plain flour
1 tbsp cocoa powder
pinch salt
154g pack Oreo Cookies

1 - Preheat oven to 180C/350F/Gas Mark 4.
2 - Grease and flour a 20cm/8in square baking tin
3 - Melt the butter and chocolate together in a bain marie. Alternatively melt the butter in a pan over a medium heat. When the butter has melted, remove the pan from the heat and add the grated (or chopped) chocolate. Leave to stand for a few minutes, or until the chocolate melts, and then stir together. 
Another alternative is to put the chocolate and butter in a bowl and melt in the microwave in 25-second blasts, stirring well each time.
4 - Whisk the eggs, egg yolks and vanilla together in a large bowl until the eggs begin to get light and fluffy. 
5 - Add the sugar in two additions, whisking between each. Pour it around the side of the egg mix so as not to knock out the air that has been whisked in. Keep whisking until the mixture becomes stiffer. 
6 - Once the egg mixture is ready, pour the chocolate into it - again around the sides so as knock the air out.
7 - Add the flour, cocoa powder, salt and a third of the biscuits and stir until fully combined, then pour the mixture into the prepared tin.

8 - Scatter the remaining biscuits over the top, pressing them in slightly. 
9 - Bake on the middle shelf of the oven for 25-30 minutes. The middle should be ever so slightly gooey. Leave the brownies to cool in the tin - the top will sink and crack a little.
10 - Cut into squares and serve

Tuesday, 8 June 2010

Happy Birthday Mum!

My mum is always on a diet and she absolutely loves chocolate, and specifically chocolate brownies. You don't have to be a math whizz to figure out that diets and brownies don't go together and so she usually (very admirably) abstains. So when I told her I was going to make her a cake for her birthday, she instantly requested 'those chocolatey things'. 'Brownies?' I asked. She nodded vehemently.


One of the main reasons I decided to blog about baking was so that it would motivate me to try out new recipes. So instead of making our (mine, my sister and my cousin's) tried and tested brownie recipe which I love, I decided to try out these 'Cream Cheese Swirl Brownies with Heath Bars and Pecans' (but without the pecans) from the 'At Home with Magnolia' cook book.


I think Heath bars are like Daim bars but I forgot to buy some so I just used white chocolate instead. My verdict? Hmmm - they were nice and very fudgy but way too sweet, and this is after I reduced the sugar and used brown sugar instead. The whole point is that the brownie bit is sweet but the cream cheese topping not so much and they balance each other out but I still think the brownie bit is way too sweet, and this coming from me; someone whom the term 'sweet tooth' defines better than any other! Also, they took forever to bake, at least twice what the instructions said!
Actually, I think I'll just try my regular recipe with this cream cheese topping next time.  Saying that though, everybody else really liked them so they're not terrible, I just personally think there must be a better recipe for these out there. I'll try and perfect it myself and let you all have my amended recipe.


Cream cheese swirl brownies with heath bars 


Ingredients
Cream Cheese Filling
227g cream cheese, not softened
28g sugar
1 large egg, at room temperature
2 tablespoons all-purpose flour


Brownies
106g all purpose flour
1 teaspoon baking powder
1/4 teaspoon salt
170g unsalted butter
113g dark chocolate (70% cocoa solids)
200g sugar (I prefer brown sugar in brownies, I think they give it a better rounded flavour rather than just sugary sweetness)
3 large eggs, at room temperature
2 tablespoons whole milk
2 teaspoons vanilla extract
85g chopped Daim bars


Preheat oven to 170ÂșC / Gas Mark 3. Grease and lightly flour a 13 x 9-inch baking pan
1 - To make the cream cheese filling: In a medium size bowl, beat the cream cheese with the sugar until smooth.
Add the egg and flour and beat well. Set aside.
2 - To make the brownies: In a small bowl, combine the flour, baking powder, and salt. Set aside.
In a medium size saucepan over low heat, melt the butter with the chocolate, stirring occasionally, until smooth.
Remove from the heat, transfer to a large bowl, and allow to cool to lukewarm, about 5 minutes.
.
Stir in the Sugar
Add the eggs, milk, and vanilla and beat well.
Add the dry ingredients and mix thoroughly.


3 - Stir in half of the chopped Daim bars. (white chocolate in my case)
Reserve 1/2 cup of the brownie batter.
Spread the rest of the batter evenly in the prepared pan.
Drop the cream cheese mixture by tablespoons over the batter.
Next, drop the reserved brownie batter by teaspoonfuls in between the cream cheese filling.
Using a small knife, swirl the two batters together, forming a decorative pattern.
Sprinkle the remaining Daim pieces (white chocolate) over the top, and using a spatula, gently press into the batter.
Bake for 45-55 minutes, or until a cake tester inserted into the center of the pan comes out with moist crumbs attached.
Do not overbake.
Allow to cool overnight before serving.