Pages

Sunday, 27 February 2011

Irish Car Bomb Cake and The Great British Bake-Off

"Irish Car Bomb"?? I hear you ask.

Well, lucky for you, I am here to enlighten and educate :) An Irish Car Bomb is a drink. It is made up of a shot which is half Baileys and half whiskey; Baileys on the bottom and whiskey on top. Then you pour  3/4 of a pint of Guinness and let it settle. And now for the best part! You drop the shot into the pint of Guinness and chug for your life! If you don't drink quickly enough, the drink will curdle and become pretty disgusting to drink. Mmmmm yummm! Not. What is yummy though are these cupcakes inspired by the drink from cupcake queen Annie's Eats.
Now for the second part of my story. A friend on Twitter sent me the ad for 'The Great British Bake-Off' and suggested I apply. At first, I was adamant I wouldn't. I barely like photos so I definitely don't want to be on TV. Plus I have never seen the show and was convinced there's no way I'd be good enough. However, I decided to apply thinking I'd never get through and so I had nothing to lose. So I filled in the 6-page application form, e-mailed it off and forgot about it! A few weeks later, I got a phone call and spent 45 minutes talking to a lovely lady called Cheryl about baking. And another couple of weeks after that, I got another phone call asking me to come and meet the judges with two samples of my baking; one sweet and one savoury. Now, those of you that read my blog must know that savoury baking isn't something I do often so I was a bit stumped as to what to make. Since I wanted to make things I had made before and liked; I decided to make Nigerian meat pies and Guinness cake. However, I decided to take inspiration from Annie's Eats and sandwich my Guinness cakes with her Baileys ganache and cover with her Baileys buttercream frosting. I hadn't made them before but I didn't think ganache and buttercream would be too much of a risk.

The day dawned bright and sunny and I wandered off to Holborn to meet Paul Hollywood and Mary Berry.  Under bright lights and video cameras, Paul asked me if I had ever baked bread. I said 'no' and they proceeded to try my meat pies first and labelled the dough too salty, and too tough. Mary said I used too much water and Paul said that I should practice my bread making as that would help me with dough. Then they tried the cake and had nothing but good things to say (phew!). They said it was incredibly moist, the combination of the Guinness and Baileys went very well together and was altogether "very good cake". Unfortunately they didn't put me through to the next round because they thought I'd fall at the first hurdle due to my inexperience with bread but that was fine. They didn't say anything I didn't already know; that I'm good with sweet baking and not so good with savoury! And on the plus side, I got to take my cake home and taste it!

Anyway, that's been my interesting couple of weeks. I leave you with pictures of my cake!! And I can confirm what they said, it is VERY GOOD CAKE! If you'd like to try it, use my Guinness cake recipe and Annie's Eat's ganache and butter cream recipes.

Tuesday, 22 February 2011

The Best Brownies in the World. Ever.

I know this is  a grand claim but I really believe it to be true! I LOVE brownies! But I rarely eat brownies out. Because I am always disappointed. The only other brownies I like are 'Two-bite brownies' made by Safeway in Canada. Sods law, I only know one person who lives in Canada but whenever we meet up, she very wonderfully brings me a few bags of them. Apart from those, no other brownies ever live up to these ones. And I know because I've tried lots of them. 
However, these brownies did not come by their title easily. They were first made by my sister about 7 years ago and the original recipe was an Anthony Worrall Thompson recipe for triple chocolate brownies. And while they were quite oily, wouldn't always cook all the way through and difficult to cut into defined squares, we still loved them and made them every chance we got. Slowly, Kitty (who by the way is a total domestic goddess! I highly recommend you all befriend her and get her and her husband to invite you round to dinner!!) and I made a few adjustments to the recipe. And then I moved to London and introduced it to my cousin who fell in love with them and also made an adjustment to the recipe. And then I made more adjustments to the recipe and voila, the best brownies ever! They're choc full (pun intended) of chocolate but also the perfect combination of cakey and fudgy which is just how I like my brownie. And they're the brownie that keeps on giving - they're wonderful as dessert just out of the oven with with vanilla ice cream and I personally think at their peak a day or two after with a glass of milk.


Anyway, as I've been promising for months, here is the recipe. I made these for a bake sale at work. I always make brownies for bake sales because they're a crowd pleaser, easy to transport and oh so simple to make! Let me know what you think of them if you give my recipe a go :)


Ingredients


300g dark chocolate (At least 70% cocoa solids)
250g unsalted butter
100g milk chocolate cut into large chunks
100g white chocolate, cut into large chunks
175g plain flour
1tsp baking powder
4 large eggs, lightly beaten
2 tsps vanilla essence
200g dark brown sugar
125g caster sugar
1 tablespoon instant coffee granules


1 - Preheat oven to 170C/325F/Gas Mark 3
2 - Grease and flour a 30x20x3.5cm tin
3 - Break the dark chocolate into pieces and melt with the butter in a bain marie
4 - Combine the flour and baking powder in a bowl and put aside
5 - When chocolate and butter is melted, remove from bain marie and stir in the sugars and instant coffee granules (because brown sugar can be lumpy, make sure you break up any lumps and mix sugar in properly)
6 - Stir in the eggs and vanilla essence
7 - Fold in the flour
8 - Lastly, fold in the chunks of white and milk chocolate, give it one turn and pour mixture into the prepared tin - do not stir too much as you don't want the chunks to  melt

9 - Bake in the oven for 25 - 35 minutes or until a skewer inserted comes out pretty much clean.
10 - Allow to cool in the tin and then cut into squares

Sunday, 13 February 2011

Forever Nigella: Glitzy Chocolate Puddings

I am taking part in my very first food blogger event and I'm very excited!!! This one is hosted by Maison Cupcake and the theme is 'Seduced by Chocolate'! Factor in the fact that I have a foodie crush on Nigella and that I'm totally obsessed with chocolate and this month's theme couldn't be any more perfect!


On an aside, I've named my new mixer (who features proudly in some of the photos) Nigella. Oh, I should probably mention that I'm someone who names my stuff - my laptop is called Ella Mac, my spider plant Granola (my ex-boss named her) and now Nigella, the latest addition to my kitchen! I hope Nigella would be flattered, it is meant as the highest compliment.


I leafed through my three Nigella books for a recipe before finally settling on this one from 'Nigella Express'. Firstly because I liked what they were called. Secondly because thinking that I had left this till the last minute (I thought the deadline was today instead of next Sunday) as well as thinking I had two other things to bake this weekend, I wanted something relatively easy, and thirdly because I liked what they are called. Oh, hang on, I think I said that already ;p You can find the recipe on Nigella's website and I leave you with my pictures.


Tuesday, 8 February 2011

My New Toy and Cookies and Cream Brownies

I promise that one day, I'll bore you with an ENTIRE post on my kitchen gadget wish list, but for now, you'll have to make do with my exciting news that I've added the Breville SHM2 Twin Hand and Stand Mixer to my kitchen! 
This is my pretty new mixer! It is not quite the Kitchenaid mixer in a variety of beautiful pastel colours that I'm constantly lusting after but it's a definite step up from my crappy Sainsbury's mixer. They say you shouldn't speak ill of the dead so in defence of my (now dead) mixer, it mostly did the job. For several good months. Except for when I was making buttercream frosting. It didn't matter how long I stood over my bowl of butter and icing sugar, it didn't matter how numb my hand managed to get, it wouldn't reach that creamy perfection I was after. But now, I can just dump my butter and sugar into my free-standing mixer and go off to read a few more pages of 'Emma' while letting it work it's magic. Whoop whoop! I can't wait to make buttercream! And bread, because it has dough hooks. Can I get another whoop?

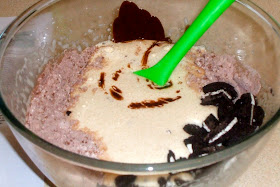
Now on to something that doesn't require a mixer; brownies! This is another recipe from Lorraine Pascal's 'Baking made easy' and it is an interesting one because it only contains two tablespoons of flour.  This is a nice, fudgy brownie recipe but I think it lacks a certain je nais c'est quois (I bet I've just spelt that completely wrong! French has never been my strong suit).  I think it's almost too light. For me, the perfect brownie is one where one square fulfills all my carnal chocolate desires. One square, and even me, the ultimate chocoholic, is sated. This wasn't that brownie. I know I said this when I made these cheesecake brownies but the more brownies I eat and the more brownie recipes I try, the more convinced I am that my original brownie recipe is one of the best there is. And I know I always say I'll share it but this time I mean it, as I'll be baking them for a work Valentines Day bake sale. I'll also try my recipe with Oreos in in so watch out for a 2nd take on these brownies. 

Till then, enjoy! Because while my overly critical self might not be 100% happy with these, they are nice brownies and as with all brownies, pretty easy to make but amazingly rewarding to eat.

Ingredients

165g butter, plus extra for greasing
200g dark chocolate
3 free-range eggs
2 free-range egg yolks
2 tsp vanilla extract
165g soft light brown sugar
2 tbsp plain flour
1 tbsp cocoa powder
pinch salt
154g pack Oreo Cookies

1 - Preheat oven to 180C/350F/Gas Mark 4.
2 - Grease and flour a 20cm/8in square baking tin
3 - Melt the butter and chocolate together in a bain marie. Alternatively melt the butter in a pan over a medium heat. When the butter has melted, remove the pan from the heat and add the grated (or chopped) chocolate. Leave to stand for a few minutes, or until the chocolate melts, and then stir together. 
Another alternative is to put the chocolate and butter in a bowl and melt in the microwave in 25-second blasts, stirring well each time.
4 - Whisk the eggs, egg yolks and vanilla together in a large bowl until the eggs begin to get light and fluffy. 
5 - Add the sugar in two additions, whisking between each. Pour it around the side of the egg mix so as not to knock out the air that has been whisked in. Keep whisking until the mixture becomes stiffer. 
6 - Once the egg mixture is ready, pour the chocolate into it - again around the sides so as knock the air out.
7 - Add the flour, cocoa powder, salt and a third of the biscuits and stir until fully combined, then pour the mixture into the prepared tin.

8 - Scatter the remaining biscuits over the top, pressing them in slightly. 
9 - Bake on the middle shelf of the oven for 25-30 minutes. The middle should be ever so slightly gooey. Leave the brownies to cool in the tin - the top will sink and crack a little.
10 - Cut into squares and serve

Tuesday, 1 February 2011

Pumpkin Pie

Who says you can only have pumpkin pie at Thanksgiving? 
And mulled wine at Christmas??
Or turkey at .... actually, I don't like turkey, I'm happy to only have it only once a year. 
My point is I hate food rules! So one Friday night in late January found me in my kitchen, flagrantly disregarding the Thanksgiving rule and making pumpkin pie for a friend who I hadn't seen in 7 years and who would be visiting early on Saturday morning. It was my first pie and I chose pumpkin pie because I had it once in Canada at Thanksgiving 8 years ago. I remember being very doubtful of it because I didn't think I liked pumpkins and couldn't understand why anyone would use them to make a pie. One bite however, and I was hooked! Well, obviously not so hooked because it would be 8 years before I would have it again.


I intend to make LOTS of pies this year and this was a great start! I have one more tin of pumpkin puree (For readers in the UK, Waitrose stock tins of this around Autumn every year) and instead of experimenting with cupcakes and muffins, I might just save it for another pie.


I used a shortcrust pastry recipe from Lorraine Pascal's 'Baking Made Easy' TV show. I found it very crumbly and had to patch lots of it together in the baking tin. I think perhaps I could have added 1 more tablespoon of water. The pumpkin custard that goes in the pie is the recipe on the tin of Libby's pumpkin puree.


Short Crust Pastry


Ingredients
250g/9oz plain flour
125g/4 1/2oz cold butter, cubed
2 free-range egg yolks
large pinch salt
1-4 tbsp water, if needed


1 - Put the flour and butter in a food processor and pulse to make breadcrumbs
2 - Alternatively use your hands and rub the butter and flour together in a bowl until the mixture resembles fine breadcrumbs (I used this method)
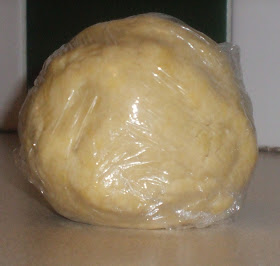
3 - Add the egg yolks and a pinch of salt, and stir together with a knife. Press the mixture together into a ball. If the pastry feels very dry, add a little water, but try to avoid adding water if you can. (I added 2 tbsp water)
4 - Once the pastry is all pressed together, wrap in cling film and pop it in the fridge to rest for 30 minutes
5 - After 30 minutes, remove the pastry from the fridge and set it aside to warm up a little (if you use it straight from the fridge and try to roll it out, the pastry will just be a hopeless crumbly mess)
6 - Preheat the oven to 180C/350F/Gas Mark 4
7 - Roll the pastry out on a floured work surface to the thickness of half a £1 coin and use it to carefully line a 20 x 30cm/8 x 12in rectangular fluted tin. Homemade pastry is often quite crumbly. Don't be alarmed by this. You can always patch it together in the tin.


8 - Take a small ball of the pastry (the size of a £1) coin and use it to gently ease the dough down into the tin. Press the handle of a wooden spoon against the pastry all round the edges to coax it into the fluted grooves. Trim off the excesses around the top. Put in the fridge for about 15 minutes, or until firm
9 - Remove from the fridge. Take a piece of baking paper slightly larger than the tin and scrunch it up, then unscrunch it and line the tin with it. Fill it with baking beans or dried beans and 'blind bake' in the oven for 20 - 25 minutes, or until the pastry feels sandy to the touch. Remove from the oven and set aside.


Filling


Ingredients
2 eggs, lightly beaten
1 x 425g can of pumpkin puree
171g granulated sugar (I used brown sugar)
1/2 teaspoon salt
1 teaspoon ground cinnamon
1/2 teaspoon ground ginger
1/4 teaspoon ground cloves
234ml evaporated milk


1 - Oven should be on 180C/350F/Gas Mark 4
2 - Combine filling ingredients together and pour into pastry case


3 - Bake for 40-50 minutes (turning pie tin round halfway) or until a knife inserted near the centre comes out clean.
4 - Allow to cool
I served mine with double cream, flavoured with vanilla and icing sugar and whipped until thick.